Odoo Documentation
Odoo 16: CRM
The Customer Relationship Management (CRM) module in the Community version of Odoo 16 is the most sought-after module for managing lead generation and customer acquisition. This platform allows you to collect and catalog leads from multiple sources, which helps you convert them into opportunities effectively. Besides, you can micromanage these leads in a single integrated channel. The collaboration of Odoo 16 CRM with other modules like Sales and Inventory ensures increased productivity in output generation, i.e., conversion of leads into opportunities.
The transparency and quick accessibility offered by the CRM module makes it easier for the Sales department to function conveniently. Since Customer Relationship Management is intricately associated with Marketing, Accounting, Management, etc., you can operate and monitor the workflow of all these departments from the CRM module. CRM is one of the critical aspects of an enterprise, which directly governs the course of its business growth. Hence, this module facilitates commercial affairs and improves efficiency by providing a comprehensive platform for customer-related operations. The fundamental functionality of the CRM module in Odoo 16 is enlisting the contact information, engagement rate, and sales potential of prospects and customers in a corporate firm.
A solid professional relationship between the company and its customers is vital for sustaining and progressing the firm’s business prospects. For decluttering the process of building and regulating these relationships, the centralized database of Odoo ERP relays all essential data to and from the system. In this module, you can record your business transactions and clientele information for the convenience of future reference. Its flexible and handy user interface adds to the operational competence of the CRM module in managing your communication history with leads and customers. Moreover, you can schedule and plan appointments with your potential customers. It also assists the sales department in importing and exporting relevant contact particulars of the system.
Let us delve into the critical functionalities of the CRM module in Odoo 16 Community version.
Features of the CRM Module
Customizable Dashboard
The CRM module’s home dashboard displays every lead and opportunity generated in it. You can view this data in Kanban, List, Calendar, Pivot, and Graph views. You can also use Filters and Group By options to sort and locate the records you are looking for. This grouping and filtering will save you from manually searching and pinpointing particular data.
Handy Lead and Opportunity Management
Odoo 16 offers a fully integrated CRM module for lead generation and management, which makes it easier for you to monitor them in a single window. You can manually enter relevant data regarding new leads and opportunities into the database. Integrating the CRM module with the other modules in Odoo 16 adds to the convenience of massive importation of leads. Additionally, it reduces manual labor and increases time efficiency through automated lead entry via website contact integration.
Scheduling Appointments
A strong business relationship with your customers is mandatory for fostering and expanding your enterprise. These relationships established through regular meetings help you convince the customers about the credibility of your product or service. You can easily schedule appointments with your customers or leads using the CRM module in Odoo16 via voice calls, video conferences, or Email. Odoo will send a system-generated or preconfigured reminder to the opposite party for confirmation. Moreover, the system allows you to review the performance of the lead and schedule the next appointment accordingly.
Integration with the Sales Module:
Most actions in the CRM module are intricately involved with the Sales module, which offers a solid framework for its functionality. This module can send quotations to the concerned party upon converting a lead into an opportunity. Besides, it is also possible to manage and monitor sales orders efficiently by integrating the CRM and Sales modules. Using this module, you can strengthen the functions of sales activities, from creating quotations to receiving customer orders. The details of all the leads and customers and their interactions will be available under a single umbrella. The sales department can access these data later on.
Unique Reporting System:
You can find a comprehensive reporting section in many modules of Odoo 16, which equips your company with precise data analysis in each module. This way, you can formulate a plan of action to improve your company’s overall performance. Moreover, you can analyze previous data and predict future trends in your niche of business (Forecast). The sales and marketing pipeline also benefits from a well-functioning reporting system.
Priorities:
The Odoo 16 CRM module provides a platform for prioritizing different activities in the marketing and sales pipeline. This process, in turn, helps maximize sales and achieve your targets effectively.
Promotion of Leads:
The CRM module allows you to send automated emails to your customers. This action directly influences sales activities by sustaining a stable customer relationship. Consequently, it becomes easier for you to convert leads into opportunities by promoting your products or services. In the following section, we shall discuss lead management in the CRM module.
Lead Management
In Odoo 16, you can collect leads from various sources and monitor their criteria to qualify as opportunities. The CRM module also helps you to generate new leads, which can convert into opportunities if they meet the company’s requirements. You can mobilize the lead management system under the Settings menu of the Configuration tab in the module.
Handy Lead and Opportunity Management
Odoo 16 offers a fully integrated CRM module for lead generation and management, which makes it easier for you to monitor them in a single window. You can manually enter relevant data regarding new leads and opportunities into the database. Integrating the CRM module with the other modules in Odoo 16 adds to the convenience of massive importation of leads. Additionally, it reduces manual labor and increases time efficiency through automated lead entry via website contact integration.
Scheduling Appointments
A strong business relationship with your customers is mandatory for fostering and expanding your enterprise. These relationships established through regular meetings help you convince the customers about the credibility of your product or service. You can easily schedule appointments with your customers or leads using the CRM module in Odoo16 via voice calls, video conferences, or Email. Odoo will send a system-generated or preconfigured reminder to the opposite party for confirmation. Moreover, the system allows you to review the performance of the lead and schedule the next appointment accordingly.
Integration with the Sales Module:
Most actions in the CRM module are intricately involved with the Sales module, which offers a solid framework for its functionality. This module can send quotations to the concerned party upon converting a lead into an opportunity. Besides, it is also possible to manage and monitor sales orders efficiently by integrating the CRM and Sales modules. Using this module, you can strengthen the functions of sales activities, from creating quotations to receiving customer orders. The details of all the leads and customers and their interactions will be available under a single umbrella. The sales department can access these data later on.
Unique Reporting System:
You can find a comprehensive reporting section in many modules of Odoo 16, which equips your company with precise data analysis in each module. This way, you can formulate a plan of action to improve your company’s overall performance. Moreover, you can analyze previous data and predict future trends in your niche of business (Forecast). The sales and marketing pipeline also benefits from a well-functioning reporting system.
Priorities:
The Odoo 16 CRM module provides a platform for prioritizing different activities in the marketing and sales pipeline. This process, in turn, helps maximize sales and achieve your targets effectively.
Promotion of Leads:
The CRM module allows you to send automated emails to your customers. This action directly influences sales activities by sustaining a stable customer relationship. Consequently, it becomes easier for you to convert leads into opportunities by promoting your products or services. In the following section, we shall discuss lead management in the CRM module.
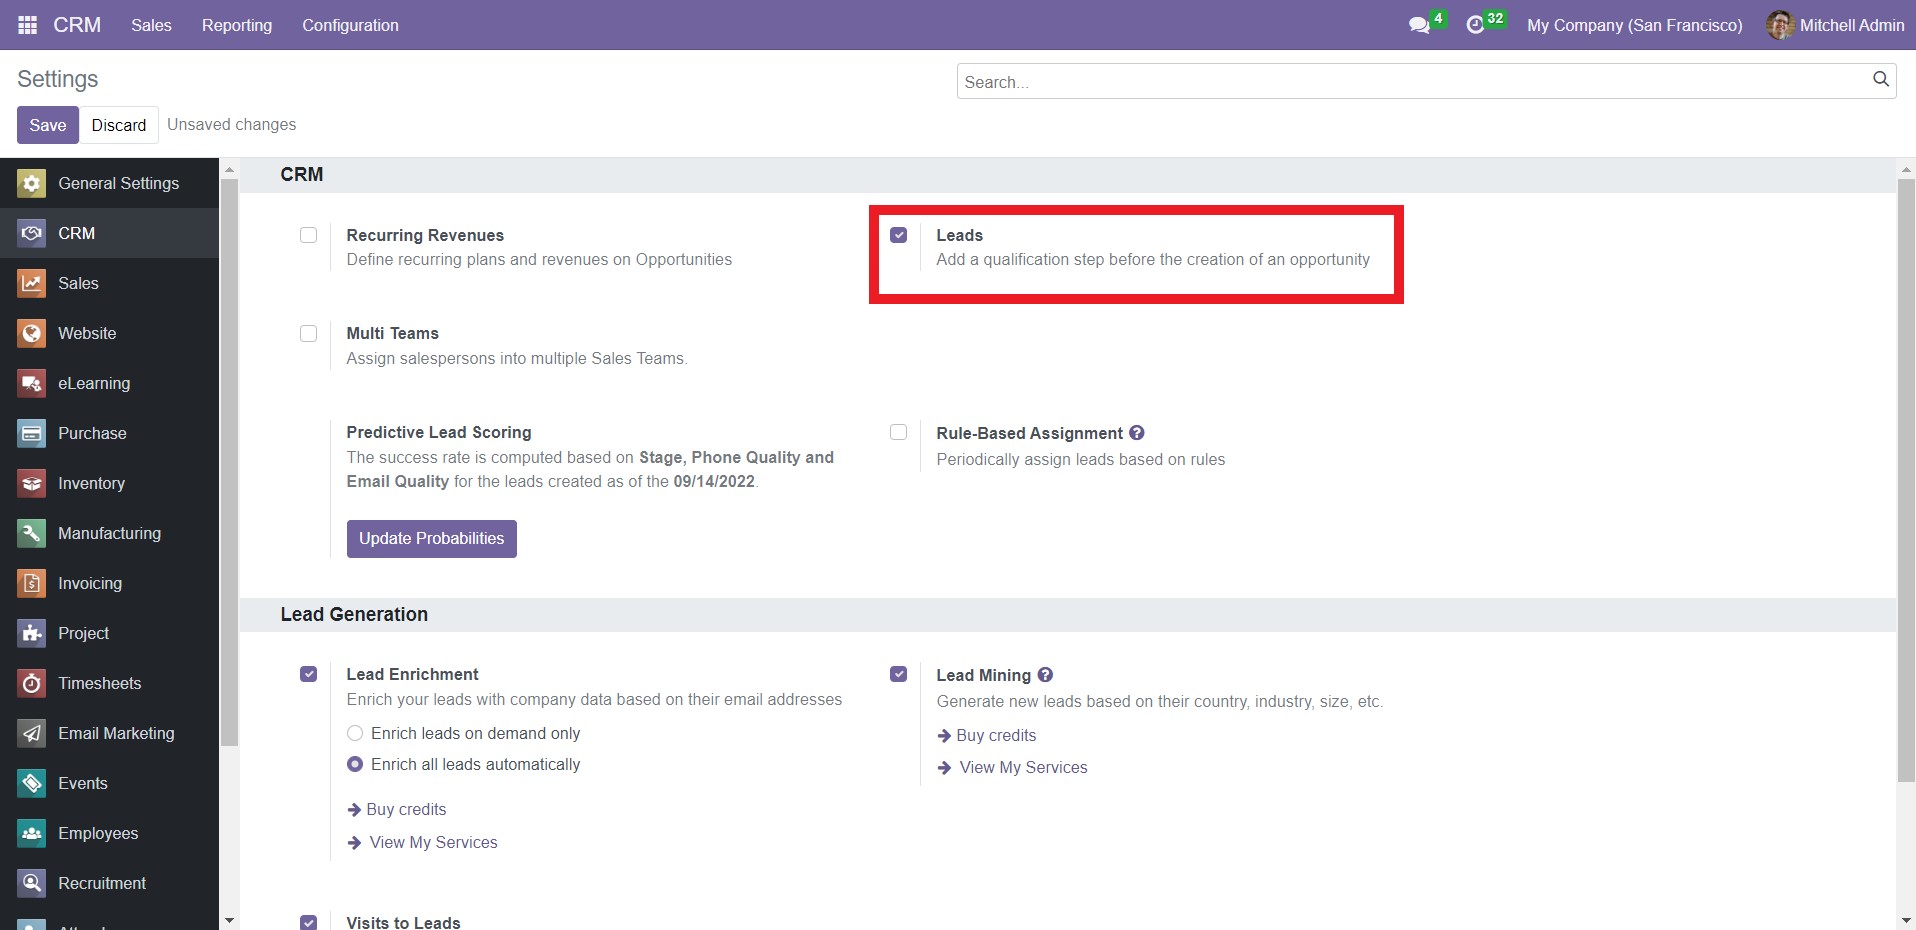
Check the Leads box as highlighted above and click on ‘Save.’ After activating this option, a new Leads tab will appear on the main menu bar.
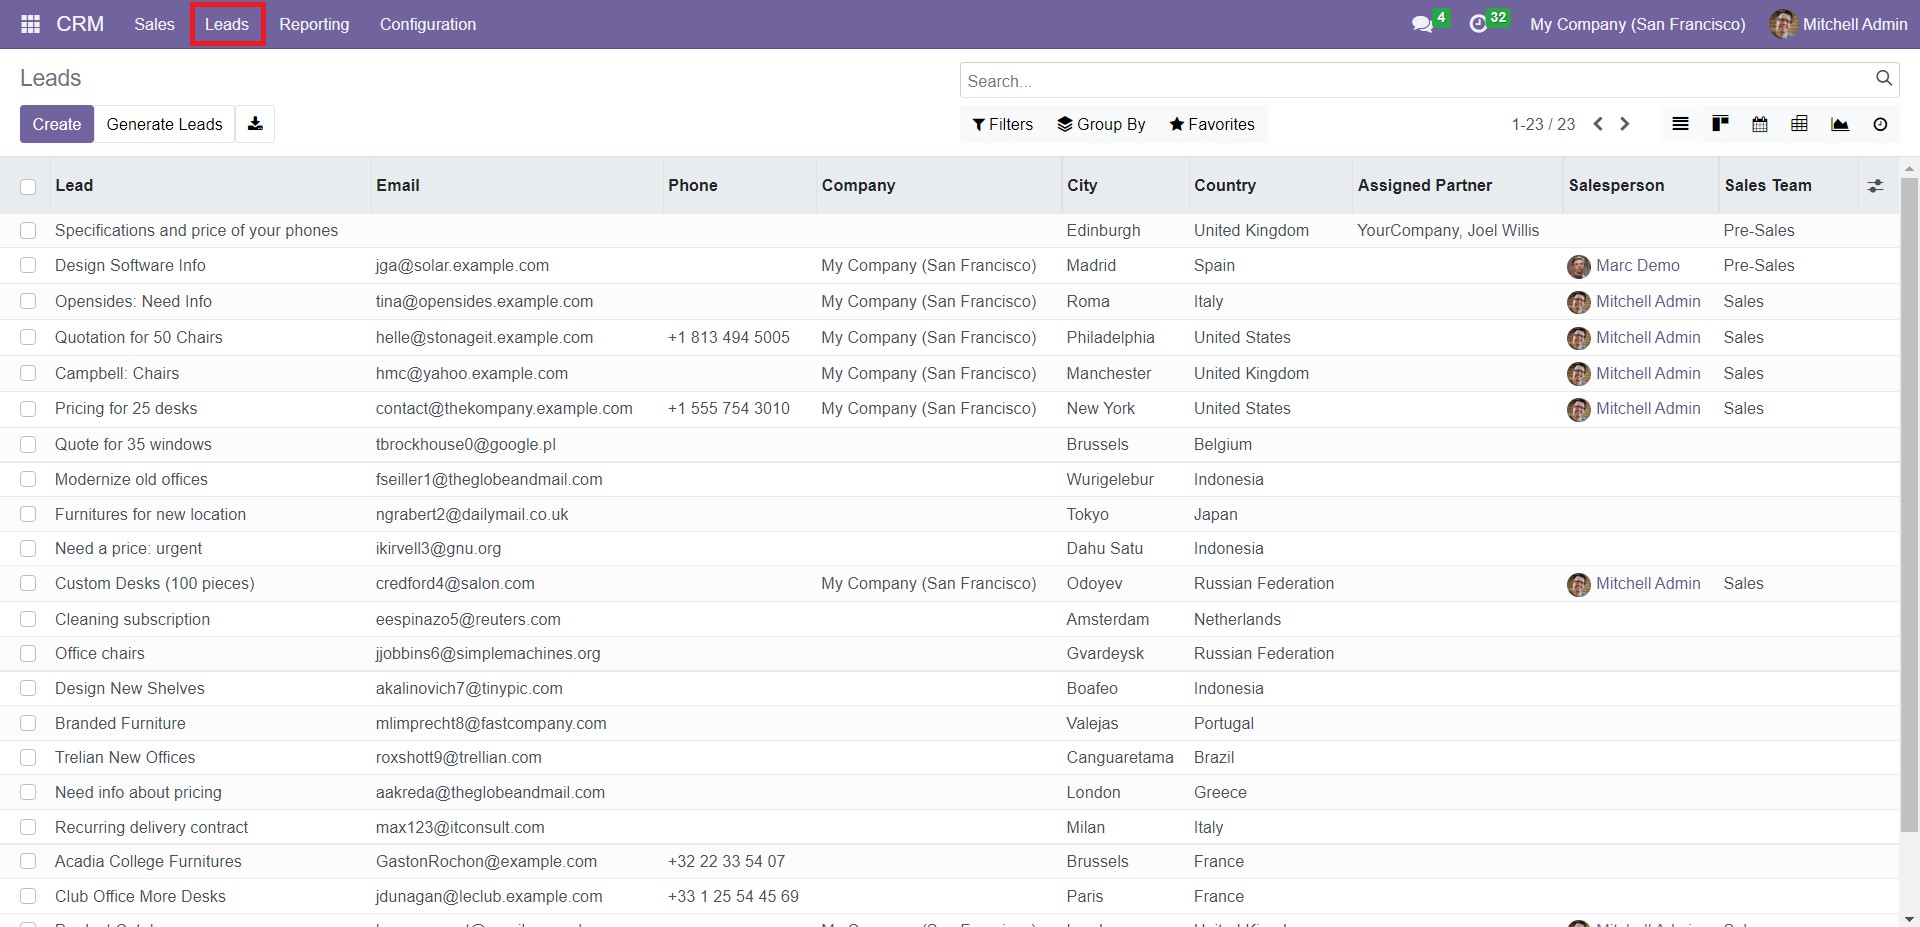
The Leads window displays the details of the prospects like Lead name, Email, Phone, Company, City, Country, Assigned Partner, Salesperson, and Sales Team. Click any lead preview to get its detailed form view.
As you can see here, the Edit button is absent from the form view. You can directly edit the data in this entry by placing the cursor on respective fields. This feature is a new addition to Odoo 16. You can create new leads in this window and manage their dynamics. Click on the Create button to add a new prospect. You will get the following window.
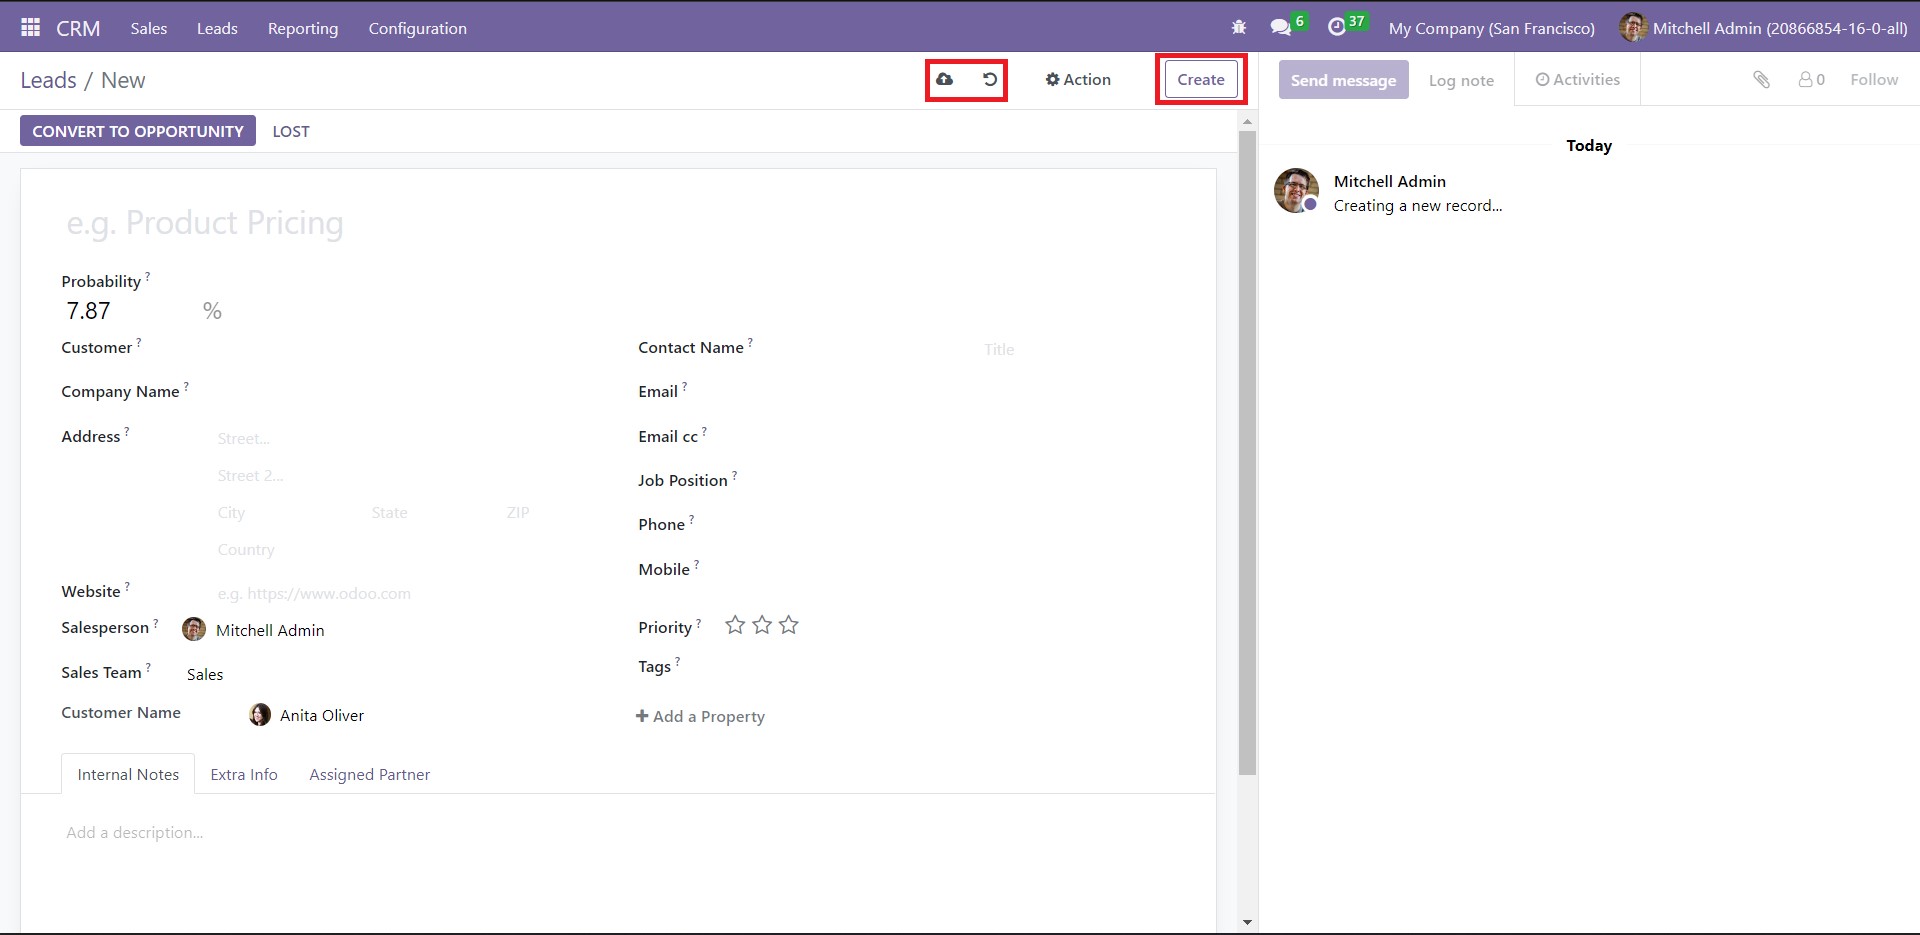
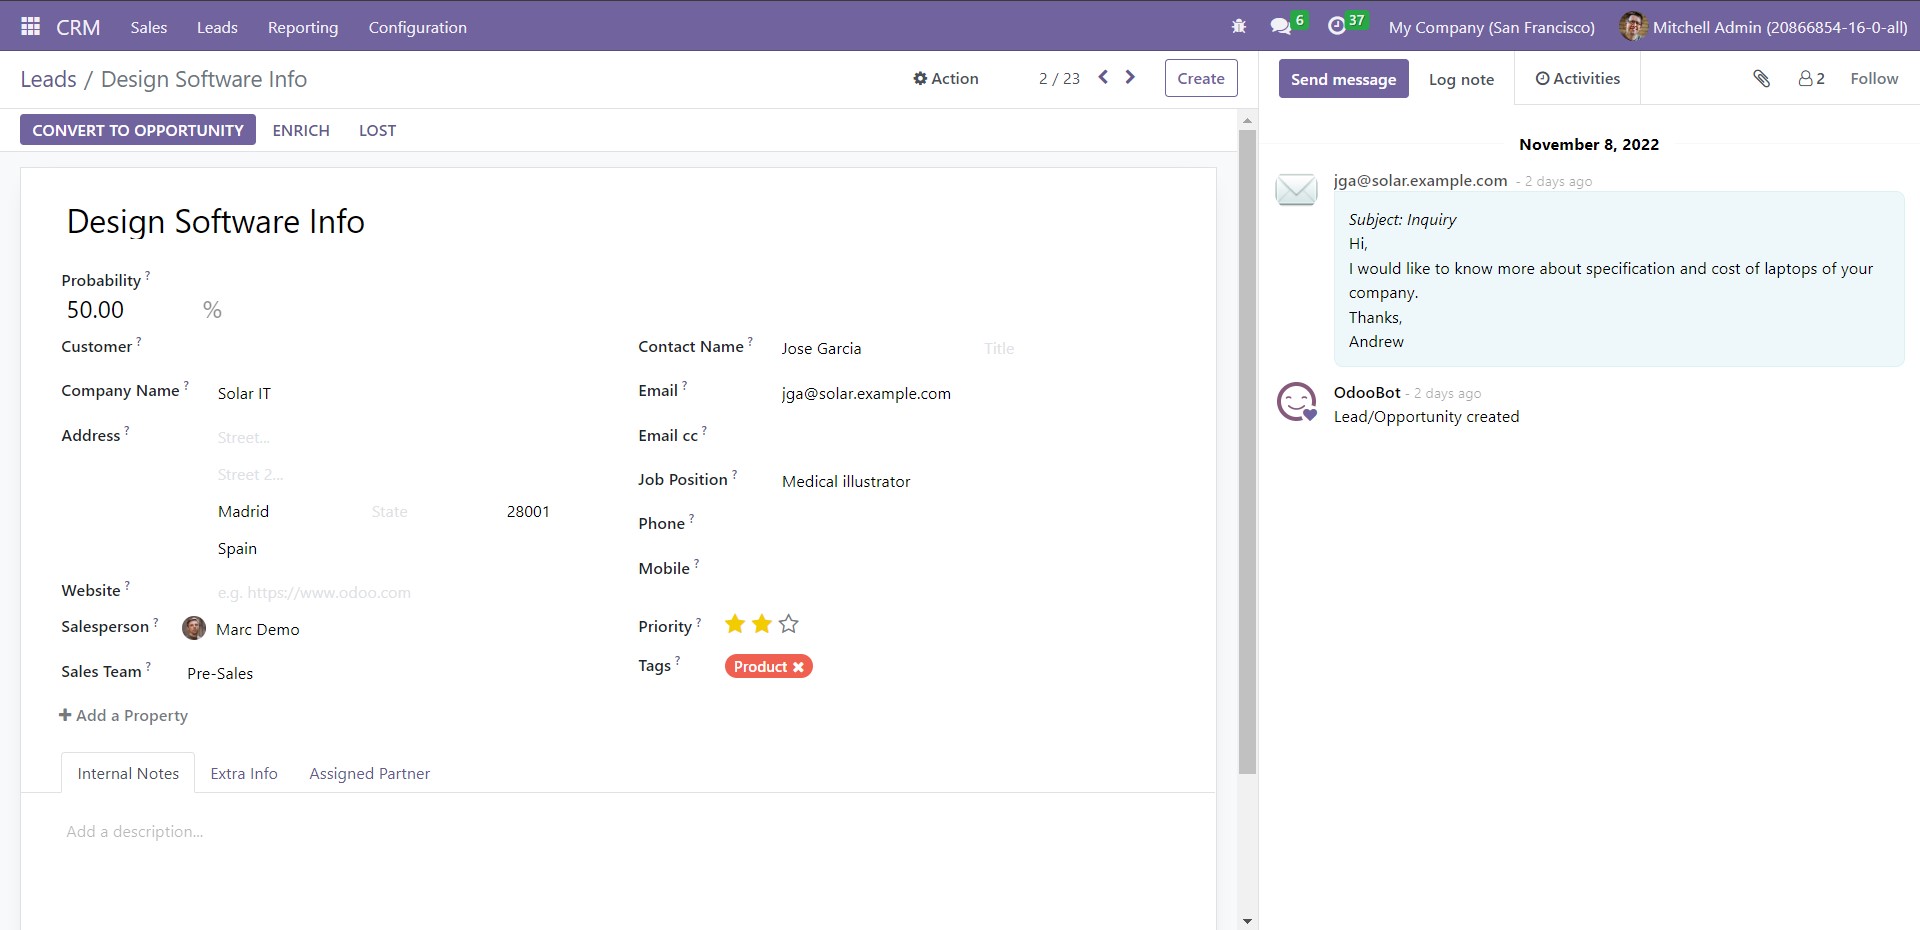
Here, you can see that the Save button is absent. The data you record gets automatically saved. You can switch to manual saving by clicking on the Save Manually icon. This latest version also shows a significant change in the Discard button. Similarly, the Create and Action buttons are placed on the right side of the window. These features are unique to Odoo 16.
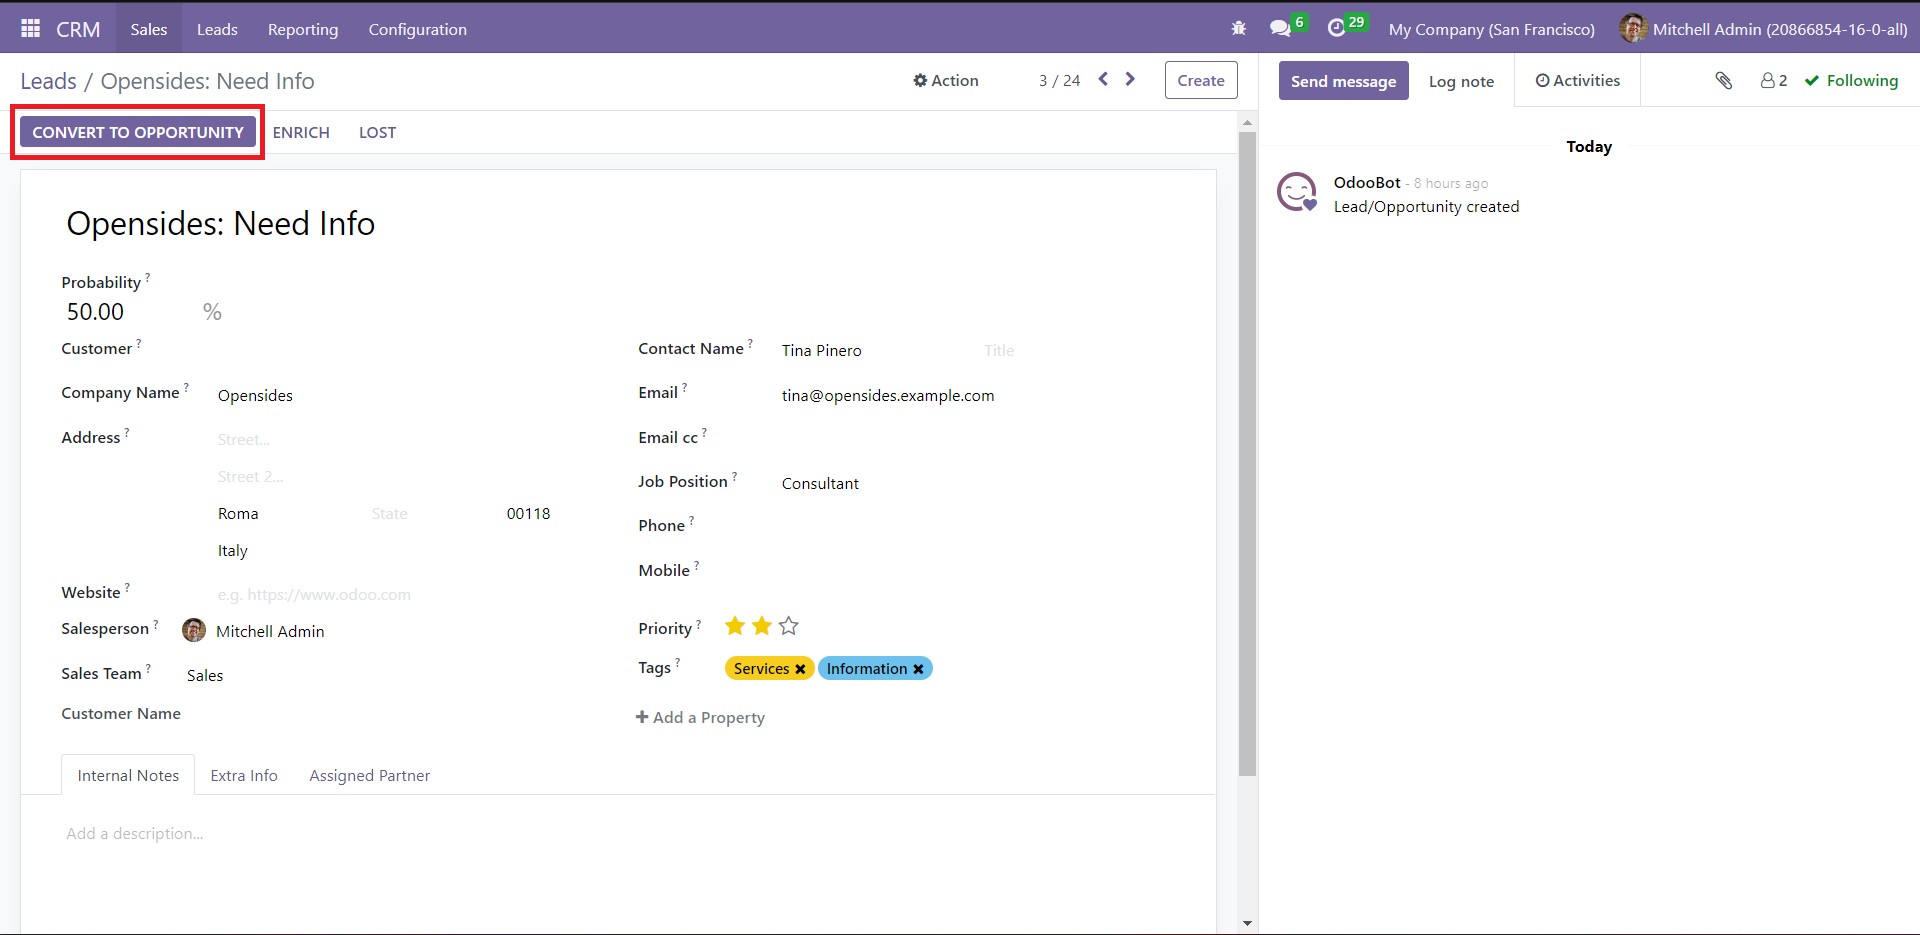
Assign a name for your lead in the respective field. In the Probability field, you can indicate the chance (in percentage) of conversion of the prospect to an opportunity. Then, provide the Company Name, Address, Website, Salesperson, Sales Team, Contact Name, Email, Job Position, Phone, Mobile, Priority, and Tags.
The Add a Property feature allows you to add new fields in the form view, which will display when you click on its preview. This is a unique property available exclusively in Odoo 16. When you click on it, you will get a dialog box.
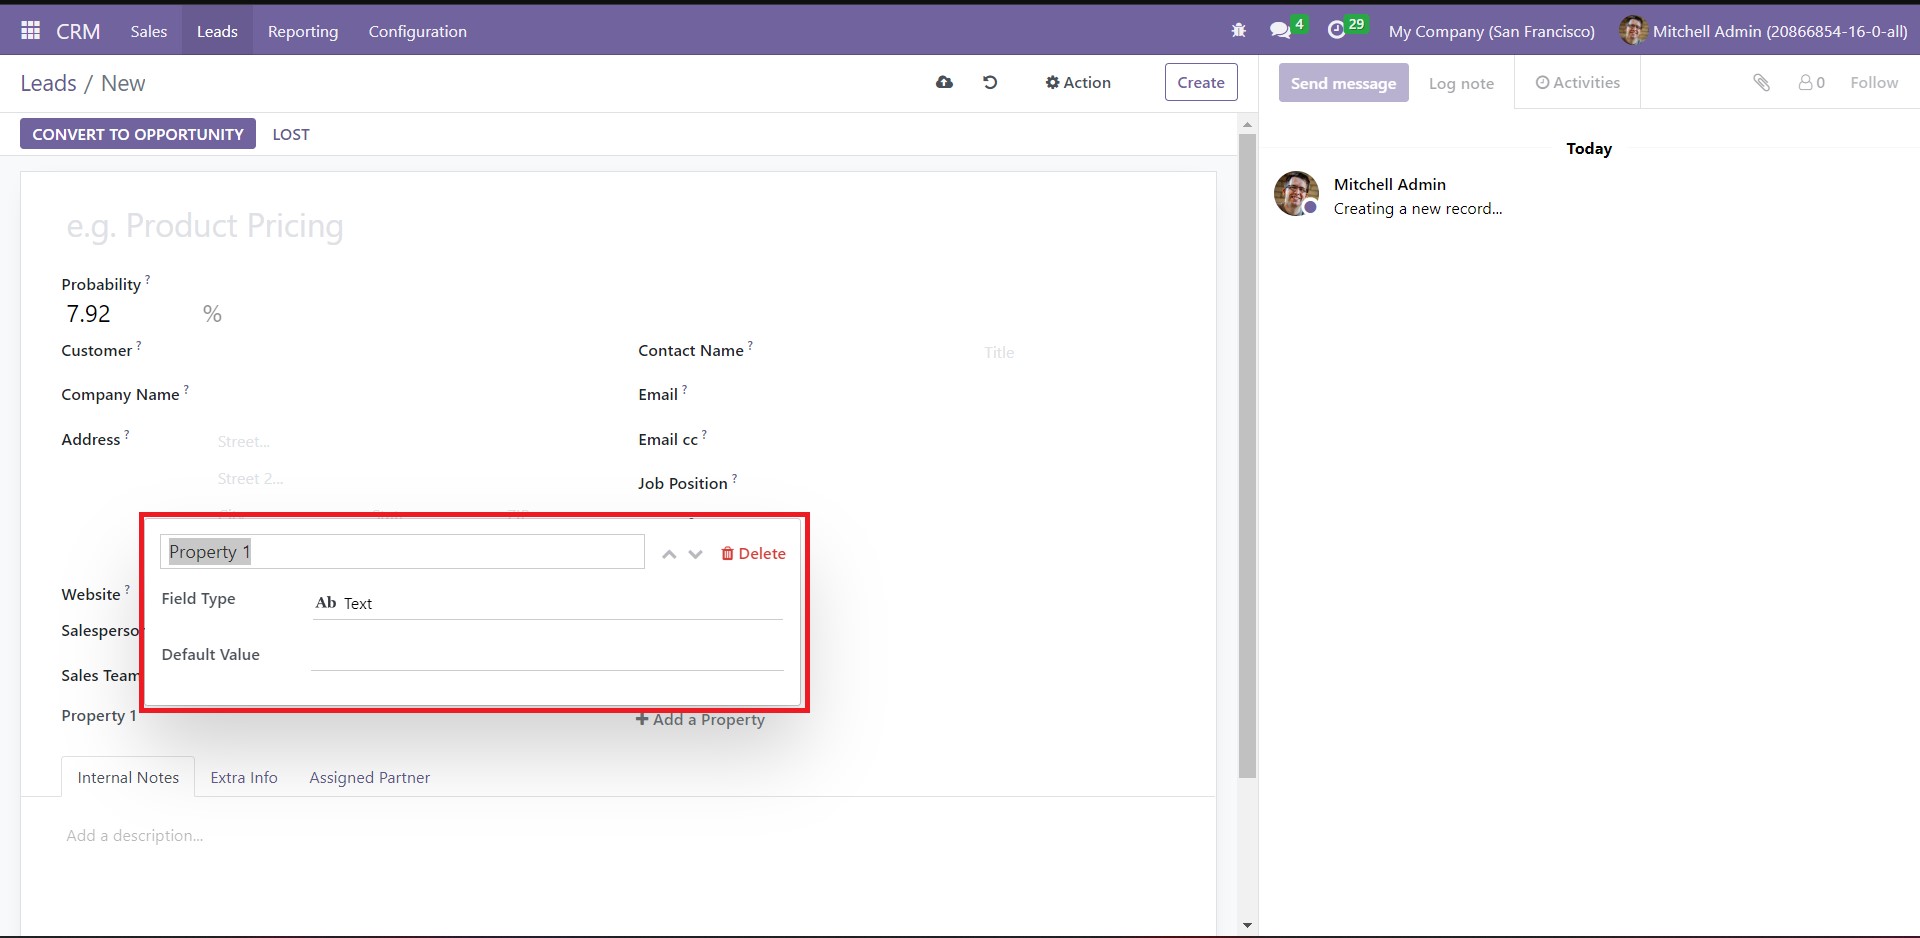
In place of ‘Property 1,’ you can add a custom field name. Select ‘Field Type’ from the dropdown list and set ‘Default Value.’ For example, name the property as ‘Contact Name.’ Select ‘Many2one’ from the dropdown list of ‘Field Type.’ Depending on this selection, you will get new fields like ‘Model’ and ‘Domain.’ Set the former as ‘Contact’ and the latter as ‘Match all Records.’ You can also add filters if necessary. Then, add ‘Default Value.’ You can assign multiple properties to the same lead.
Under these fields, three tabs are available – Internal Notes, Extra Info, and Assigned Partner.
Add additional notes under the Internal Notes tab if required. Under ‘Extra Info,’ provide the necessary details for the smooth tracking of the lead’s dynamic.
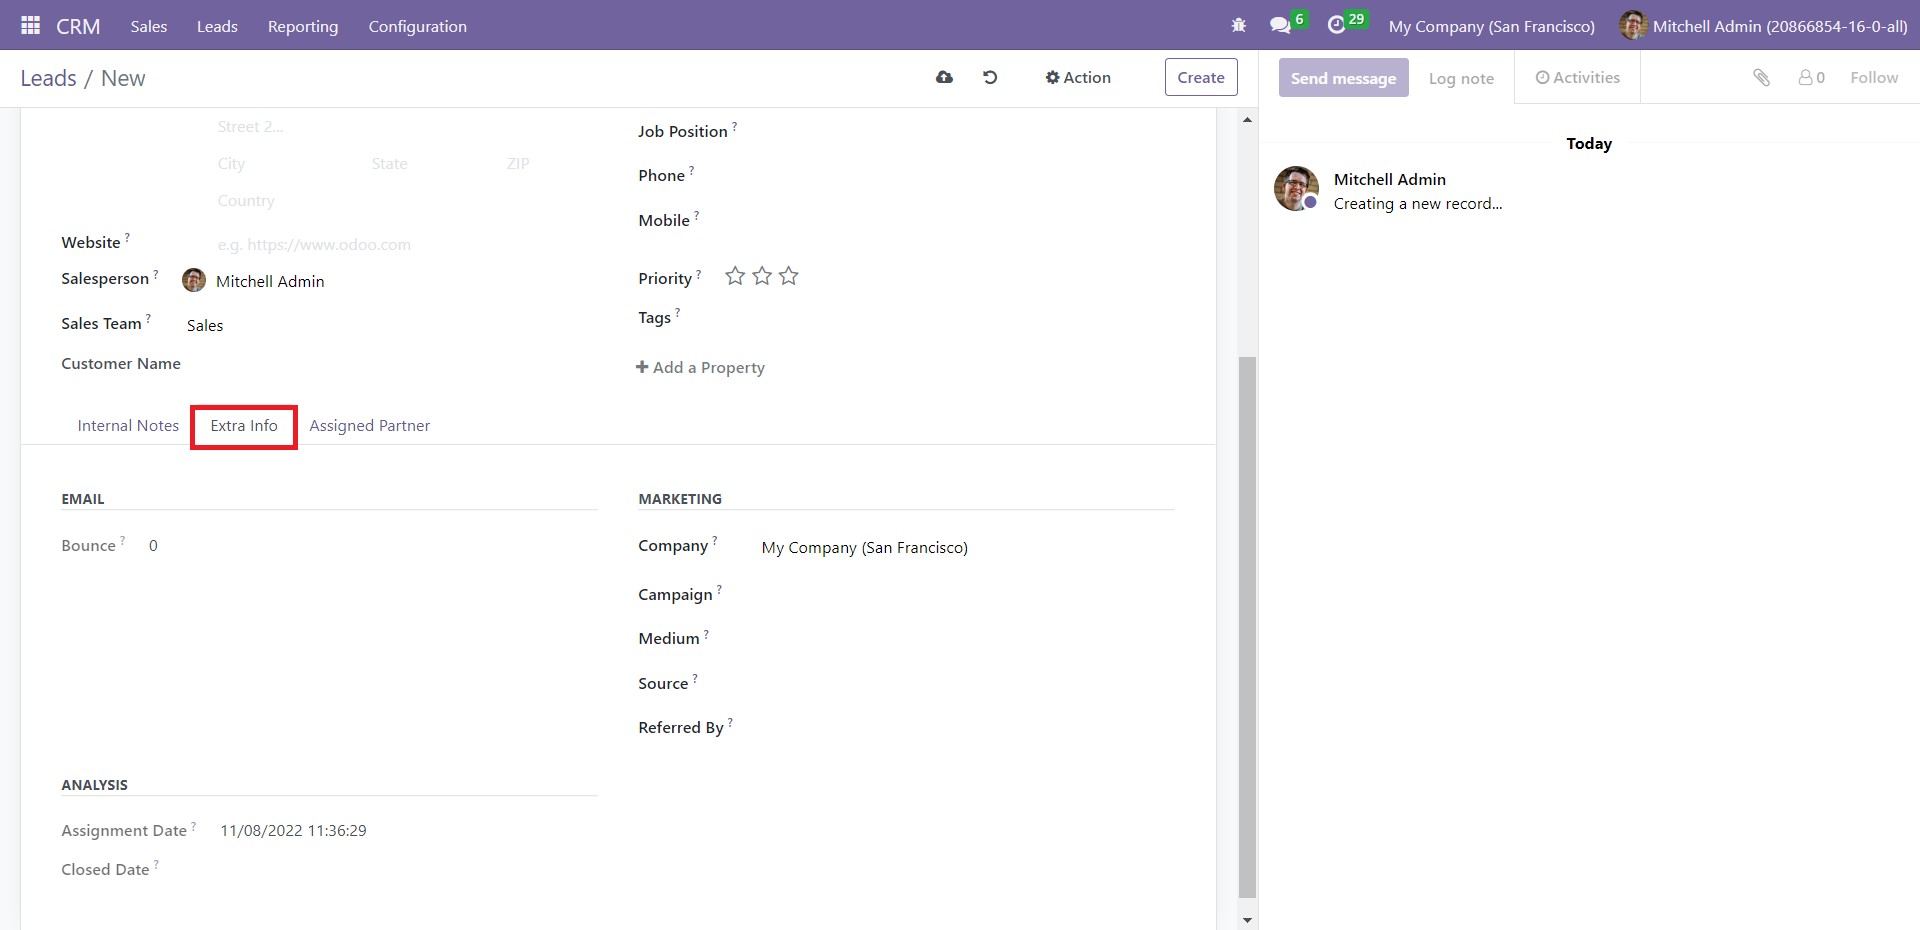
Fill in the fields under the Marketing section like Company, Campaign name, Medium of delivery, Source of the link, and Referred By. Under ‘Analysis,’ auto-generated Assignment Date and Closed Date will be visible. The Bounce field in the Email section sets the counter of the number of bounced emails for this contact, which is a new feature in Odoo 16.
The Assigned Partner tab allows you to give the details of the partner to whom the lead gets assigned.
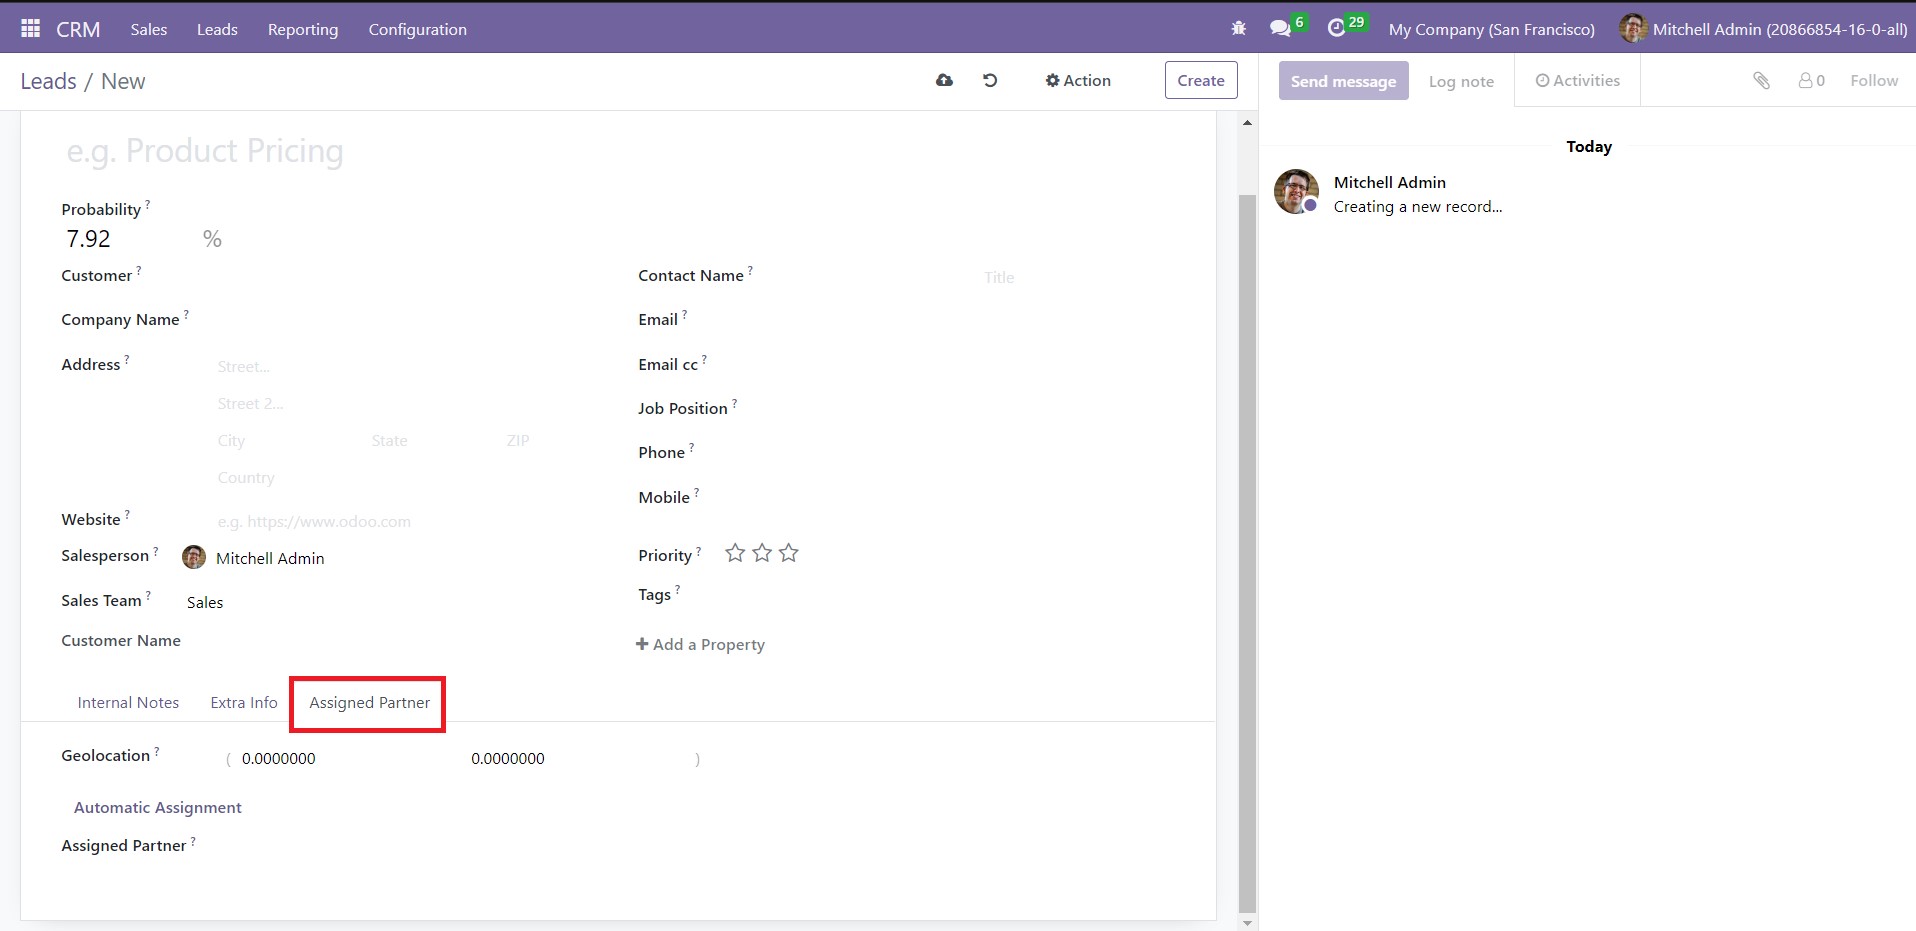
Provide the details of the Geolocation and Assigned Partner. If you want the system to automatically assign the lead to a partner, click on Automatic Assignment. When you finish adding all the details, click on Save.
Nextly, let us go over the step-by-step procedure of converting a lead into a new opportunity.
Creating a New Opportunity from a Lead
Every time you generate a new lead, you can convert it into an opportunity directly.
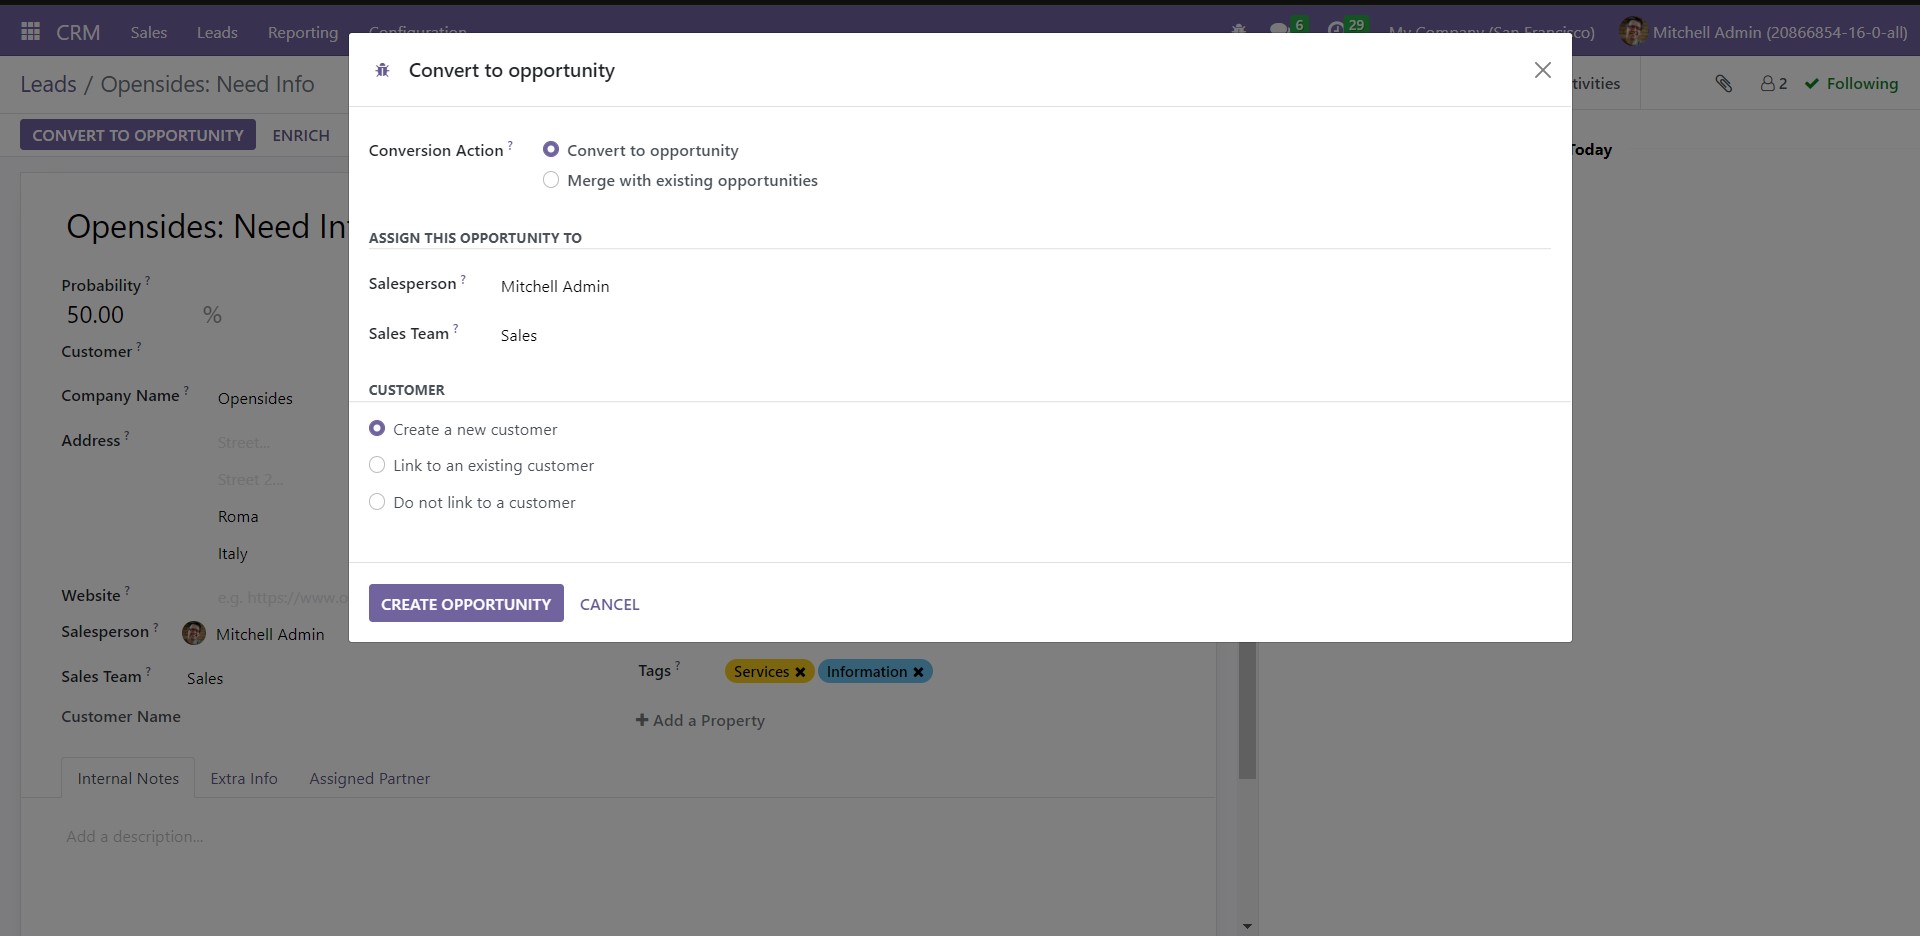
Converting a lead to an opportunity like this increases its chances of becoming a sales order later. Click on ‘Convert to Opportunity’ to get a pop-up window, as shown below.
Odoo allows you to directly convert the lead into an opportunity or merge with the existing ones. You can choose from these options next to ‘Conversion Action.’ Assign a Salesperson and Sales Team to work on this opportunity. In the Customer section, three choices are available – Create a new customer, Link to an existing customer, and Do not link to a customer. If you choose ‘Create a new customer,’ it will add the data as a new customer record. Select ‘Link to an existing customer,’ and you will get a dropdown list to select the customer to whom you want to link this opportunity. If you do not wish to connect it to a customer, choose ‘Do not link to a customer.’ After entering the required details, click on ‘Create Opportunity.’
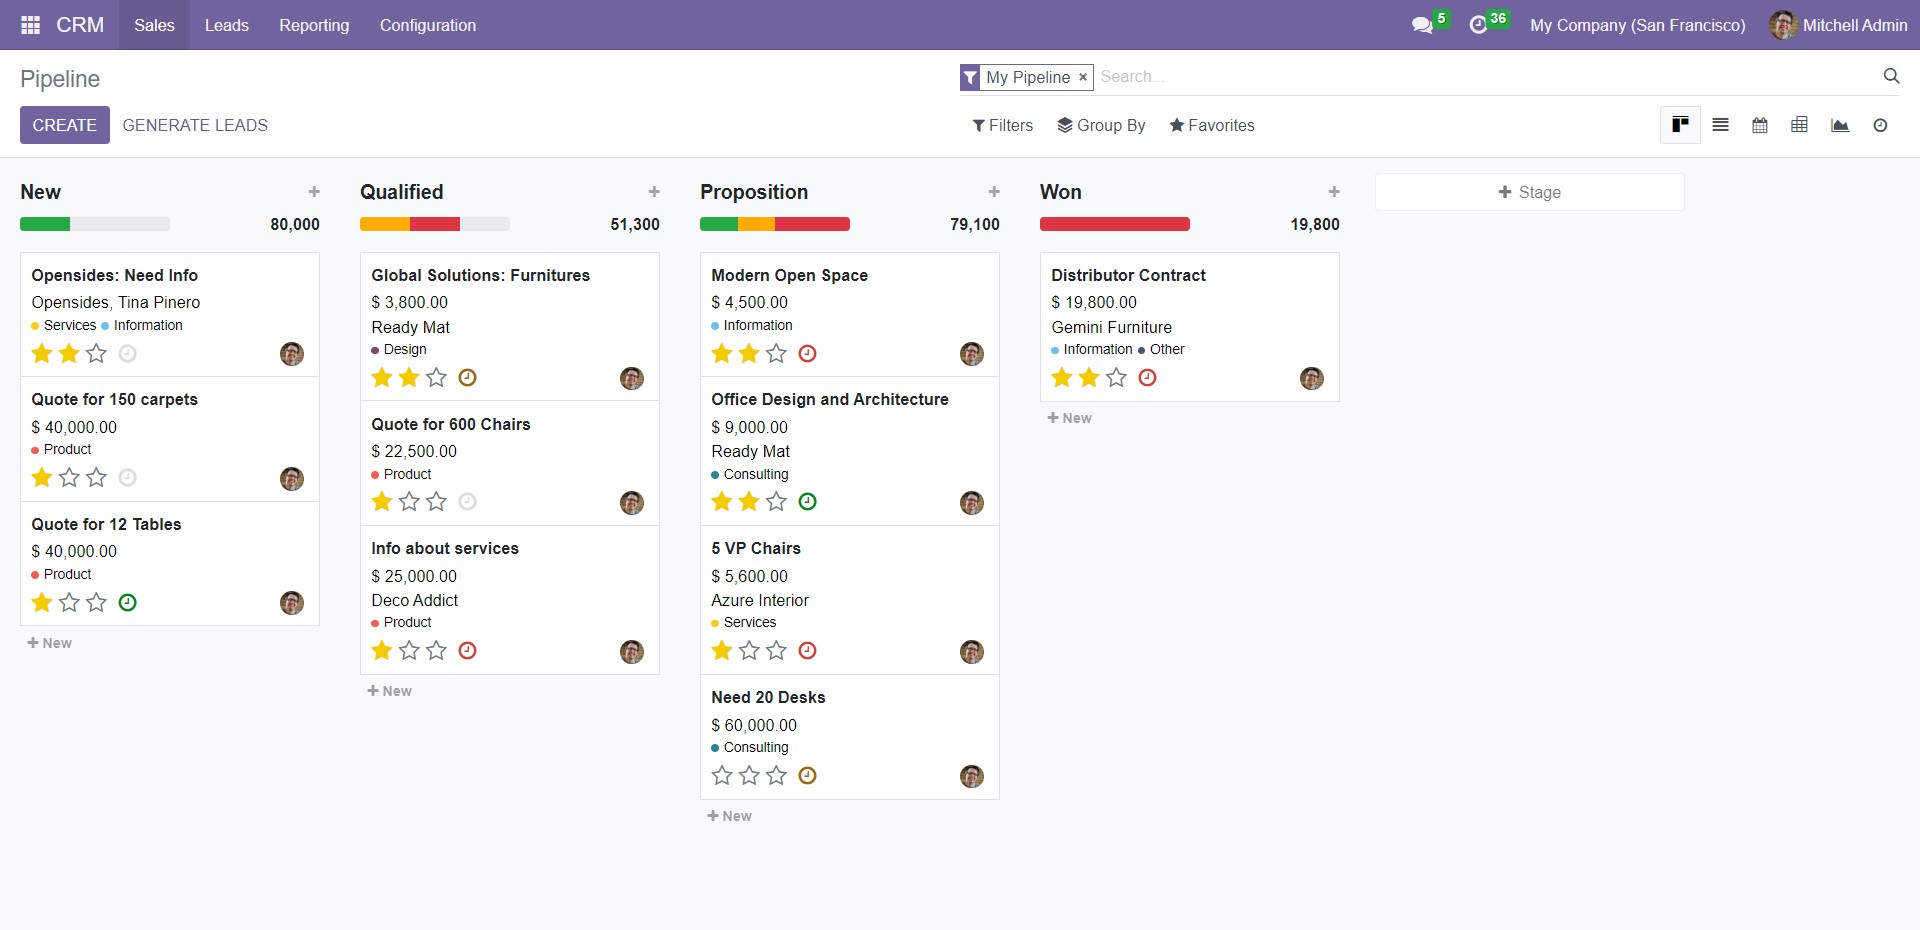
The details of all newly converted leads will be available in the Pipeline window. To access this area, click on ‘My Pipeline’ from the dropdown list of the Sales tab. In this window, you can see the categorization of opportunities into different stages according to their progress, like New, Proposition, Qualified, and Won. Click on ‘Stage’ if you want to add a new category. If you’d like to change the stage of a particular opportunity, you can simply drag and drop it to the desired phase.
The Pipeline window displays its contents in Kanban view by default. You can change this view to List, Calendar, Pivot, and Graph views using the respective icons in the top right corner of the window. The Filters and Group By options allow you to obtain the required data based on the parameters of your choice.
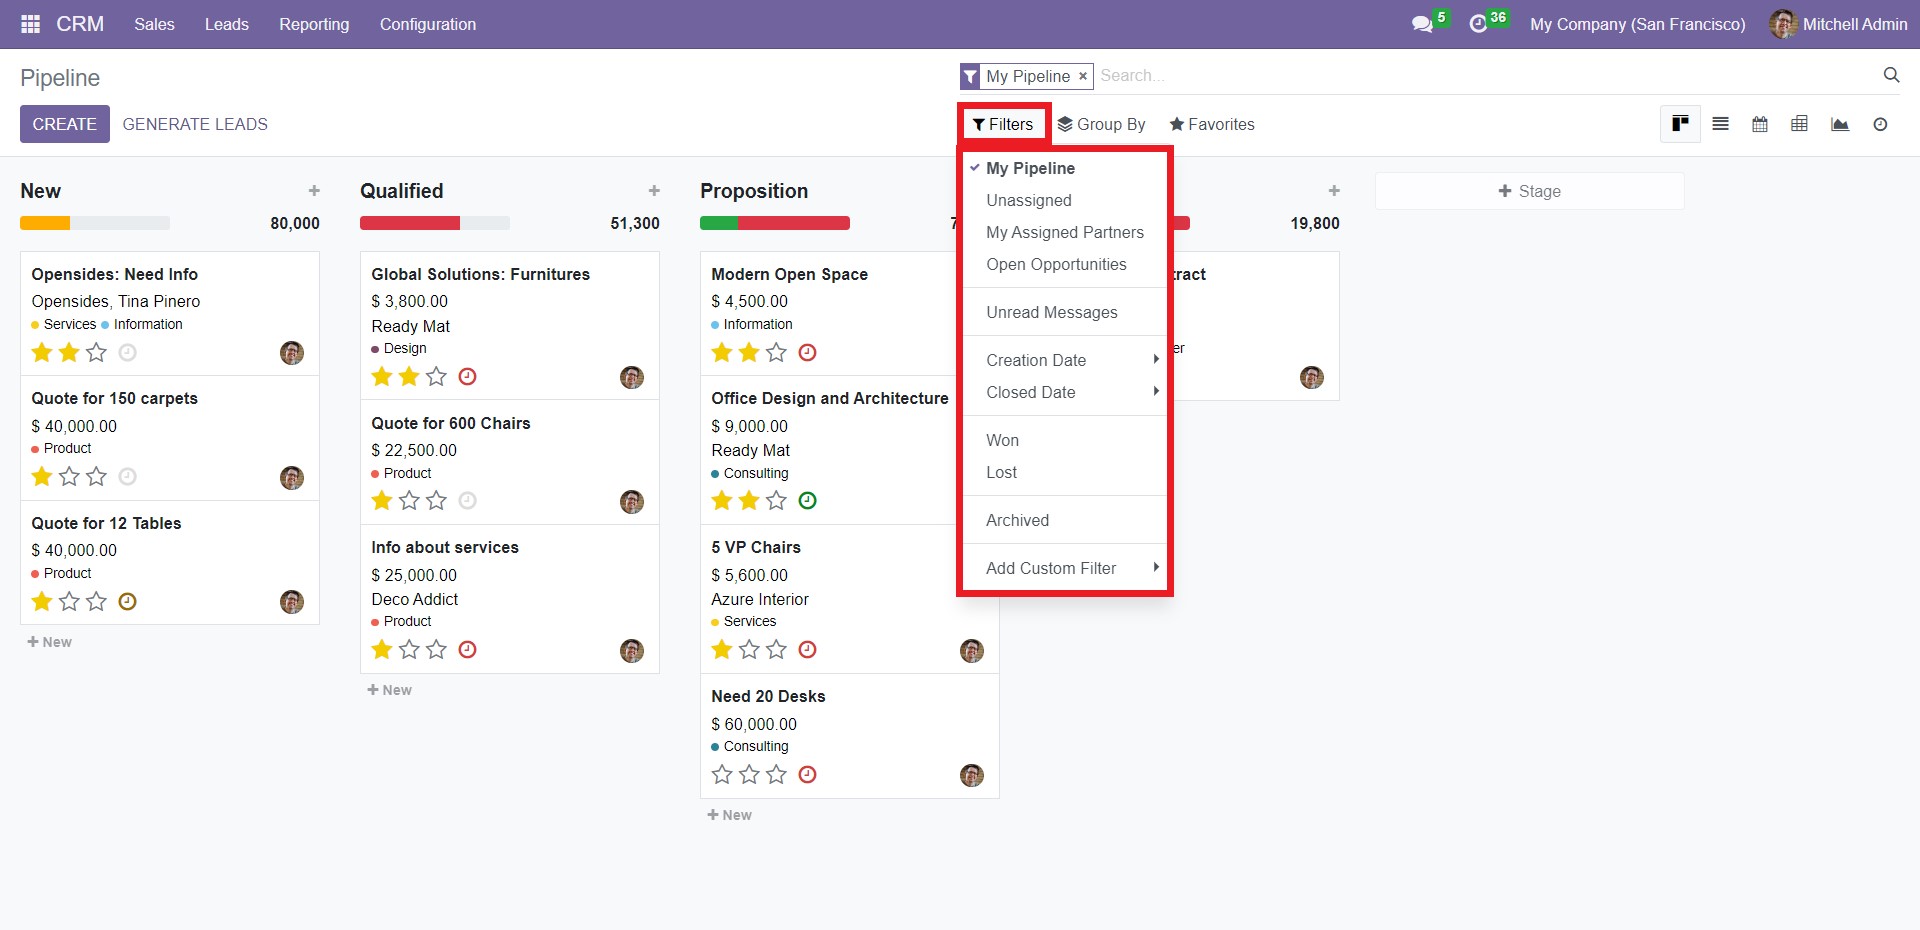
Use ‘Filters’ to segregate records by applying various criteria.
The dropdown list of ‘Filters’ has the options like My Pipeline, Unassigned, My Assigned Partners, Open Opportunities, Unread Messages, Creation Date, Closed Date, Won, Lost, Archived, and
Add Custom Filter. You can choose any filter according to your convenience and single out the needed data according to your convenience.
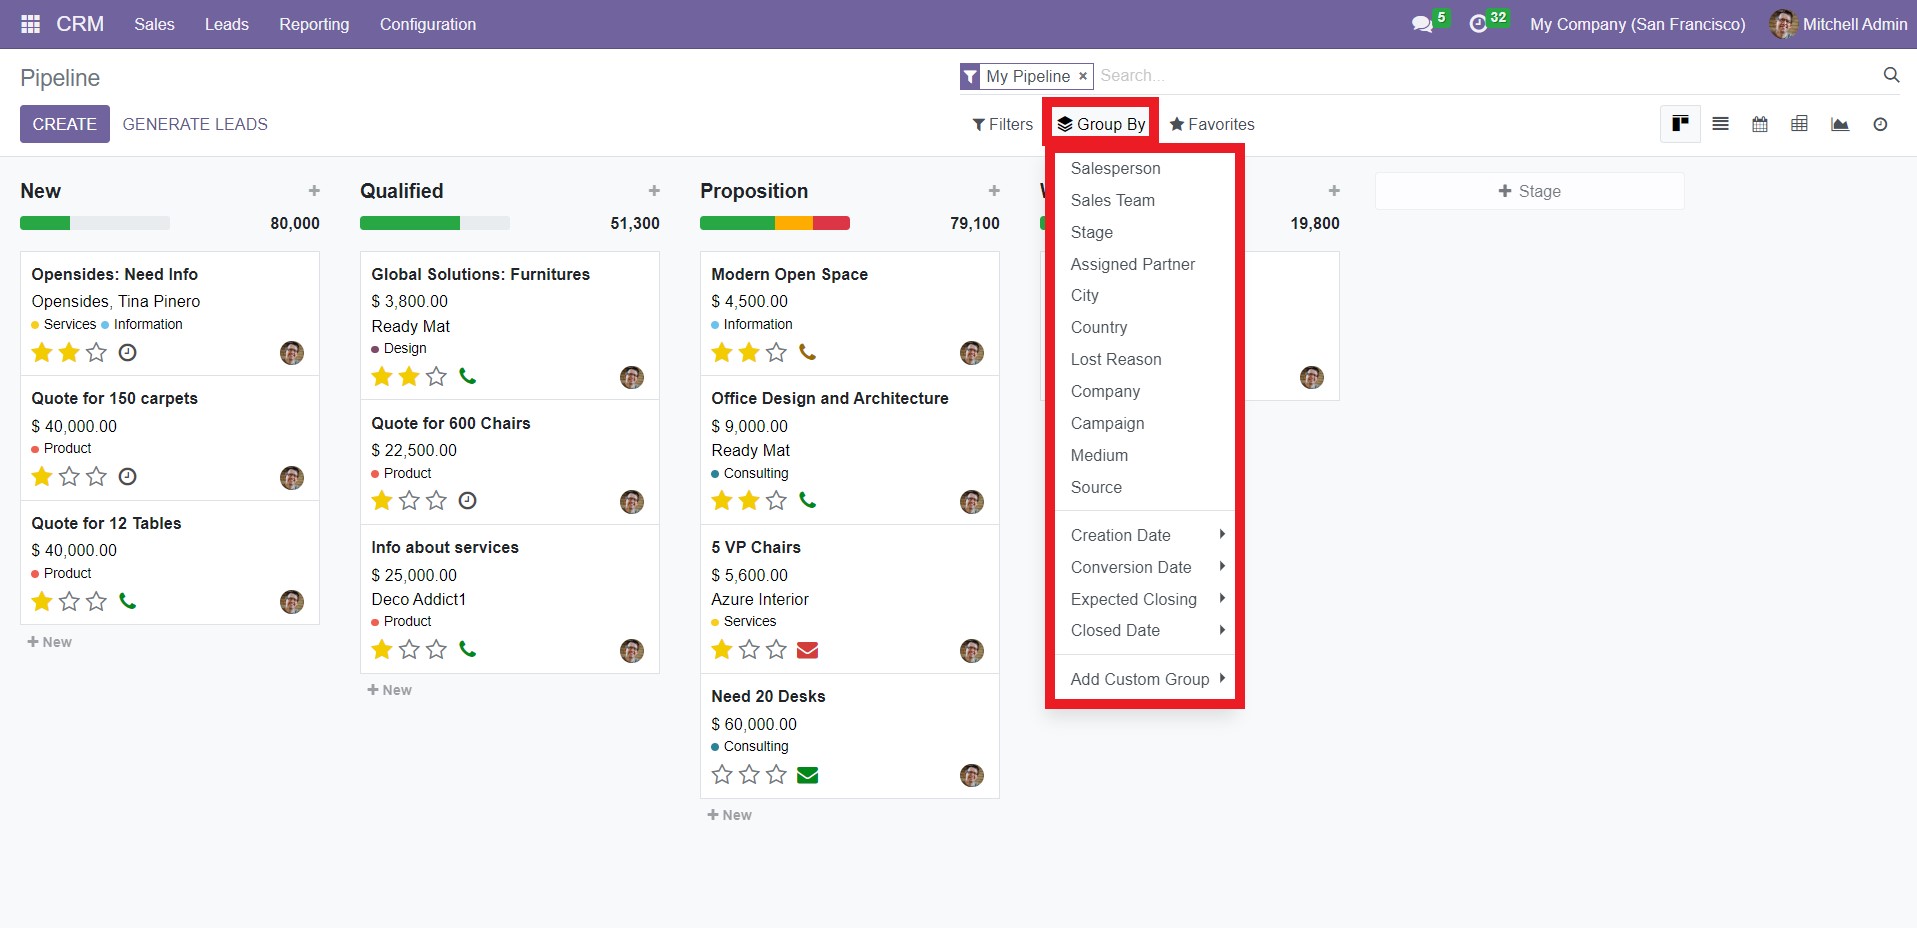
The Group By menu serves a similar function by categorizing the records into groups based on the conditions you apply.
Under ‘Group By,’ you can see the options like Salesperson, Sales Team, Stage, Assigned Partner, City, Country, Lost Reason, Company, Campaign, Medium, Source, Creation Date, Conversion Date, Expected Closing, Closed Date, and Add Custom Group. The grouped data will appear based on the criteria you choose.
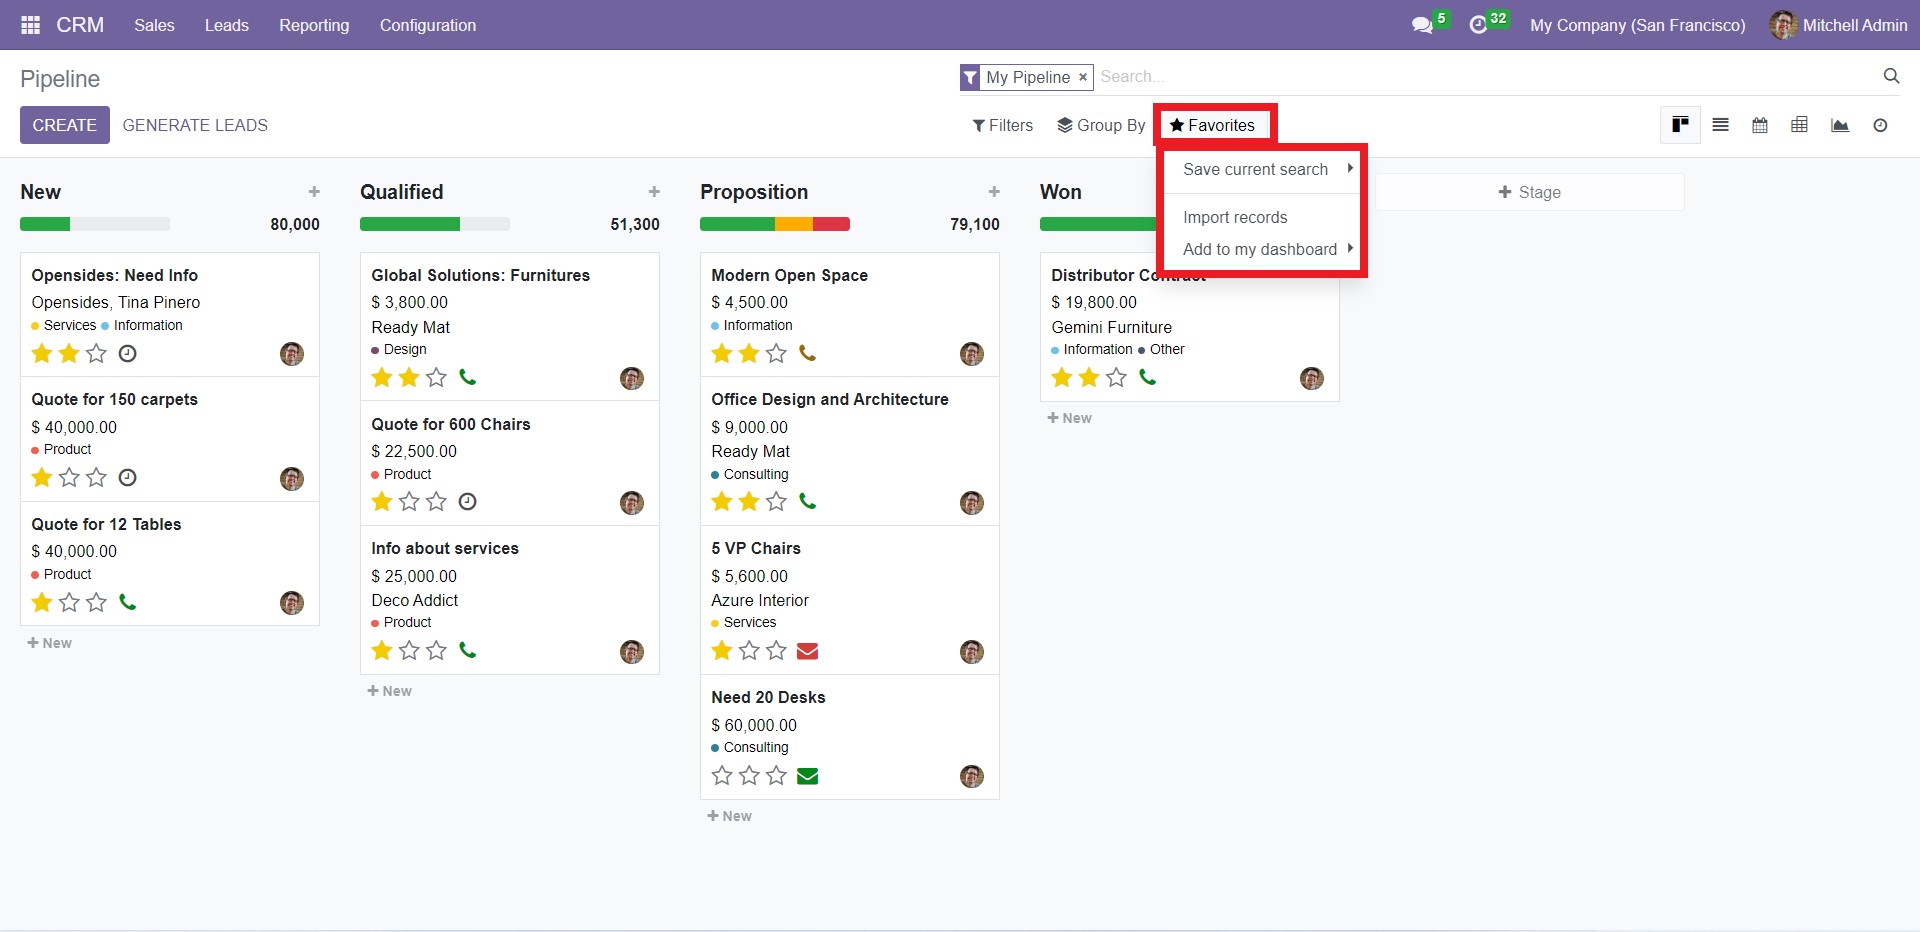
‘Favorites’ allows you to save important filters so that you don’t have to reapply them every time.
The dropdown list of ‘Favorites’ has three options – Save current search, Import records, and Add to my dashboard. Using ‘Save current search,’ you can add the already applied filters and groups to ‘Favorites.’ The ‘Import records’ option will import the data of opportunities into the system from the form view so that you don’t have to enter these records manually. If you want the filtered data to appear in the Dashboard module, click on ‘Add to dashboard.’
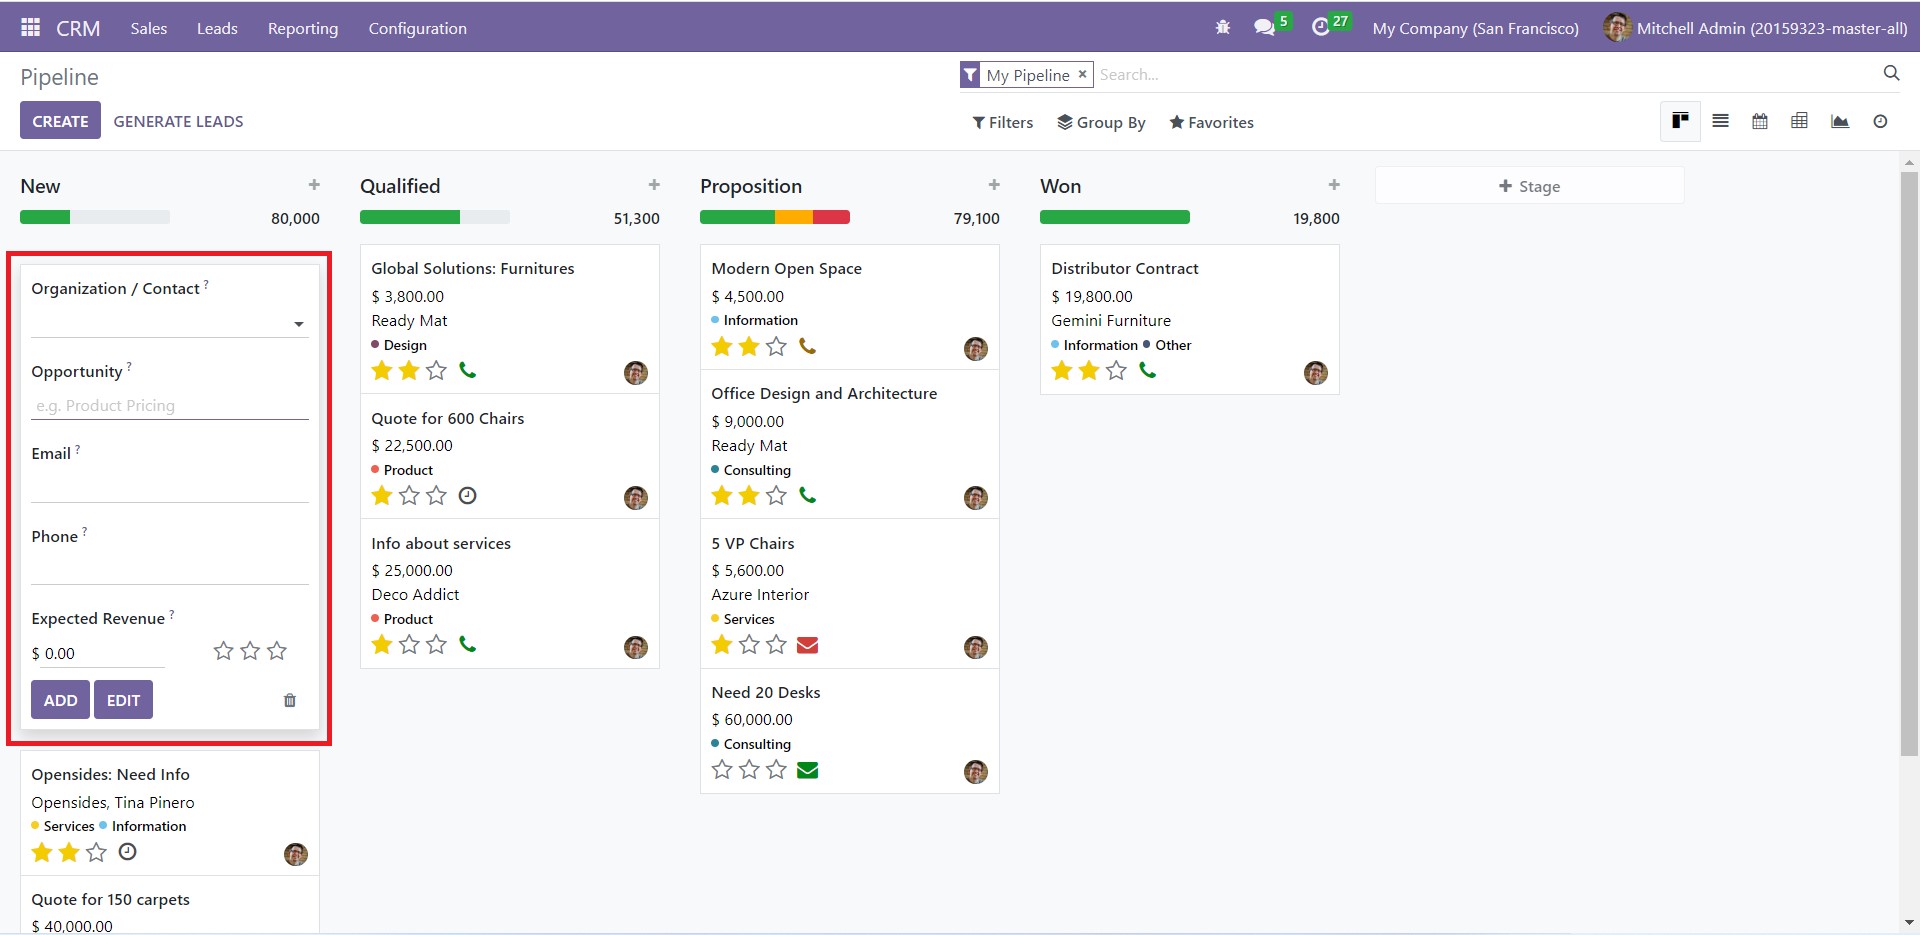
The Pipeline window allows you to create opportunities directly from the same window. To avail of this function, click on the Create button. You will get a dialog box, as highlighted below.

Fill in all the required fields like Organization/ Contact name, name of the Opportunity, Email, Phone, and Expected Revenue. You can click the Edit button to make changes to this opportunity in a detailed window. After entering the valid information, click on ‘Add.’ The newly created record will appear in the Pipeline window.
Creating a Quotation
The Odoo 16 CRM module is designed in such a way that it is convenient to create a new quotation at any stage in the Pipeline window. Click on ‘My Pipeline’ under the Sales tab and select the opportunity to convert into a quotation.
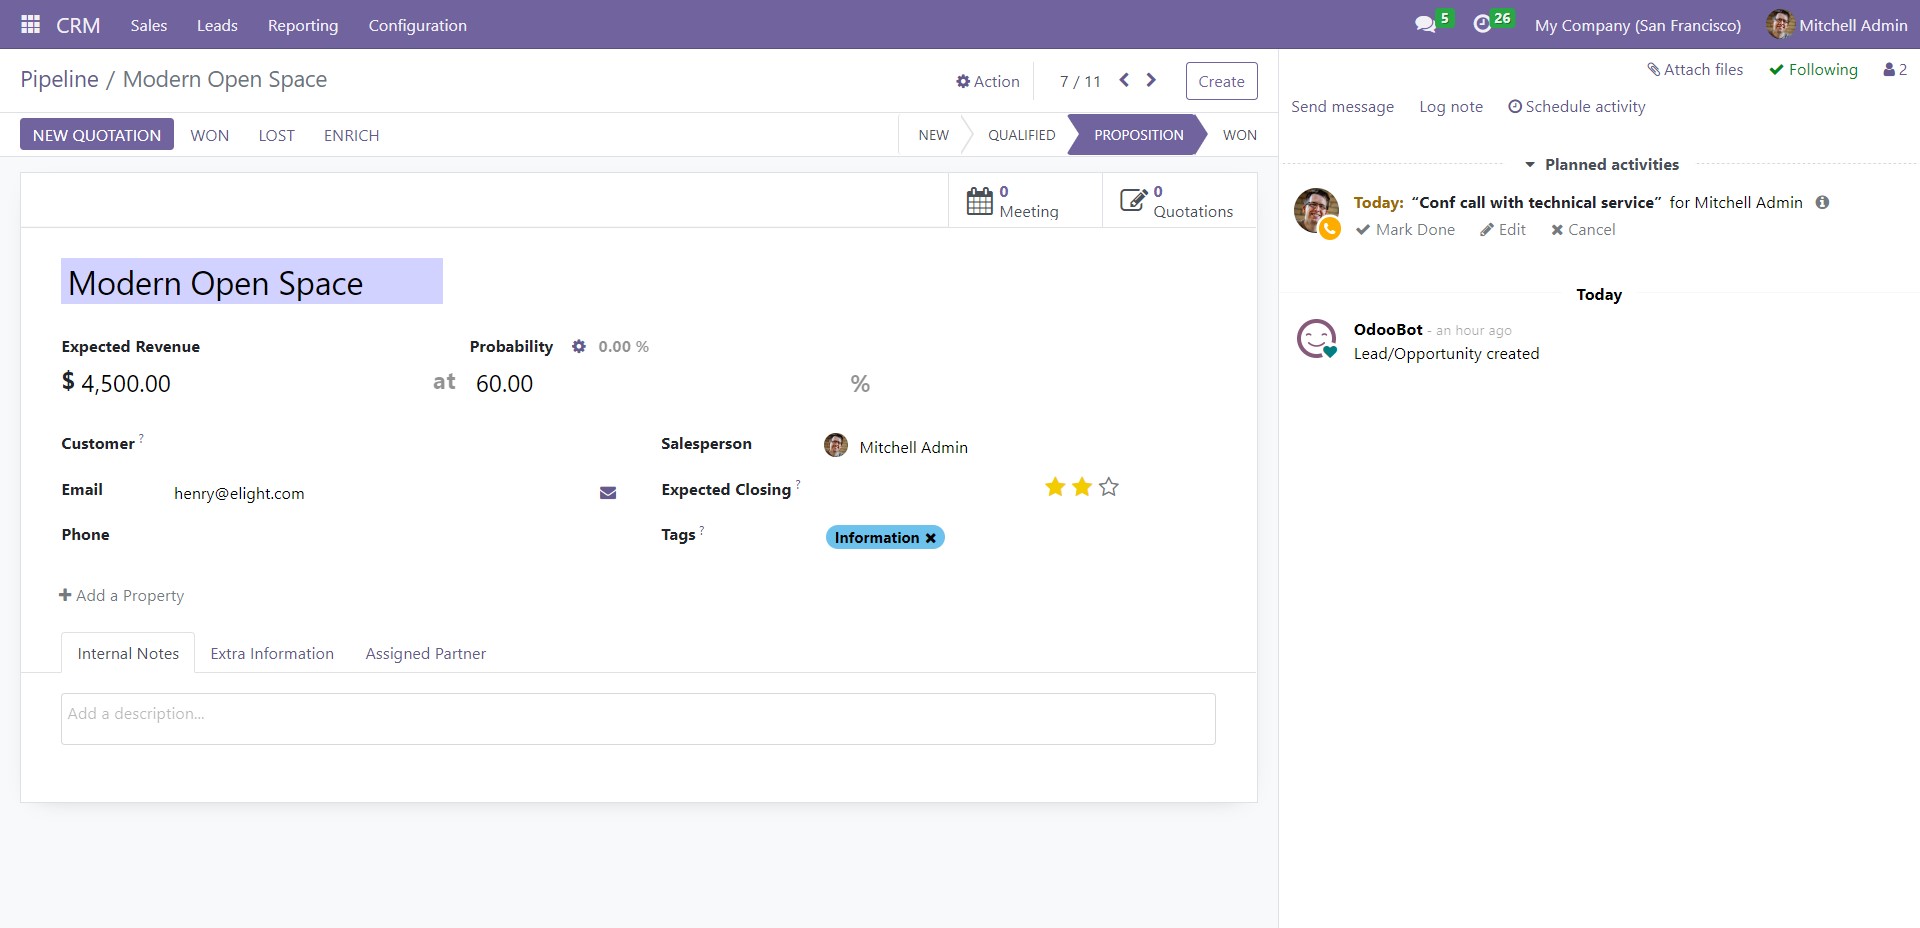
Next to ‘New Quotation,’ you have the Won and Lost options. Click on ‘Won’ if the opportunity has met the requirements to become a quotation order.
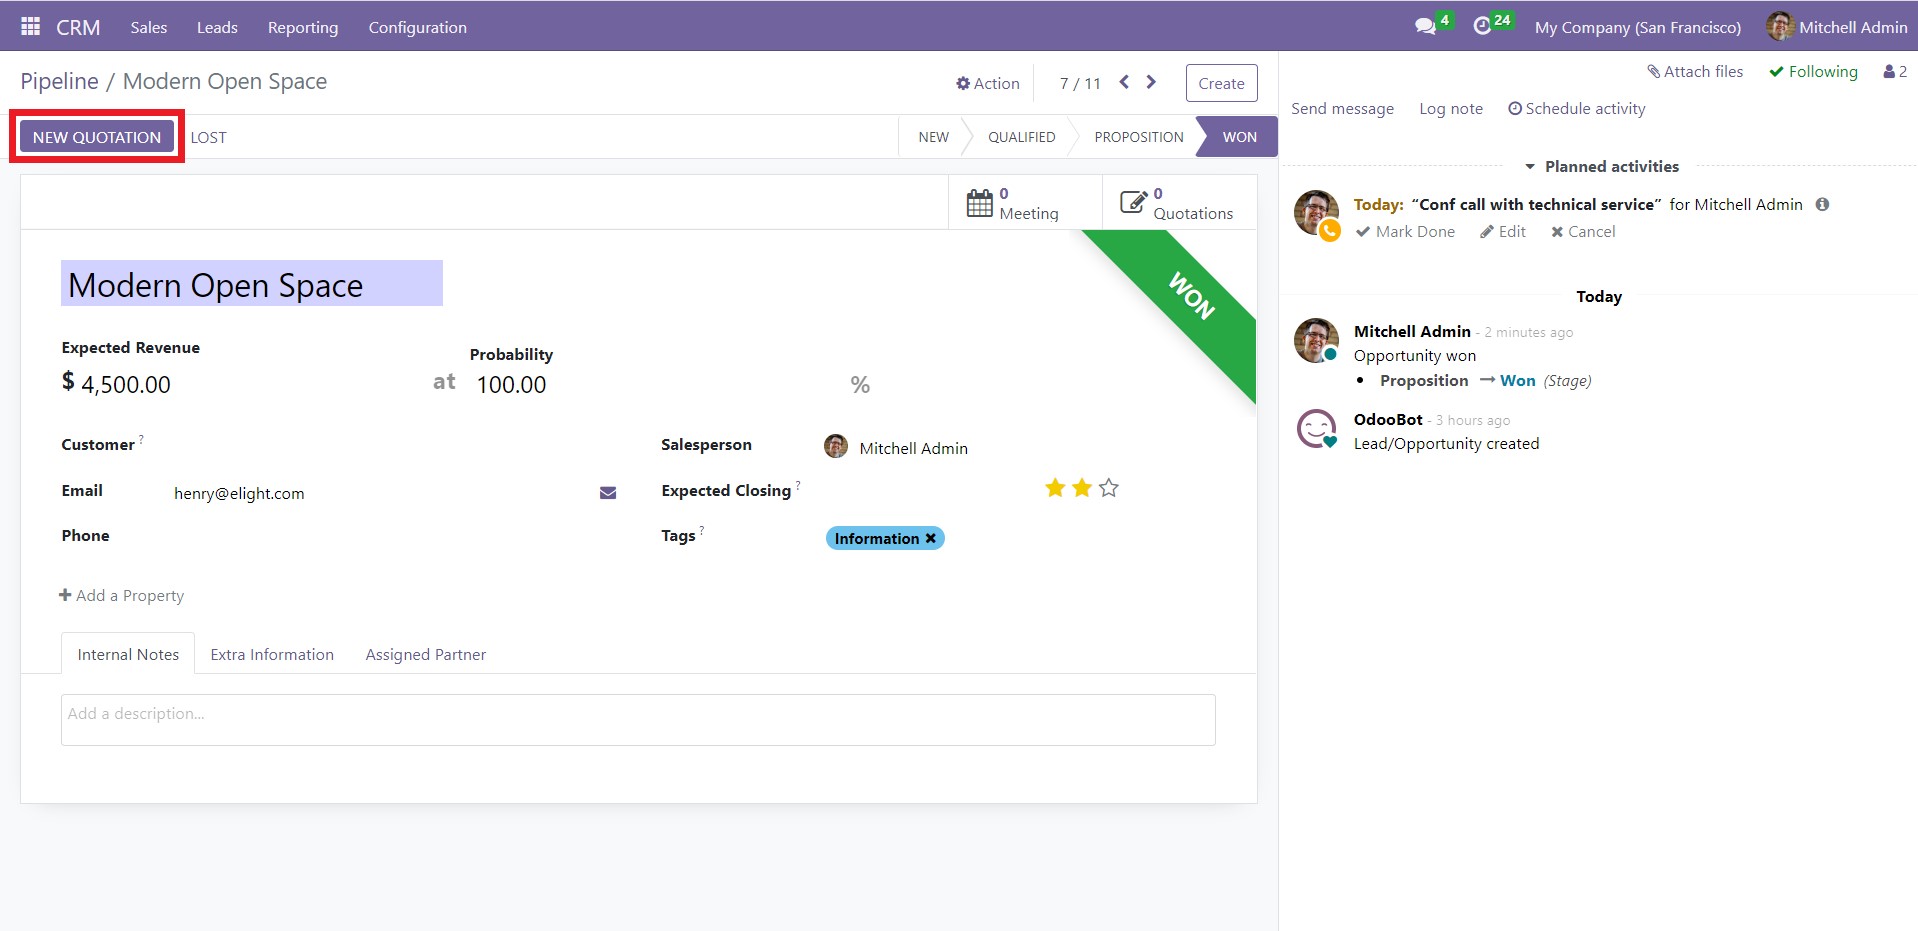
Now, click on ‘New Quotation’ to perform the conversion. A dialog box will pop up.
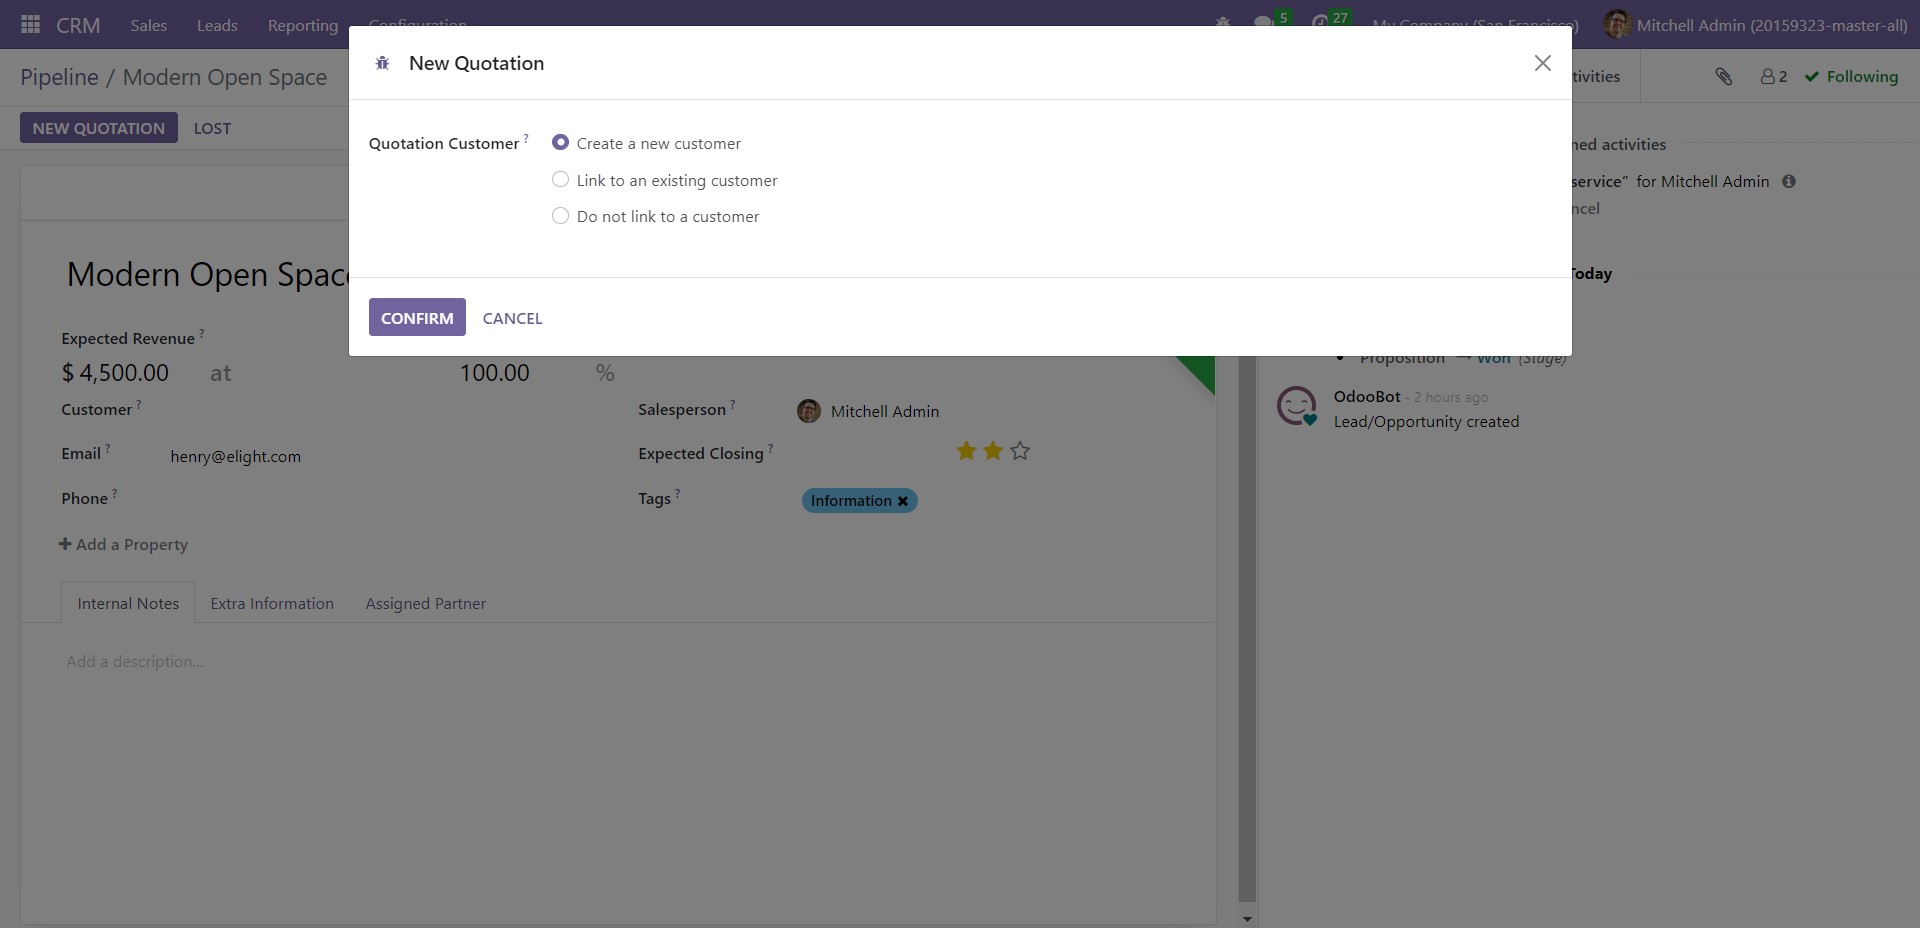
Here, you get three options regarding the customer details – Create a new customer, Link to an existing customer, and Do not link to a customer. Choose the required option and click on ‘Confirm.’
You will get the following window to add the customer's details.
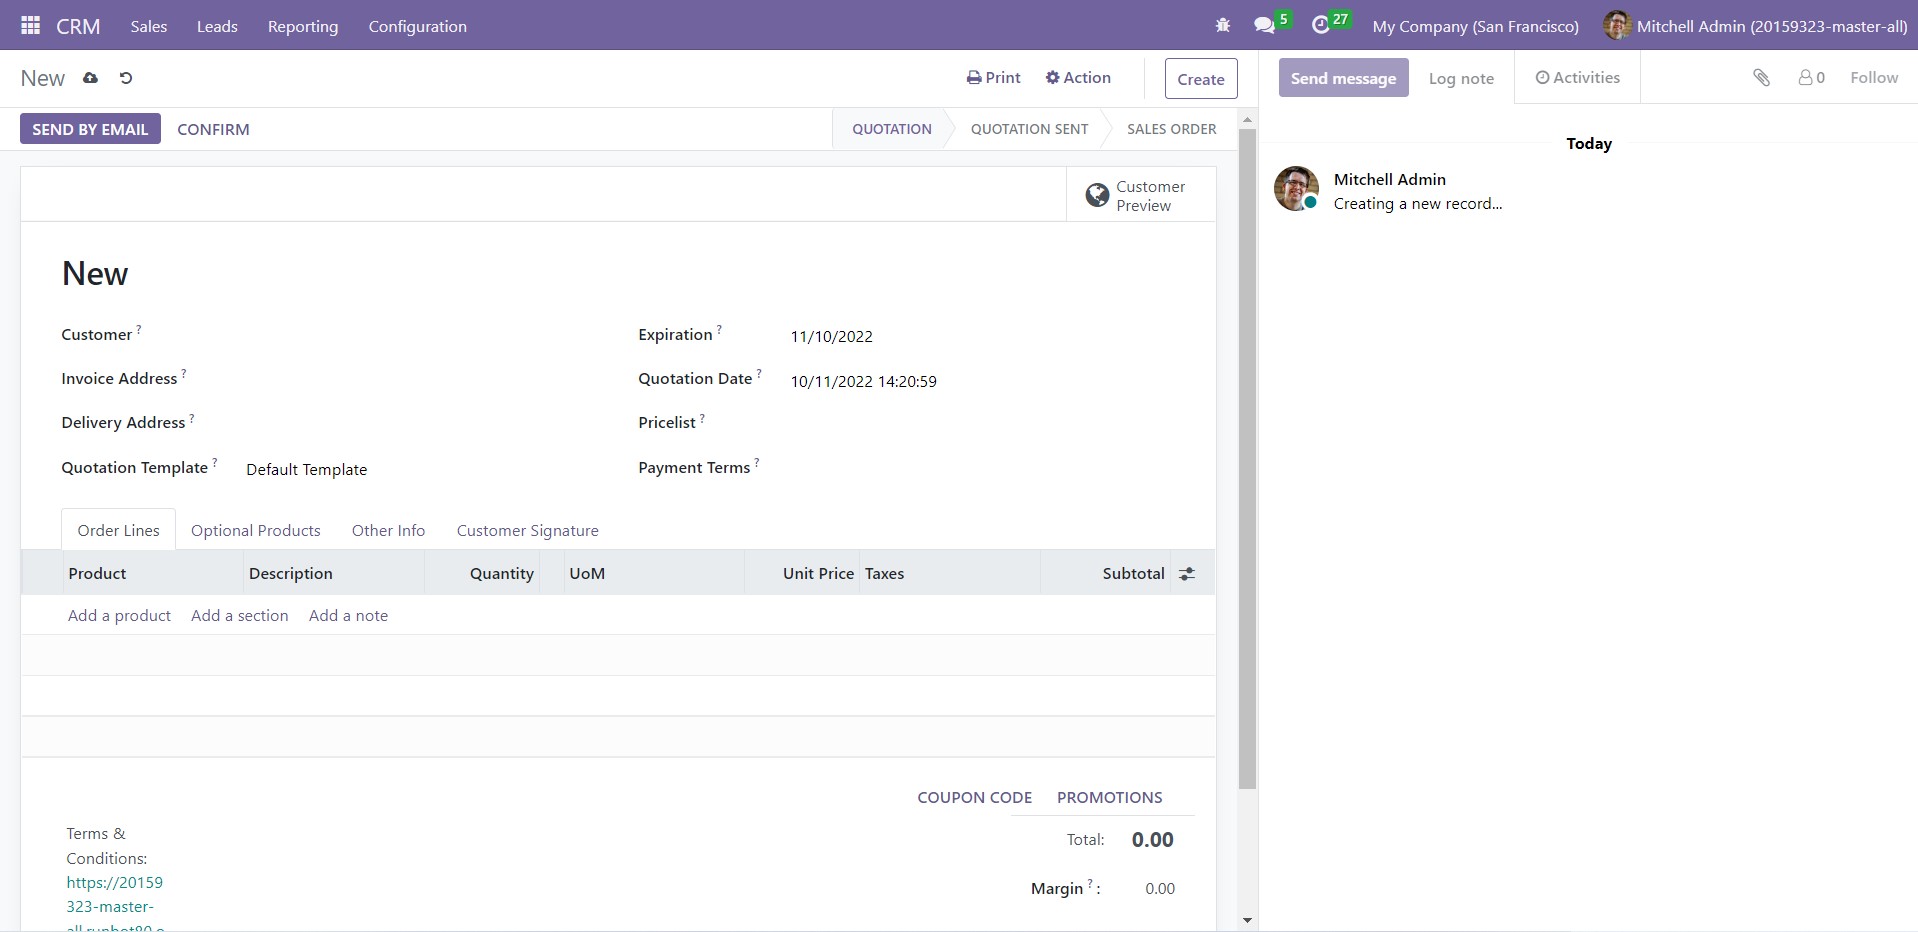
After entering the details, click on ‘Confirm.’ You can view all the quotations in the Quotations window. Select ‘My Quotations’ from the Sales tab’s dropdown list to access this window.
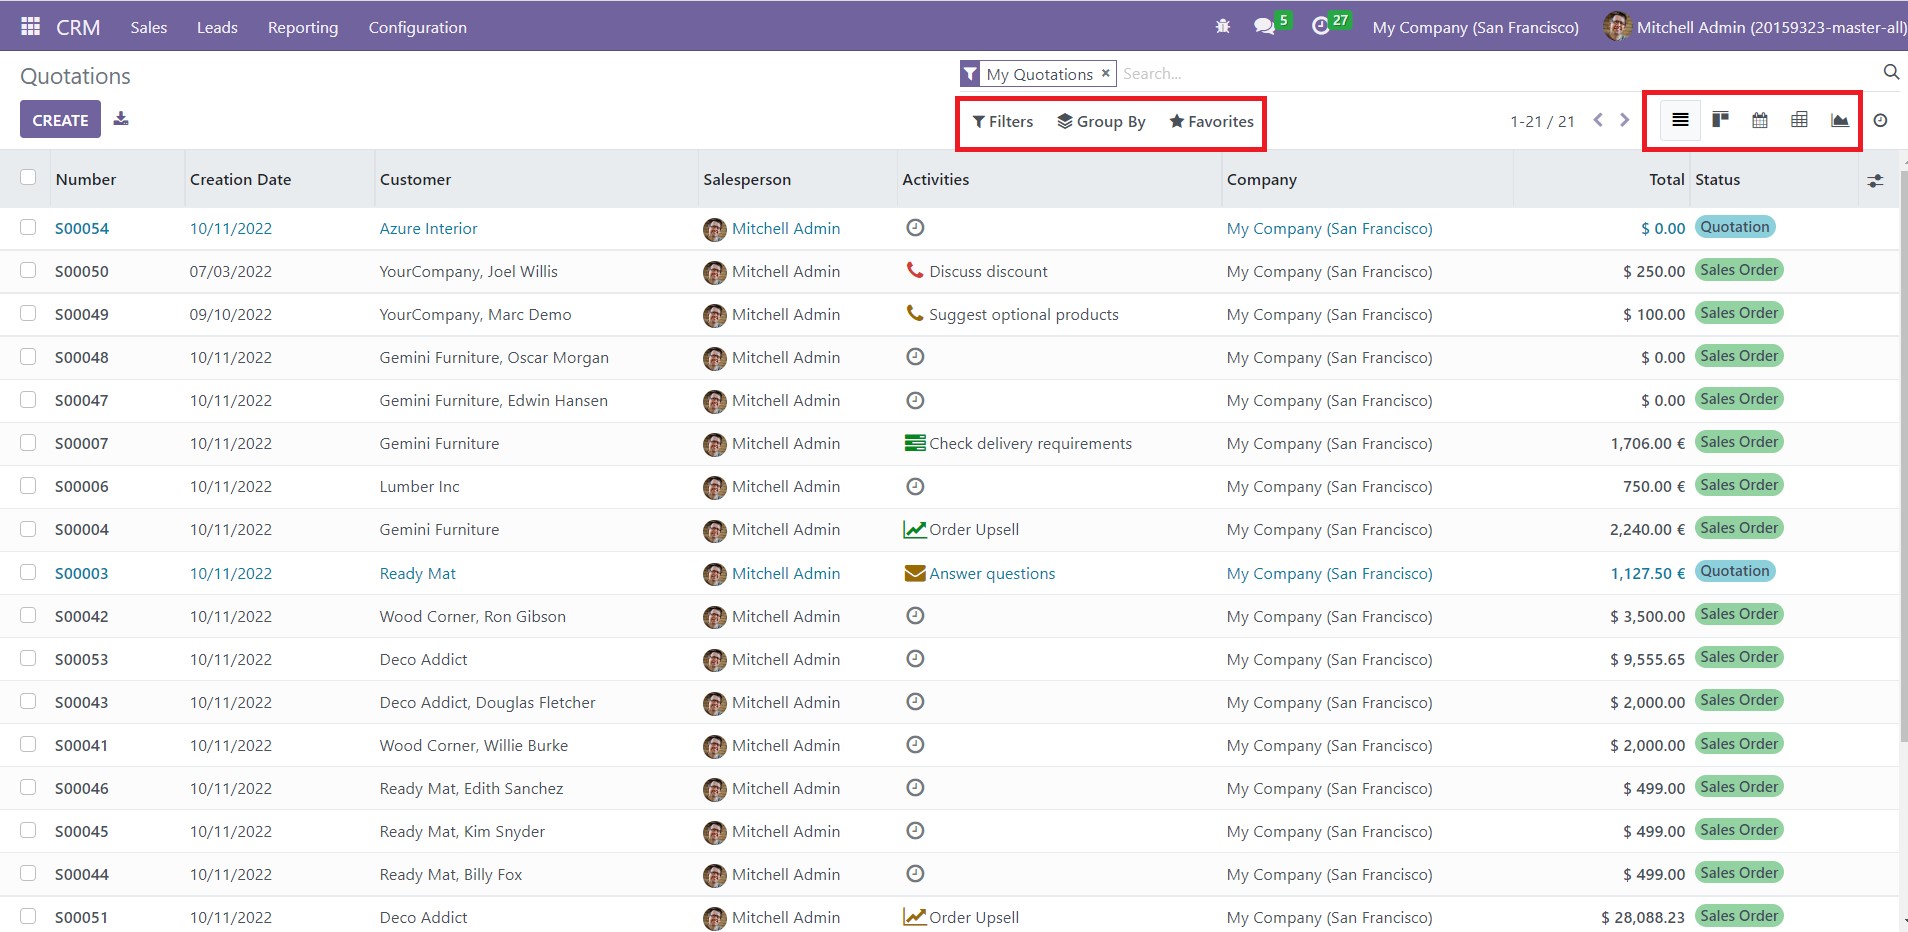
The window will display the details of the quotations like Number, Creation Date, Customer, Salesperson, Activities, Company, Total, and Status. If you want more columns to be displayed, click on the button in the window's top right corner. You will get various categories, as shown below.
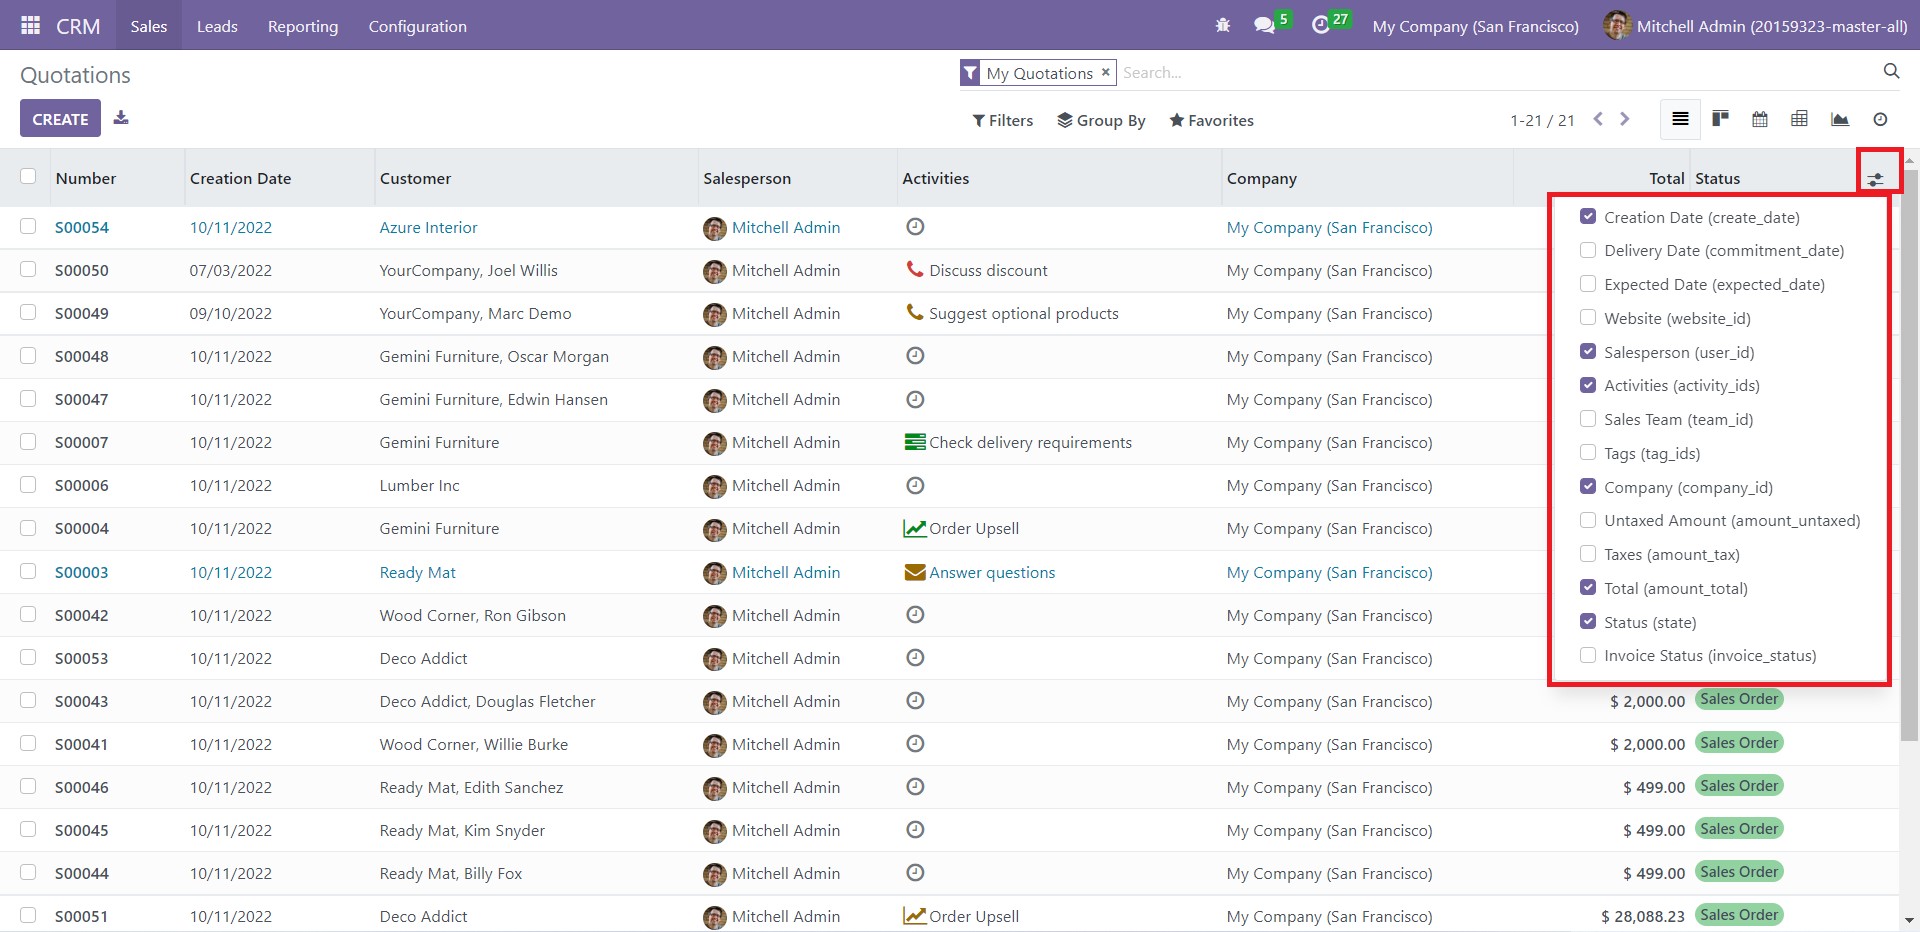
Select the ones matching your preference, which will appear in the Quotations window. The window will appear in the List view by default. For convenience, you can change this to Kanban, Calendar, Pivot, and Graph views.
The Filters and Group By options allow you to locate an individual record or data set effortlessly. Use ‘Favorites’ to avoid the hassle of applying the same filters repeatedly by saving them. You can also set default filters using this option.
Click on the Activity icon to plan and review different activities concerning your customers.
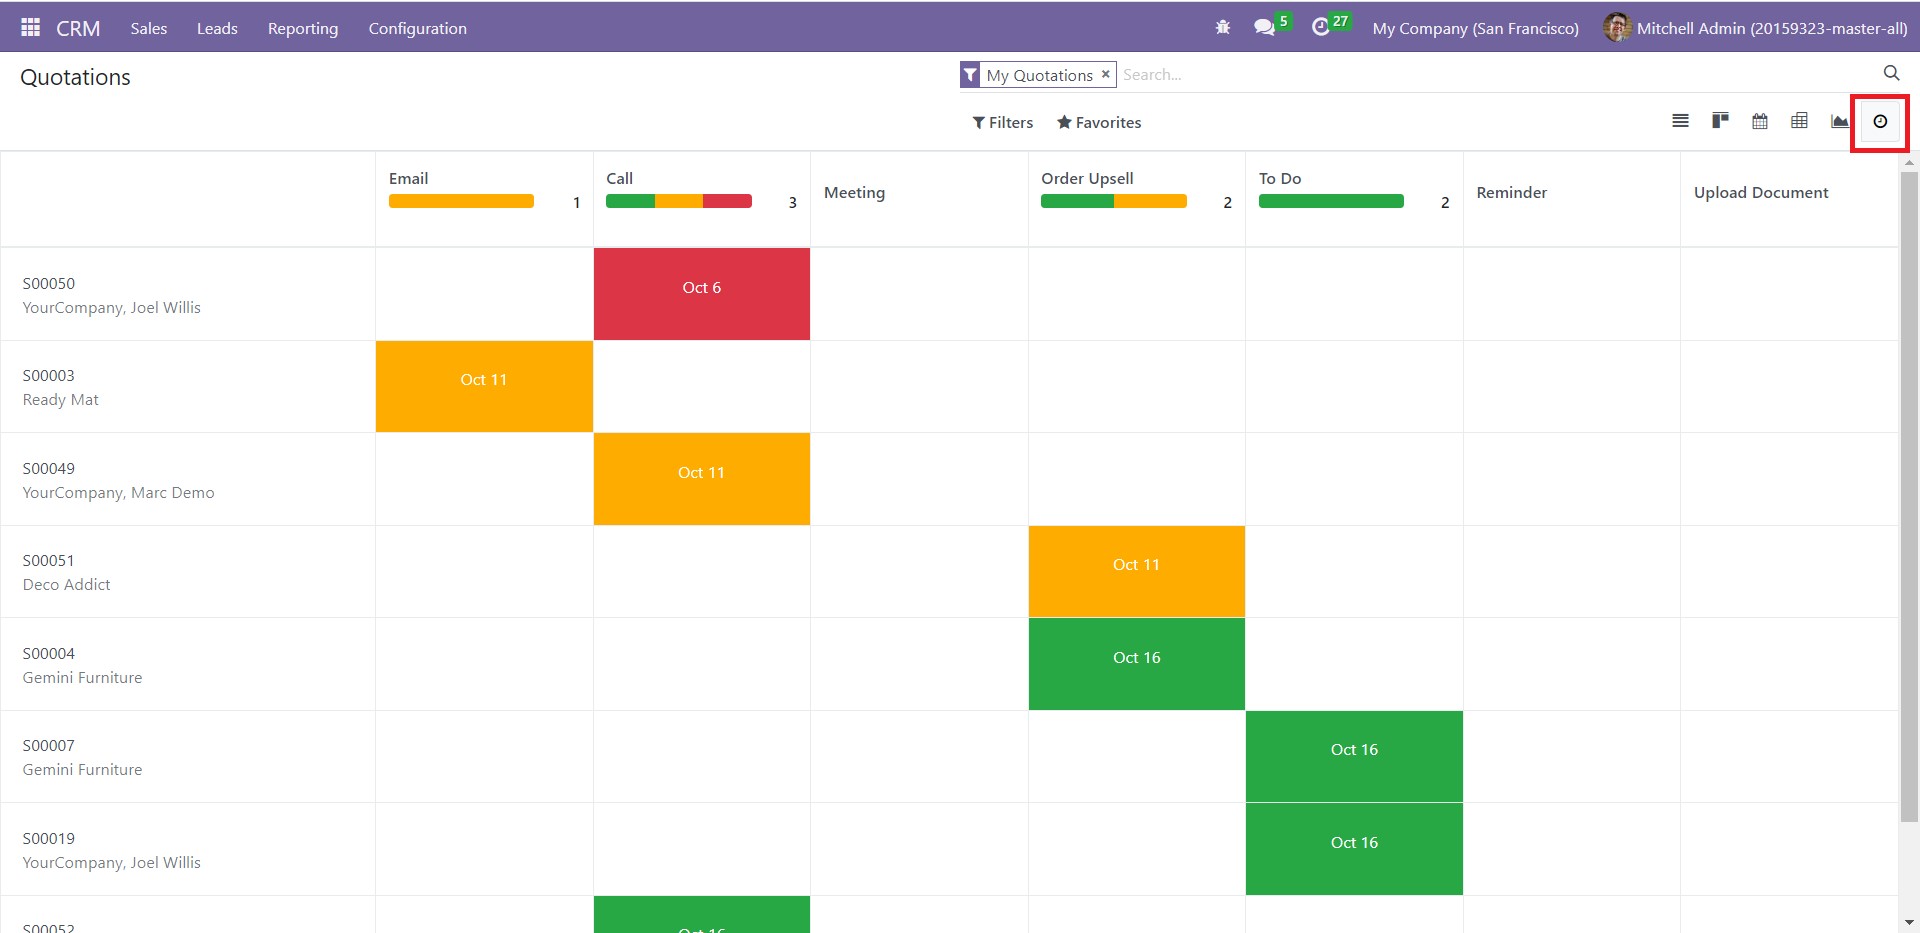
This window shows all the scheduled activities and their respective due dates. To create a new schedule, click on the + icon in any cell or click on the already occupied cells and use ‘Schedule an Activity.’ You will get the following window.
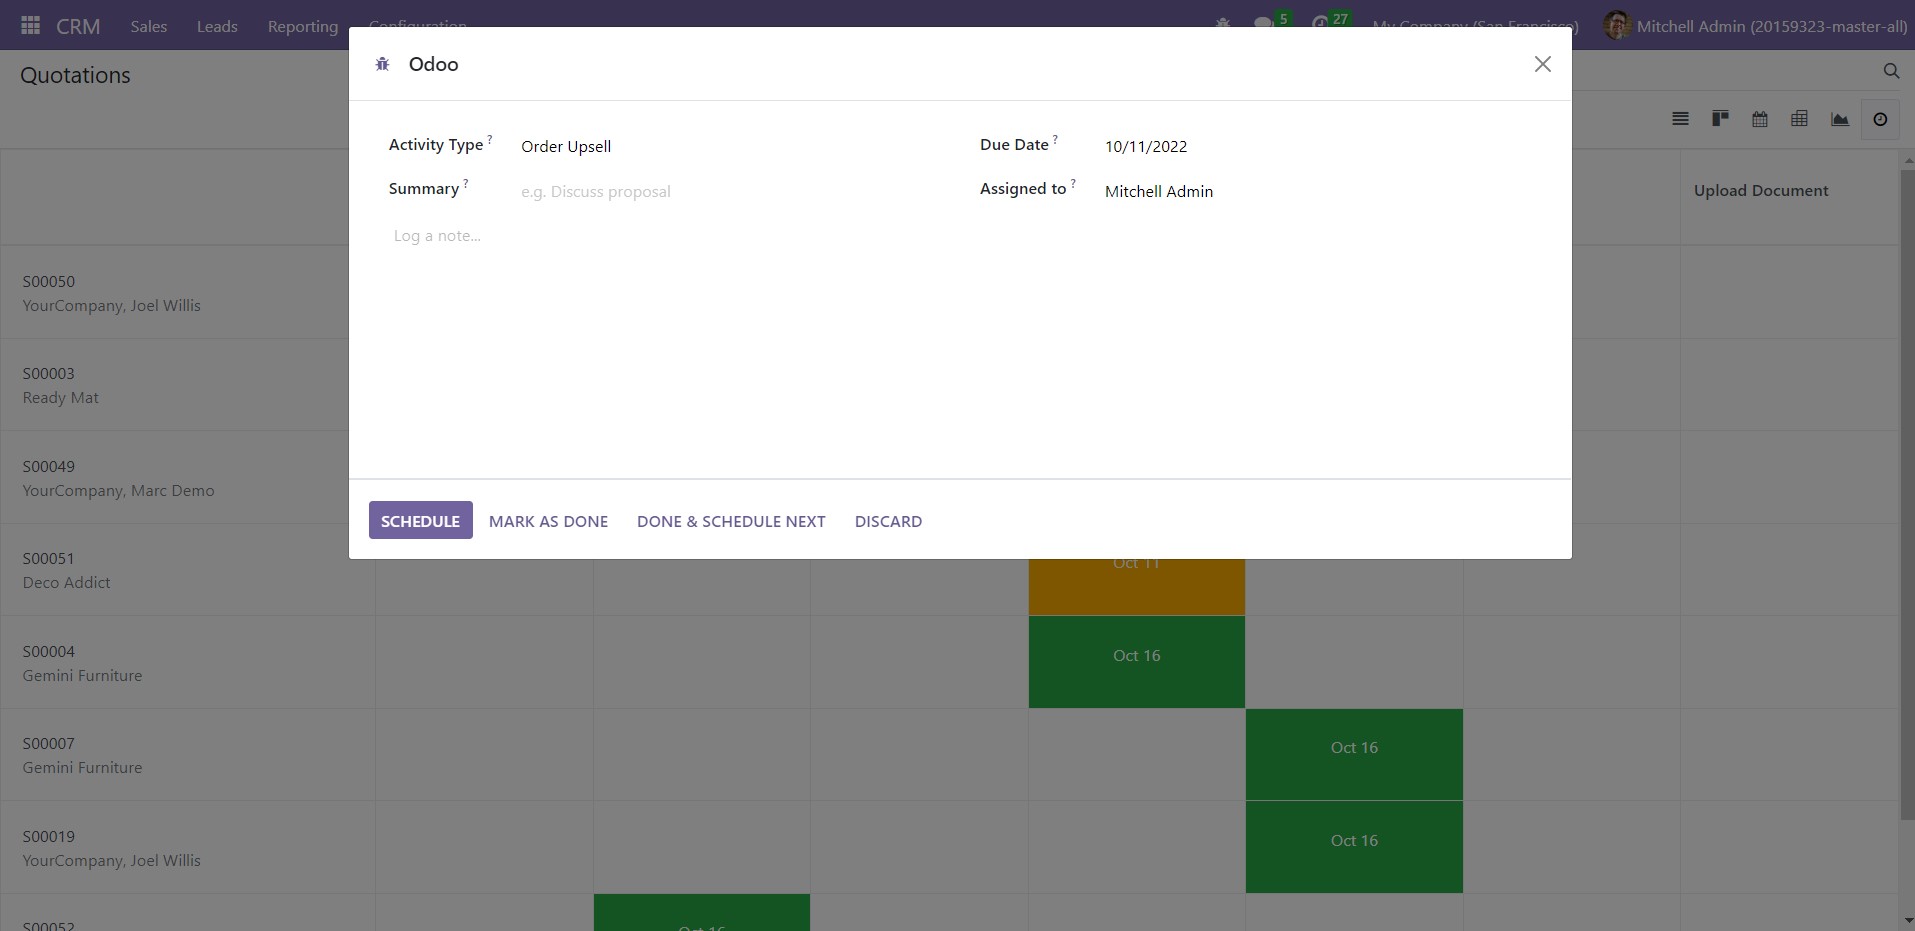
Enter the activity details and click on the Schedule, Mark as Done, or Done and Schedule Next options according to your preference.
To edit a particular record, you can simply click on it and change its details. You can convert a quotation to a sales order directly from the same window. When you click on a quotation, you will get the following window.
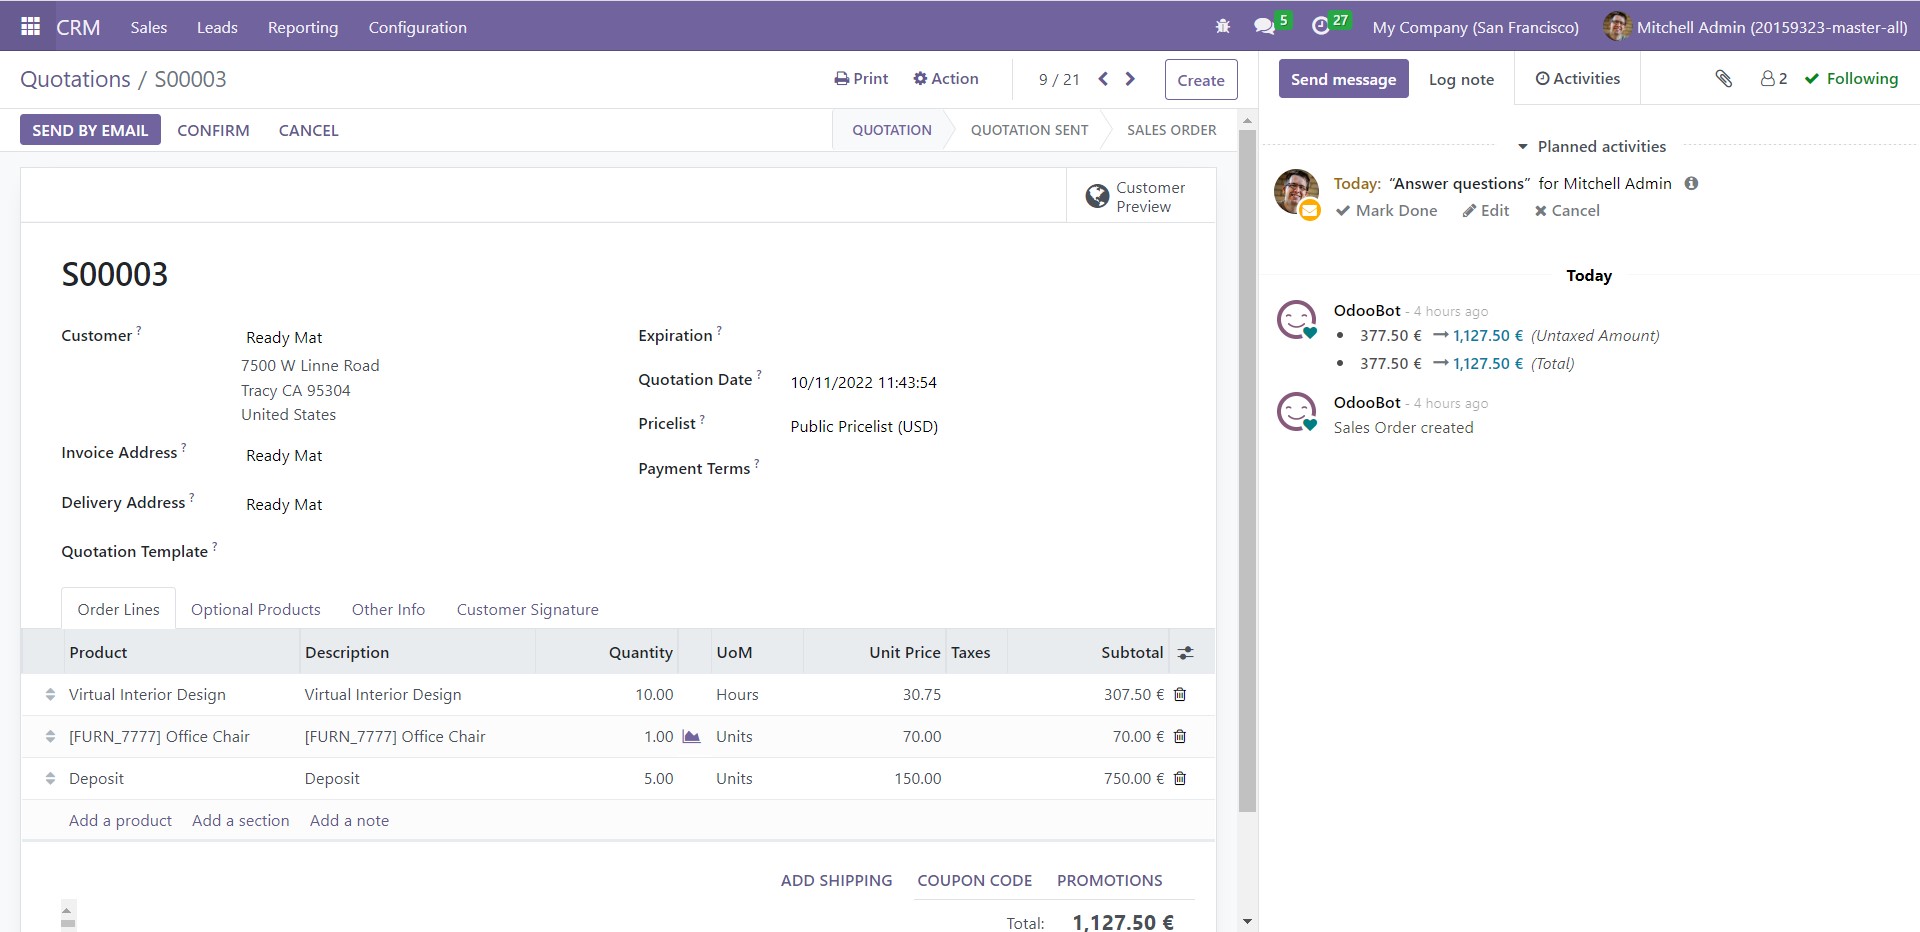
Click on ‘Confirm’ to convert it into a sales order. You can send the confirmation mail to the customer using ‘Send by Email.’
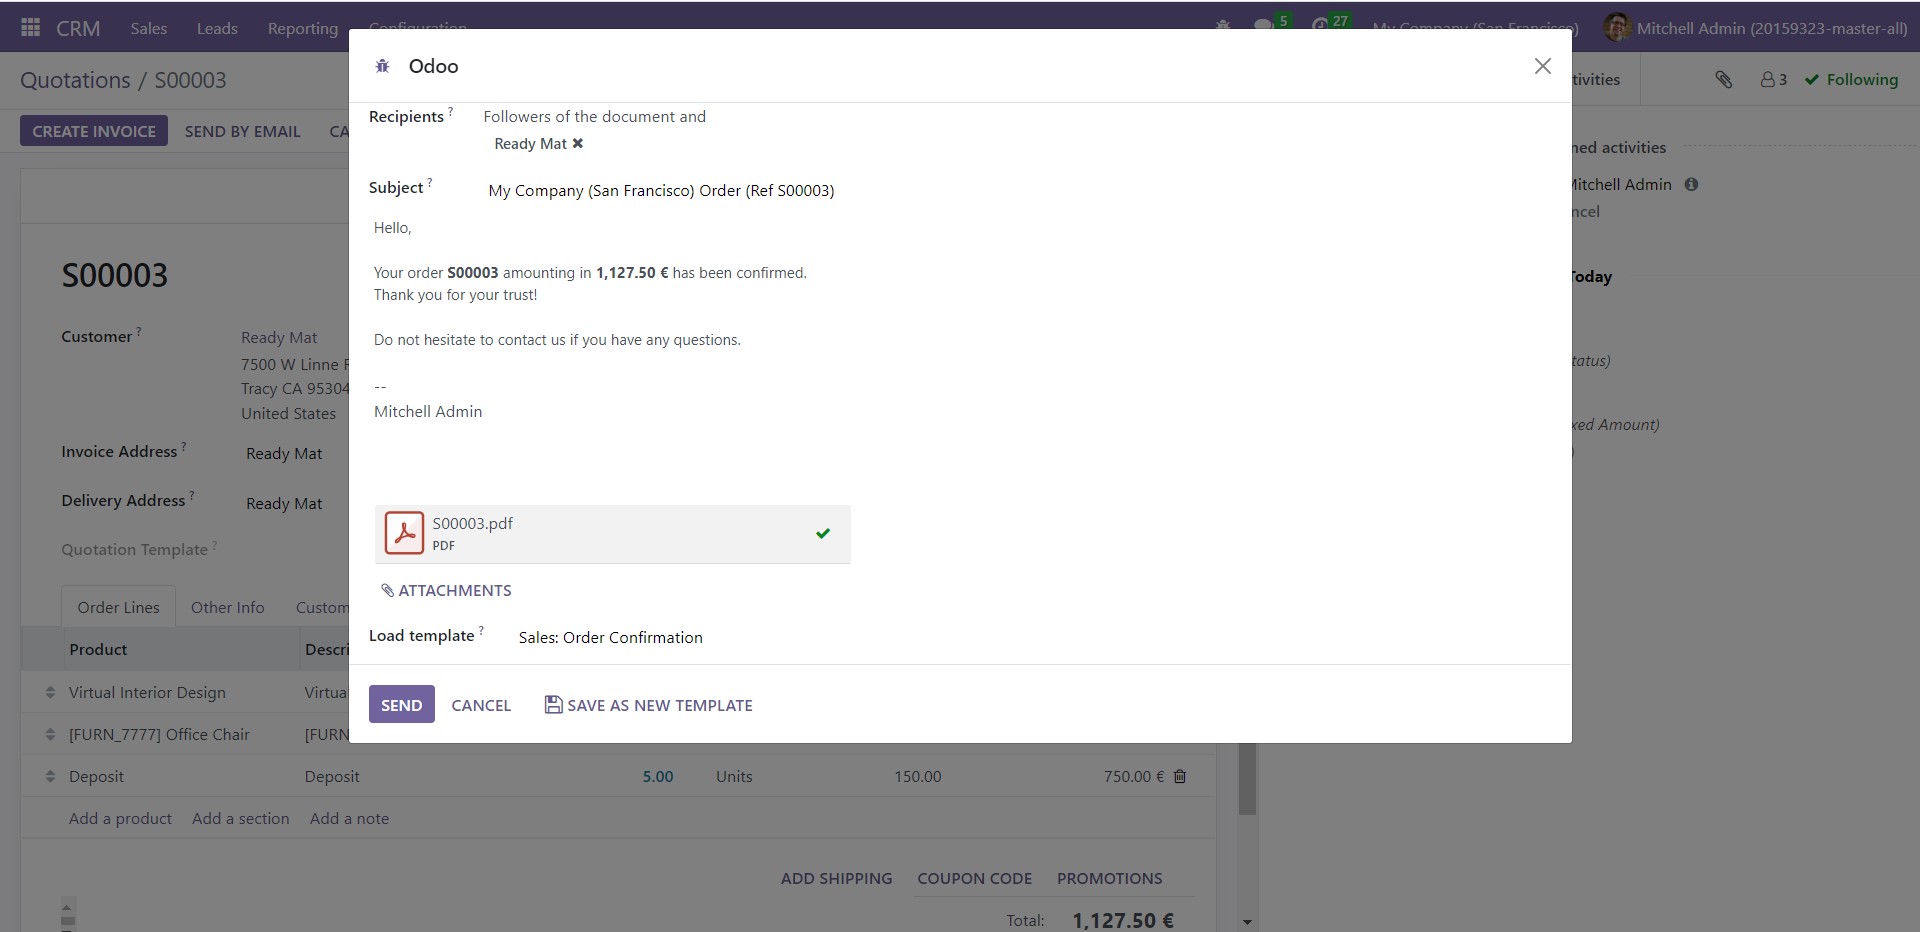
After confirming the email content in this pop-up window, click on ‘Send.’ This action finalizes the creation of a new Sales order.