Point Of Sale: Odoo 16 Community Book
Point of Sale
Point of sale is an important part of Odoo software. It is very much useful and good assistance to manage and control daily transactions in sales and processes in the shops and restaurants. The module helps you in maintaining virtual shops as well. The module can be used from ipad, desktop, or many other smartphones very easily. It can manage all the records of every transaction in the sales process and related programs properly. The module, with its simple and easy-to-use interface, helps the users to integrate it with other modules, such as inventory and accounting. With the help of this module, it can connect its retailing operations with Odoo software. The advanced tools help the module to regulate the functions in a shop or restaurant. The module can be worked offline as well.
The retail process can be easily done with the help of the Point of Sale module under the Odoo ERP Software. The operations in shops, restaurants, or bars can be done using this module. The point of sale option will be provided from the Configuration menu. The window will show all the configured point of sale operations in a list form.
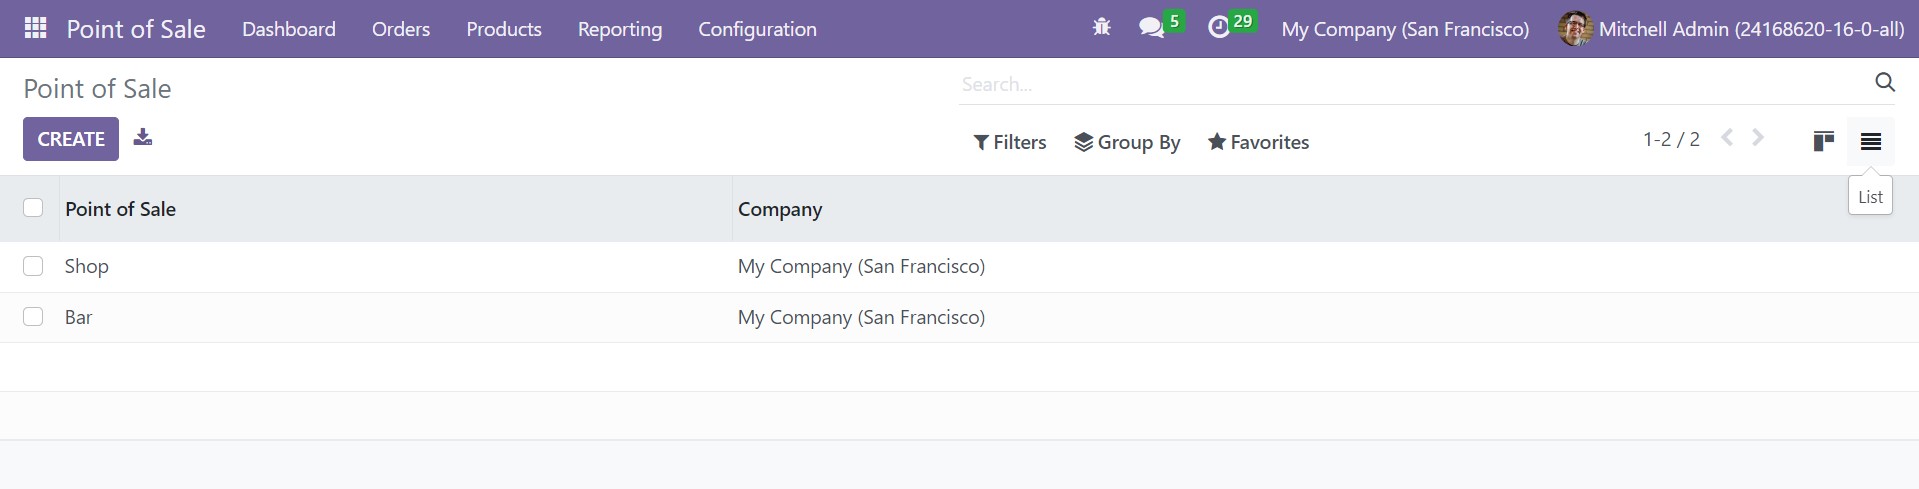
The page includes details, such as point of sale operation and the name of the company. The page can be seen in the Kanban view as well. To make a similar kind of operation, go to the Create icon provided.
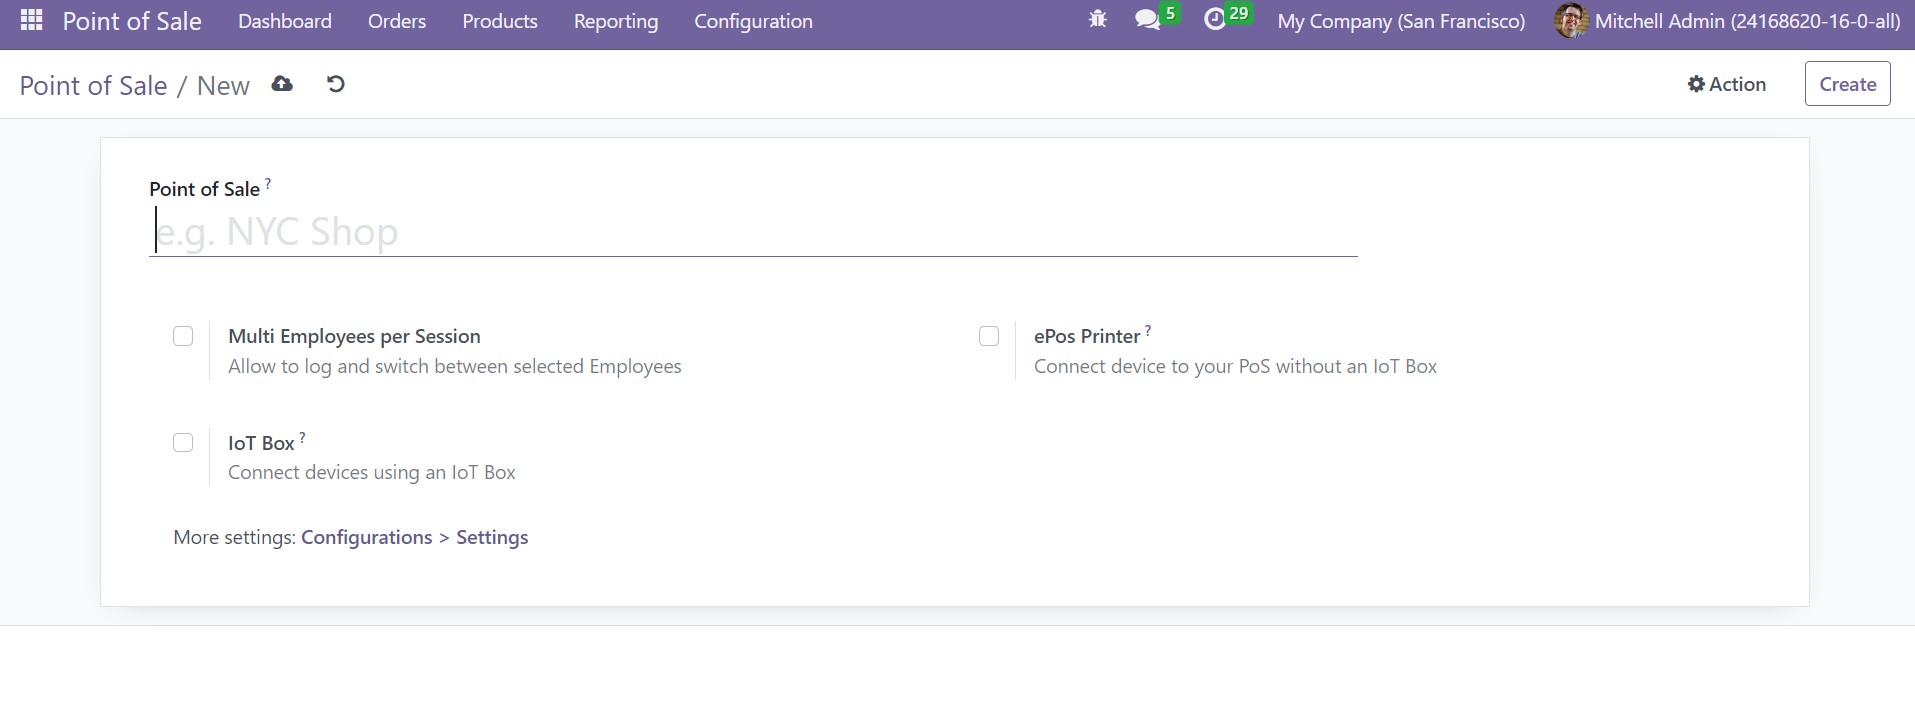
Here, you have to mention the name for the point of sale. You can trigger the multi employee per session, ePos printer, and IoT box options. More other options will be available in the settings option under the configuration menu.
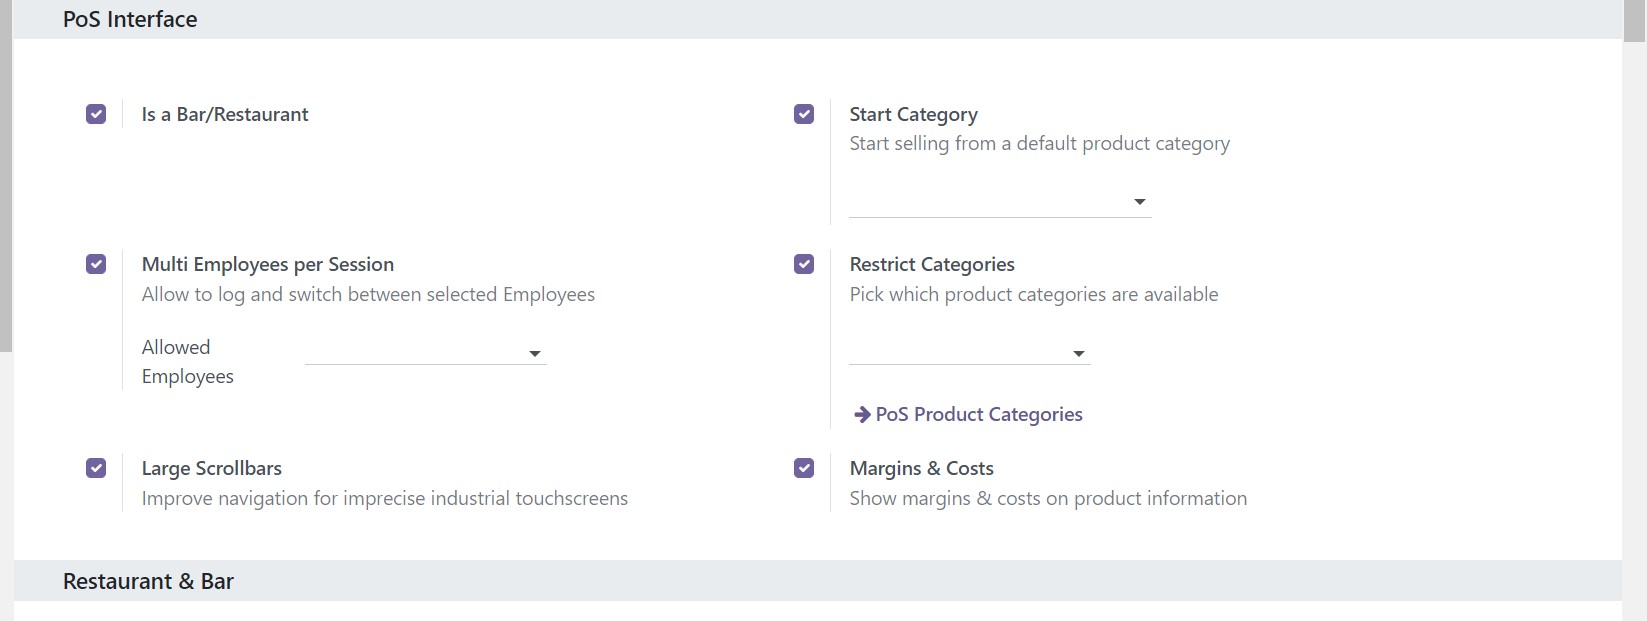
You have an option of a bar/restaurant to trigger. You will get further options, such as floors and tables, kitchen notes, early receipt printing, bill splitting and kitchen printer options in the Settings menu of the Point of Sale module. The Floors and tables option allows you to provide particular designs to floors and decide various orders to tables.
The options under the PoS interface are floors and tables map to design the floors, kitchen notes to include internal notes on particular orders for the purposes in kitchen, early receipt printing to permit receipt before the process of printing, allowing bill spitting to divide the total order lines, and kitchen printers to print the orders, which is available at the kitchen, at the bar, restaurant, and many more.
You will also get the options, such as restricting categories to select the product category which are available, large scroll bars to empower the navigation for the purpose of imprecise the industrial touchscreens, and margins and cost option to showcase the margins and cost of information on a product.
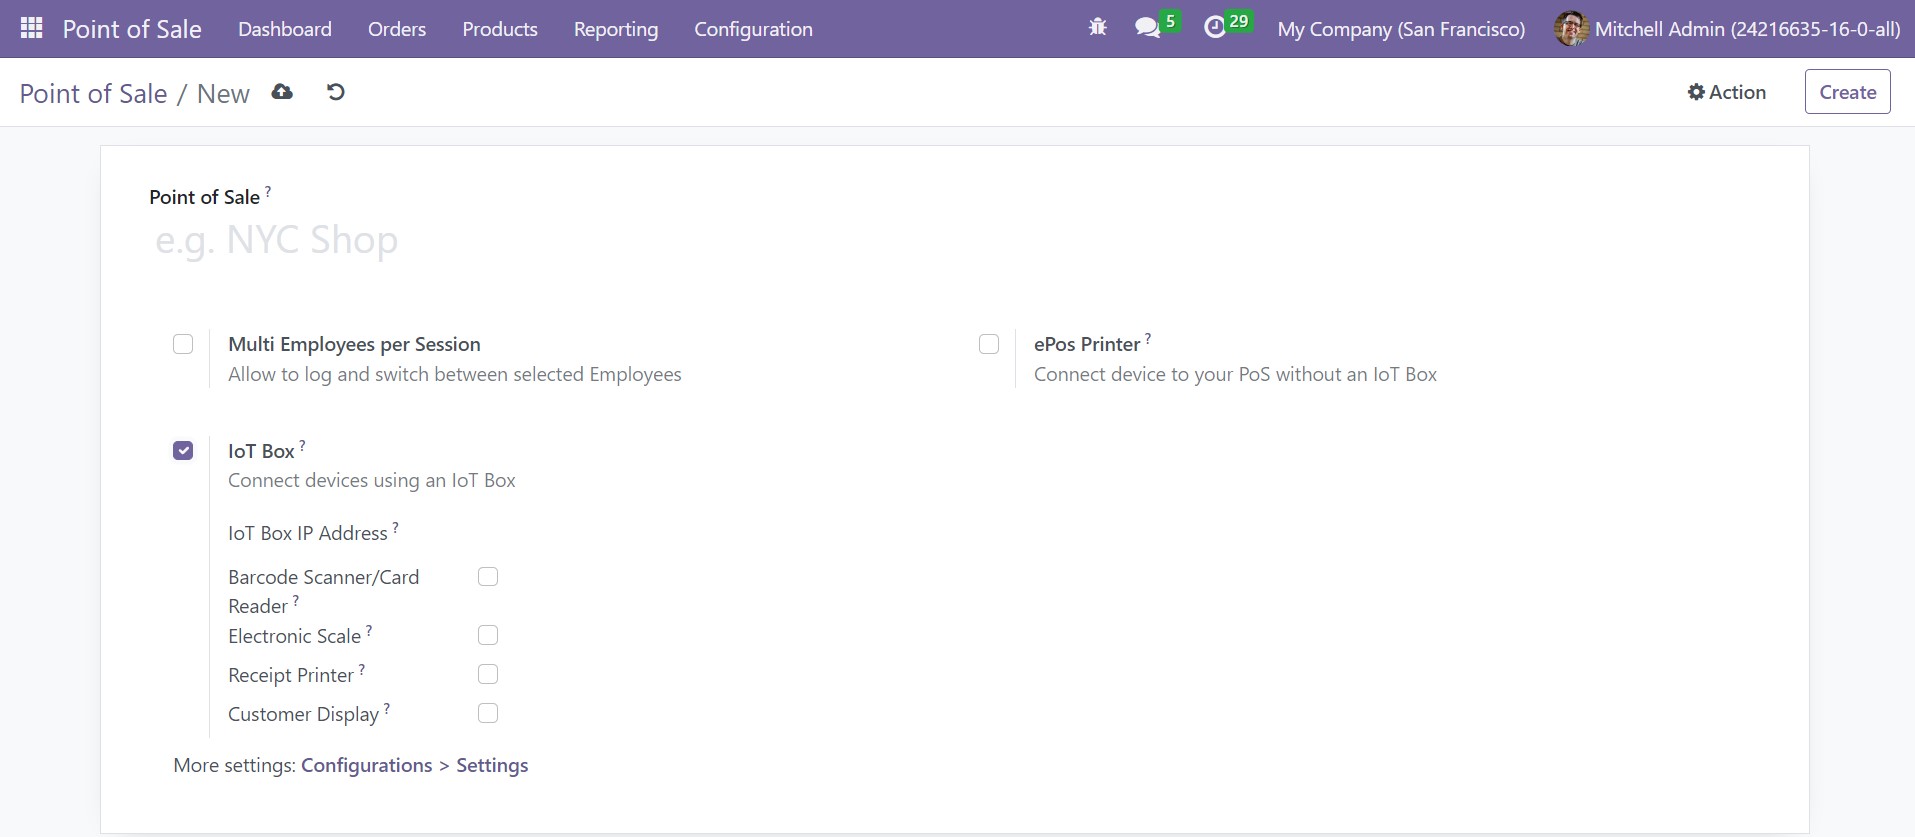
Under the IoT box, when you trigger it, you will get further options, such as an Iot box IP address, barcode scanner/ card reader, electronic scale, receipt printer, and customer display options to activate. You can also activate the ePos printer option to connect the device with your PoS without the help form the IoT box. To get further options, you can go to the settings option on the configuration menu, which will give the options as follows.
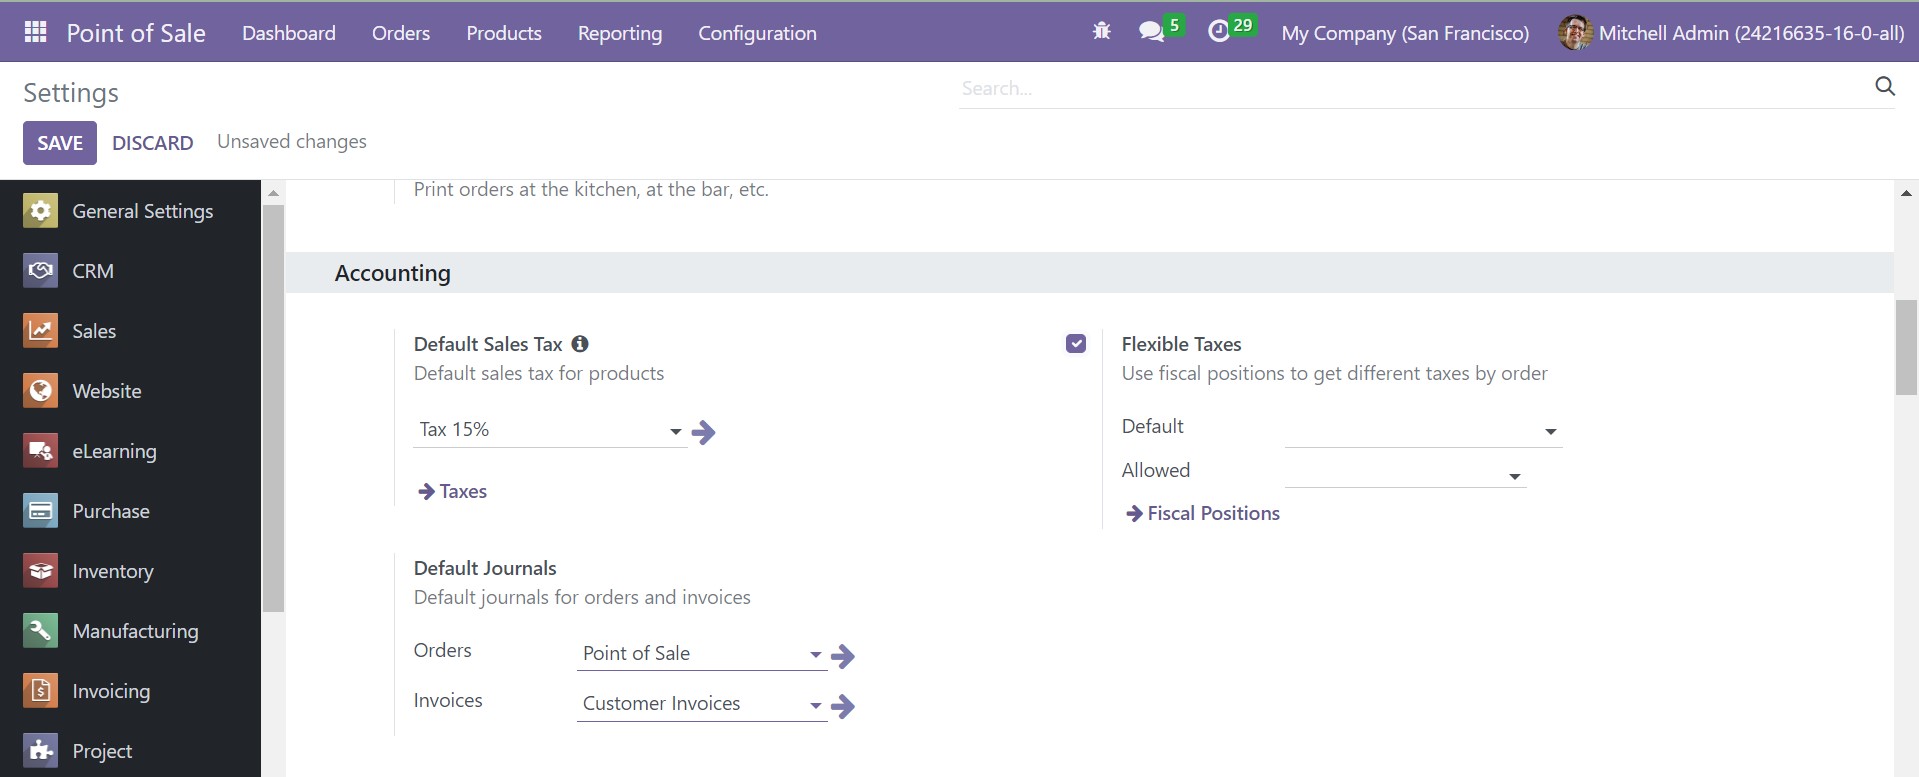
Under the Accounting tab, you will get opinions, such as default sales tax, where you can see sales tax for the particular product. There is an option of flexible tax to trigger and a fiscal position to trigger as well.

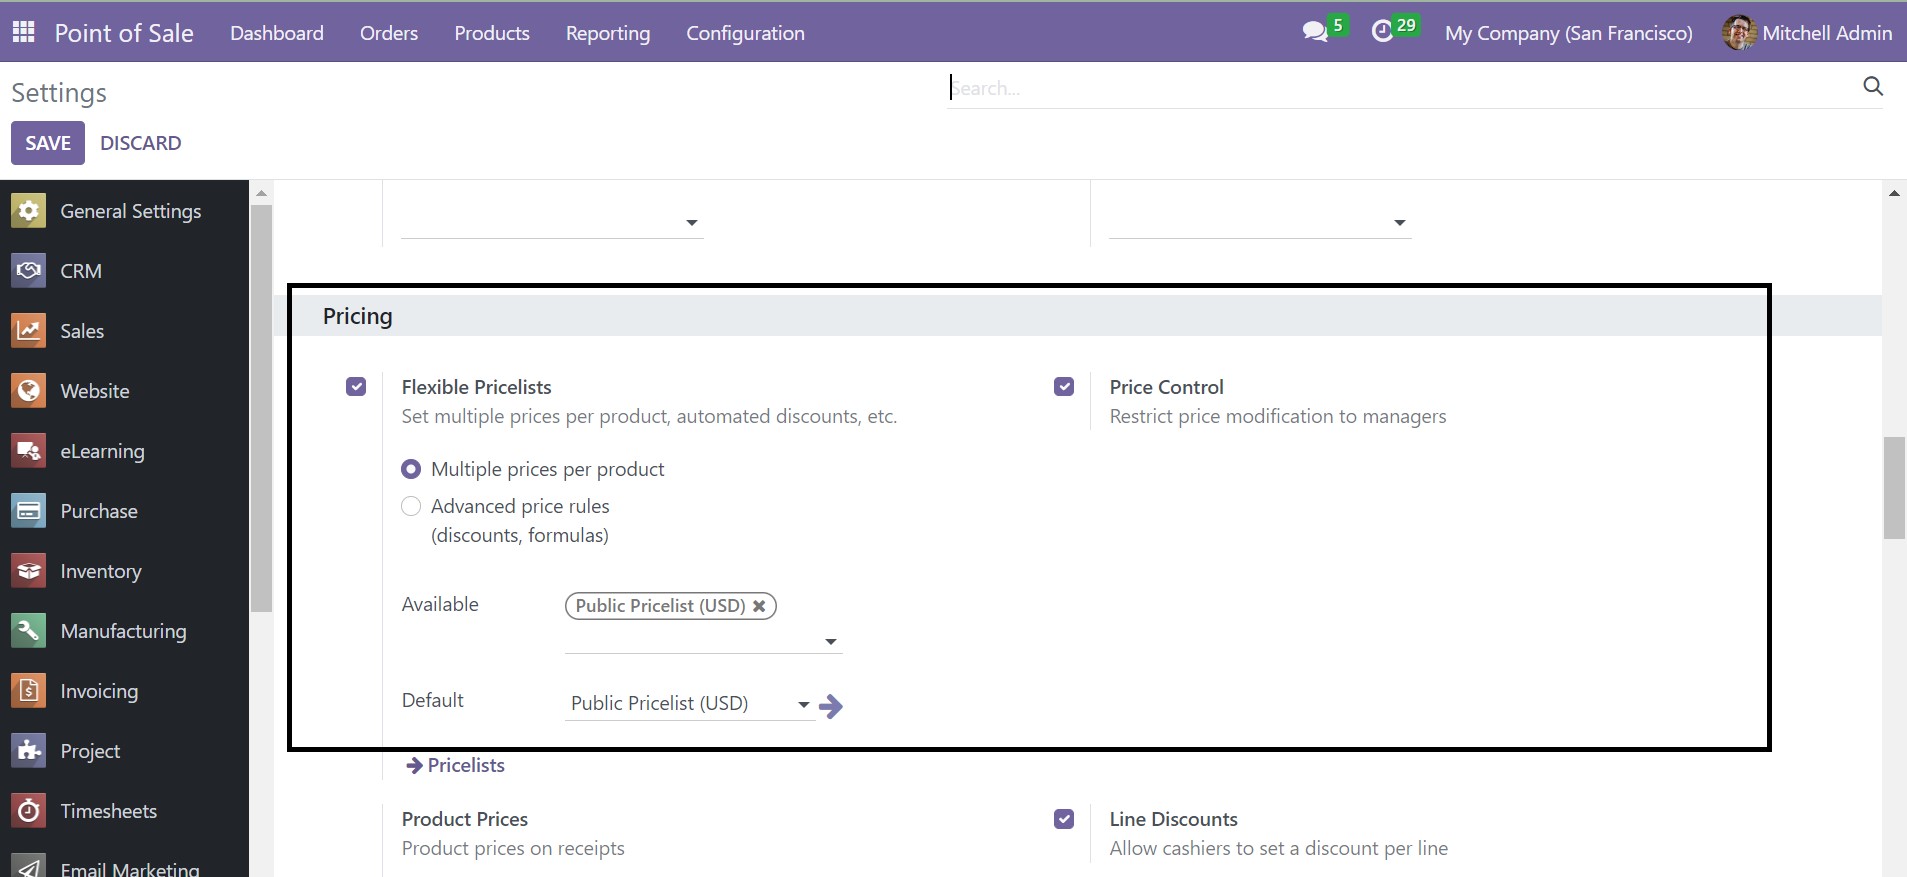
Under the Pricing tab, you can activate the flexible price lists, price control, line discount, promotions, coupons, gift cards, and loyalty programs to activate. Product price can be set as tax excluded price or tax-included price. You may also trigger the global discount option.
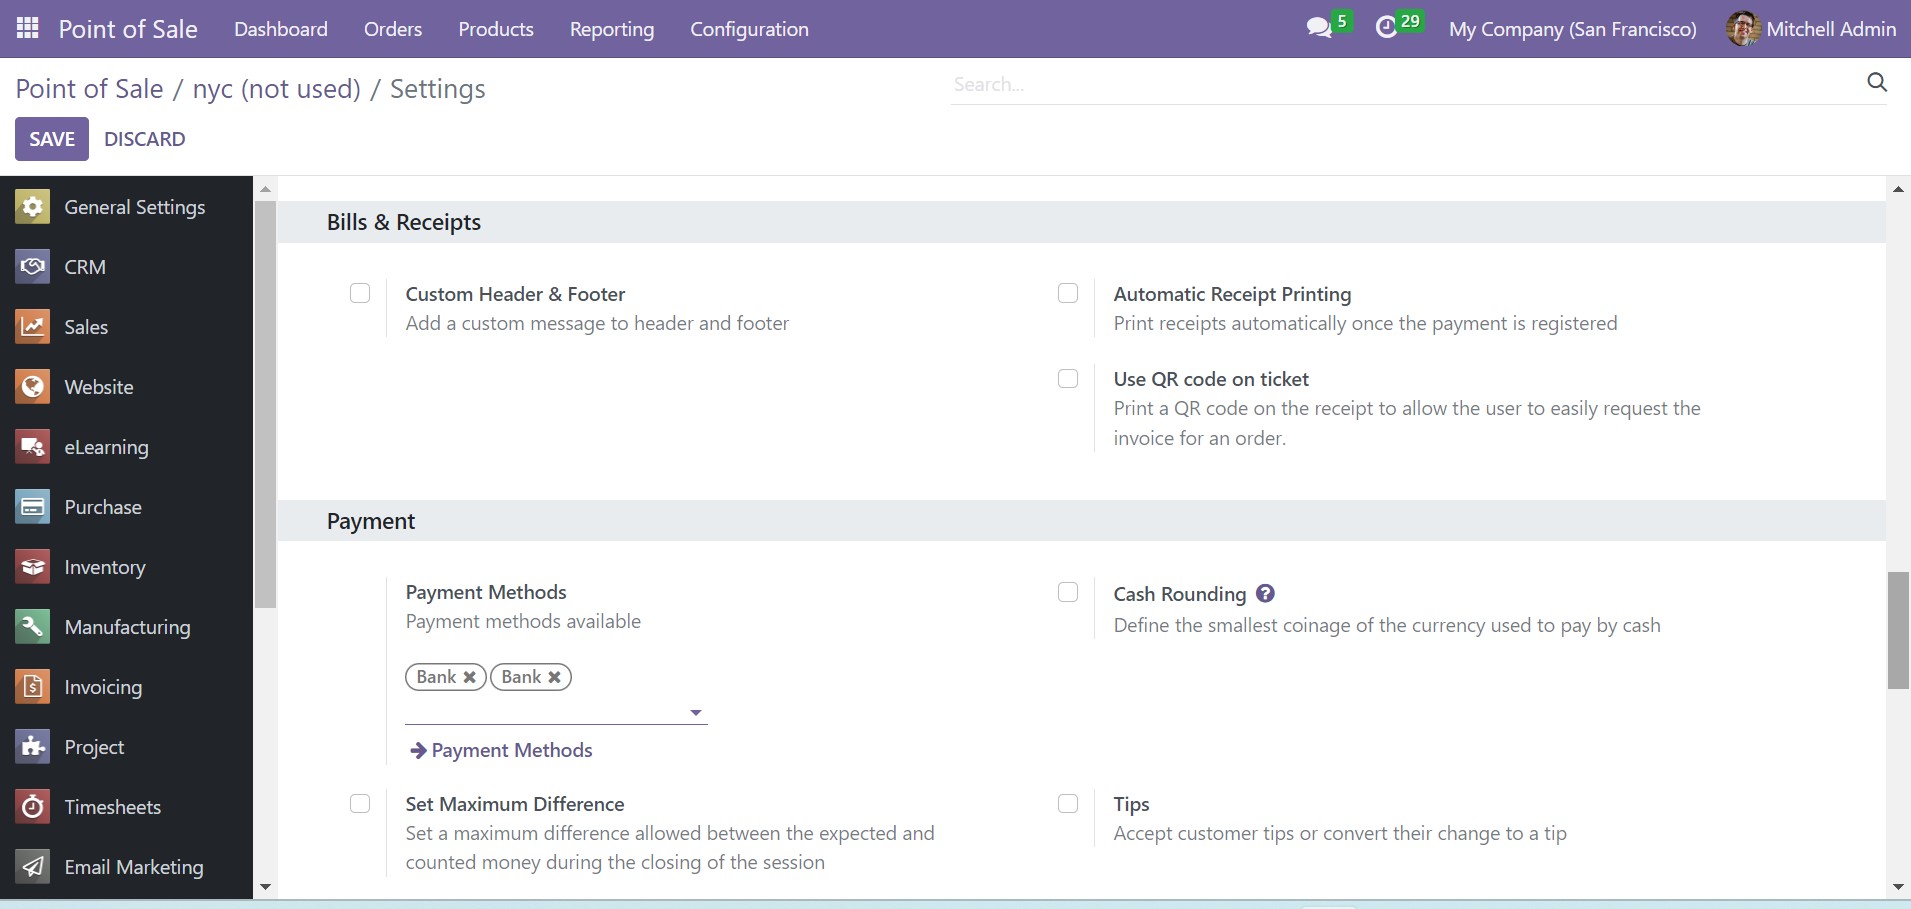
Under the Bills and receipt option, you can activate the custom header and footer option in order to include custom messages to header and footer. The automatic receipt printing option helps you to take the printouts of the receipt on their own when the payment is registered. You can make use of the QR code on every ticket, which helps you to define a QR code on each ticket to permit the user to easily ask for the invoice of the order that they have done.
Below the Payment tab, you have various payment methods that can be selected. You can trigger the cash rounding option to explain the small coinage of currency, which is made used for paying the invoice. You can even set a maximum difference, which permits a difference between the expected and counted cash when the session is closing. You can set tips for the customer or convert the cash change tips.
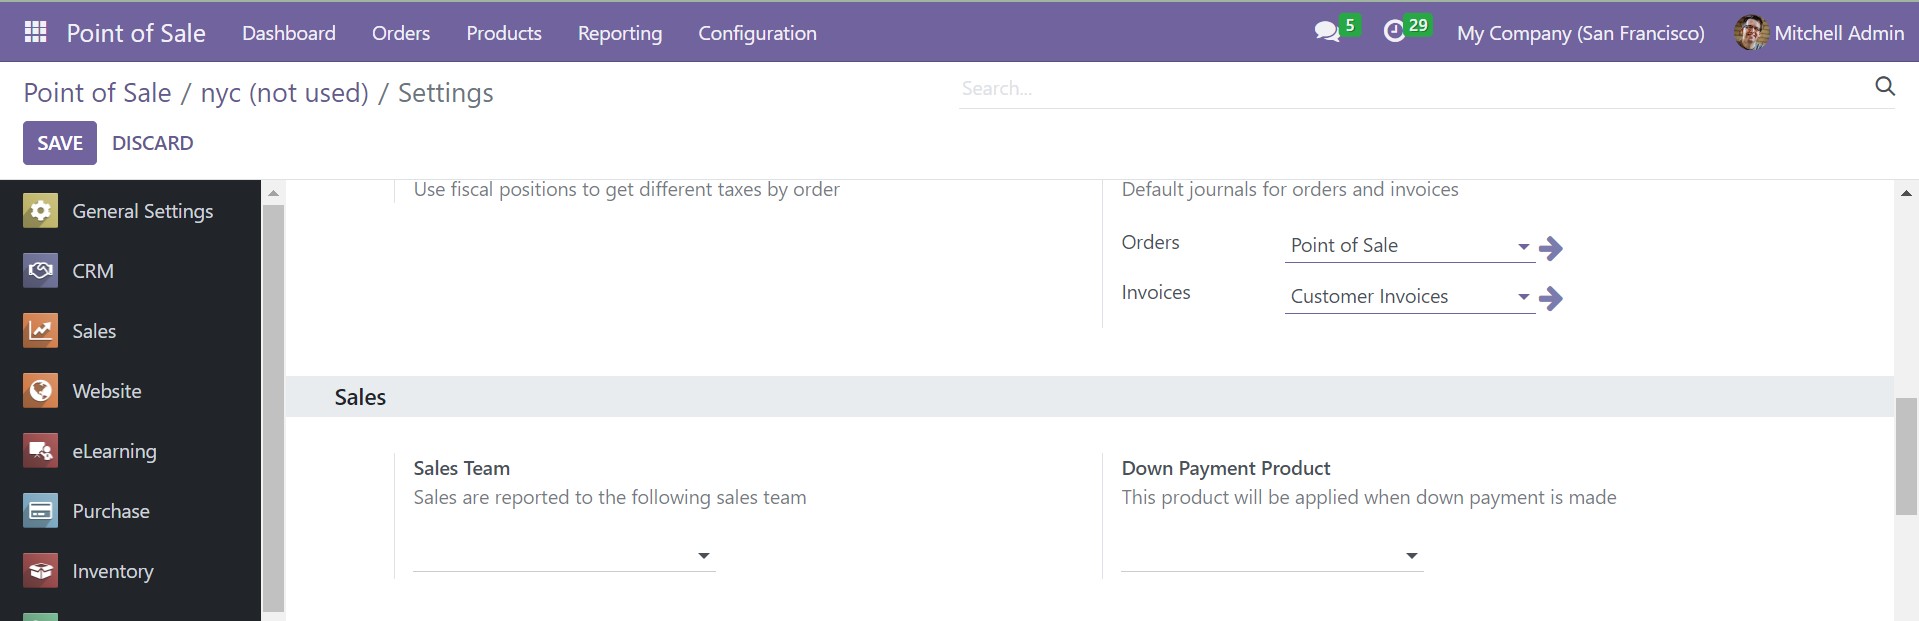
Now, under the Sales tab, you can provide the sales team, by which the sales will be reported to the following sales team. Similarly, the down payment product option helps to apply the product when the down payment is made.
With the help of the Accounting tab, you can add the operation type. On activating the allow ship later option, you can sell products and deliver them later You can make use of the barcodes as well. You can also activate journal entries. On completing all these processes, you can go to the Save icon.
Orders
With the help of the Orders menu, you will get the information regarding the orders made by the customer in the Point of Sale module. The option helps you to keep the data and regulate them very easily. The option of Orders will be available in the main menu bar itself.
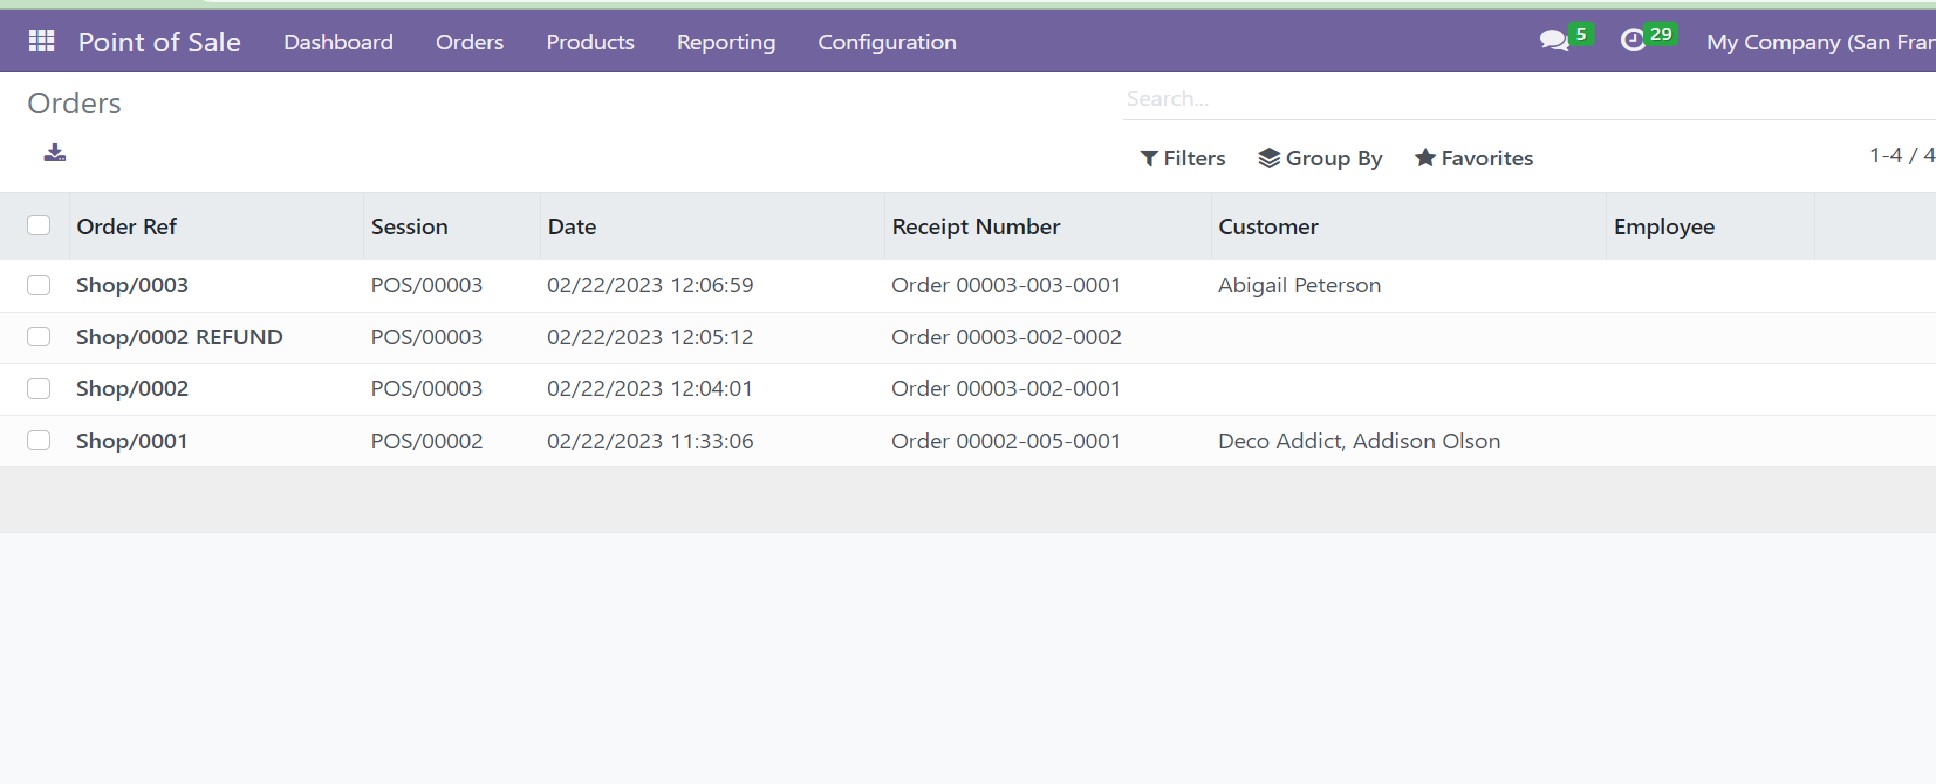
On the page, you will get the information, such as order reference, session, date, receipt number, name of the customer, employee, total, and the status of the order, respectively. The page can be seen in Kanban and pivot view also if required. If necessary, the Filters and Group By options can be used to sort out the particular category required.
Sessions
Under the Order menu, you will get an option of Session option, which provides all the sessions available in the point of sale module.
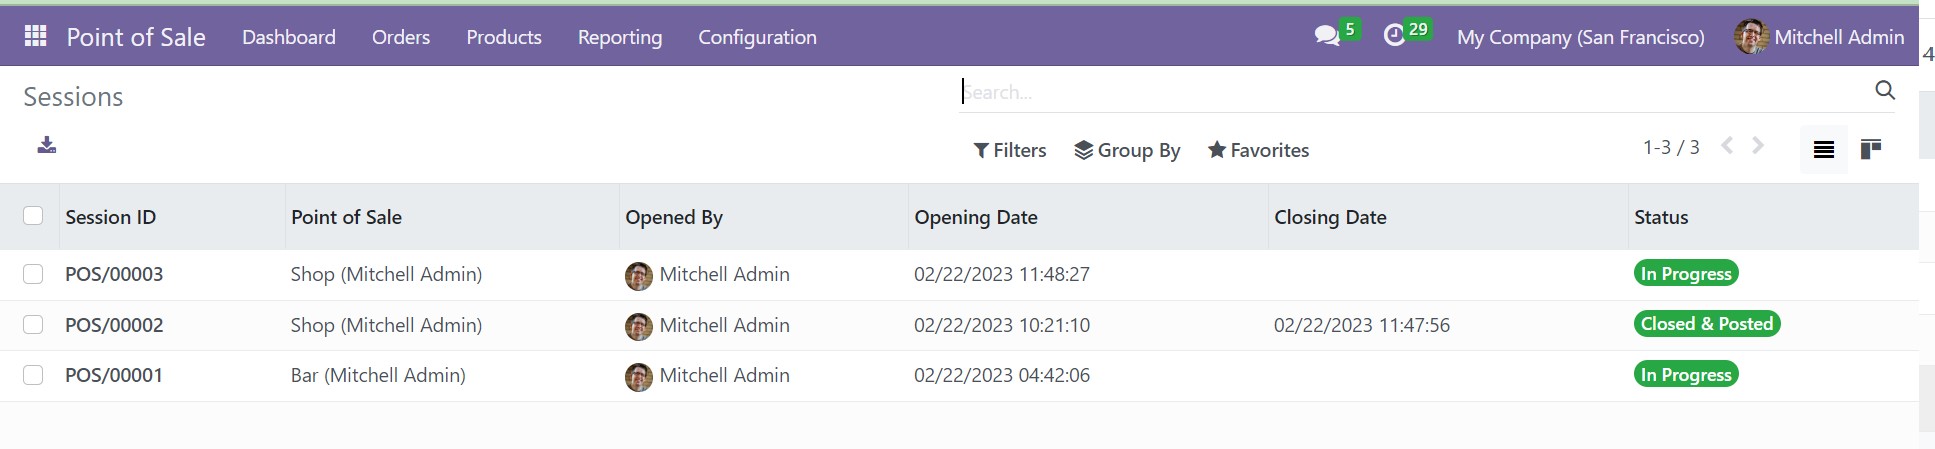
On the page, you will get the list of the sessions in the point of sale module. The page can also be seen in Kanban and List view. On the page, you can list the details of session ID, point of sale, opened by, opening date, closing date, and the present status of the session. The Filters and Group By options can be used to categorize and favorites option helps in keeping detailed sessions in the favorite list.
Payment
Under the Orders menu, you will get the option of payment which will provide all the already created lists of payments.
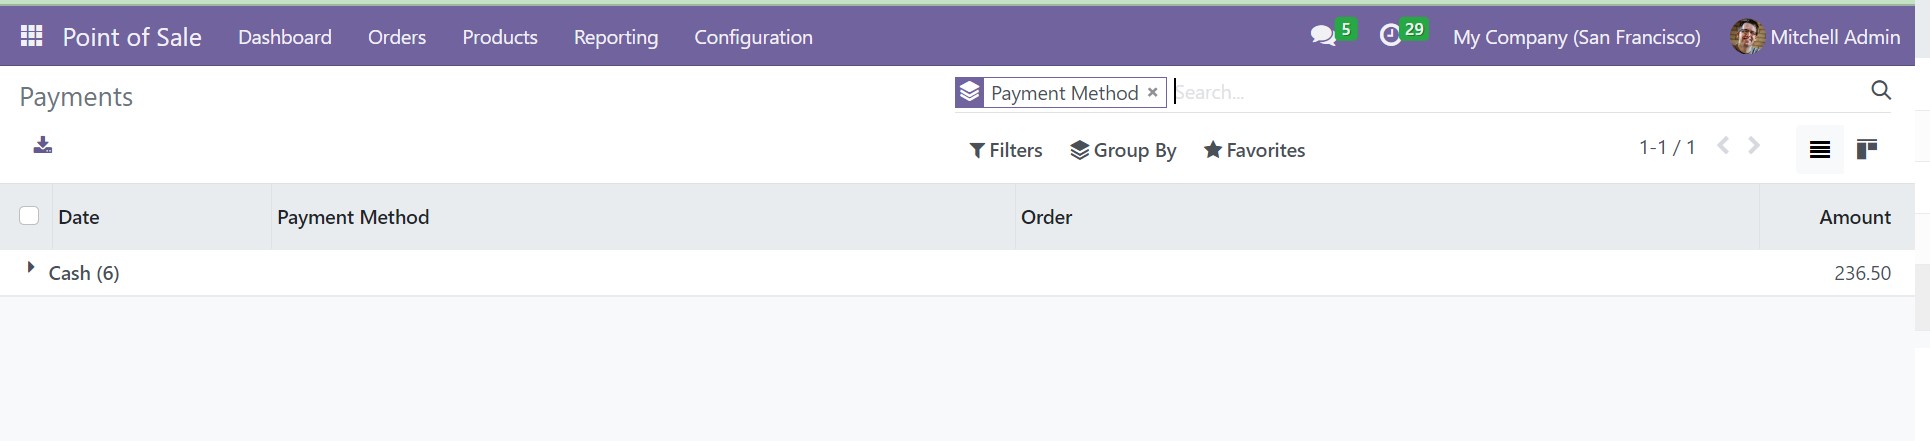
On the page, you can get the details, such as date, payment method used, order, and amount of the product as well. The Filters and Gruop By options help in the process all together.
Customers
The Customers option in the Orders menu provides the users with a list of customers and their contact details. The option helps you regulate and create such customers very easily.
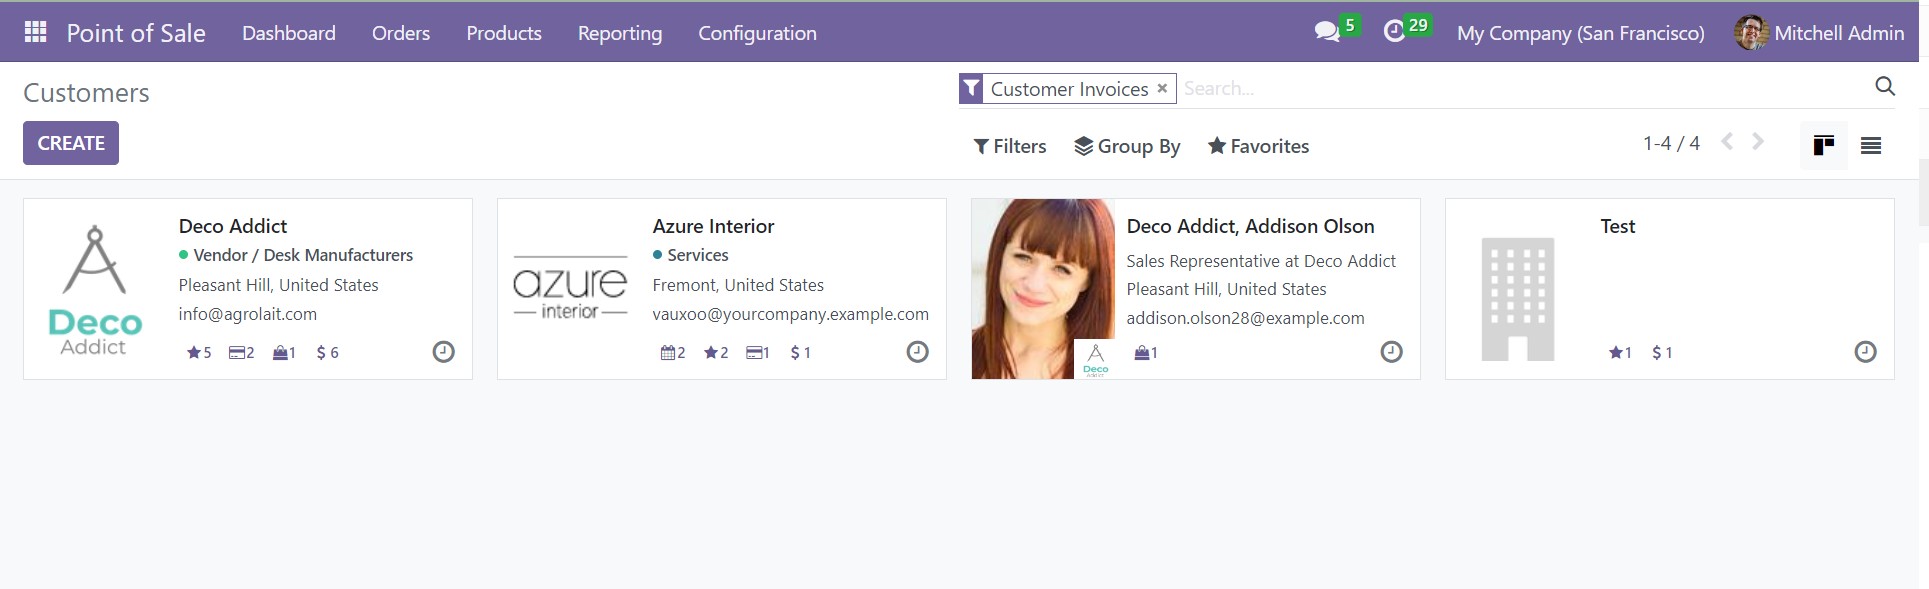
On the customer’s page, you will get the view in Kanban, which can also be seen in the list view, which include details, such as the name of the customer, phone, email, salesperson, activity, city, country, and company, respectively.
Products
Let us look at how to create a new product in this module. The process of creating a product is similar to that of creation in the purchase module. Products menu is visible in the main window of the module itself. The products provided in the window can be used to retail products within a company. The page will show the Kanban view of the list of products given. The page can be viewed in list view as well. Any of the provided products can be selected to get the further details of the product. And the Edit option can be used to make corrections if required.
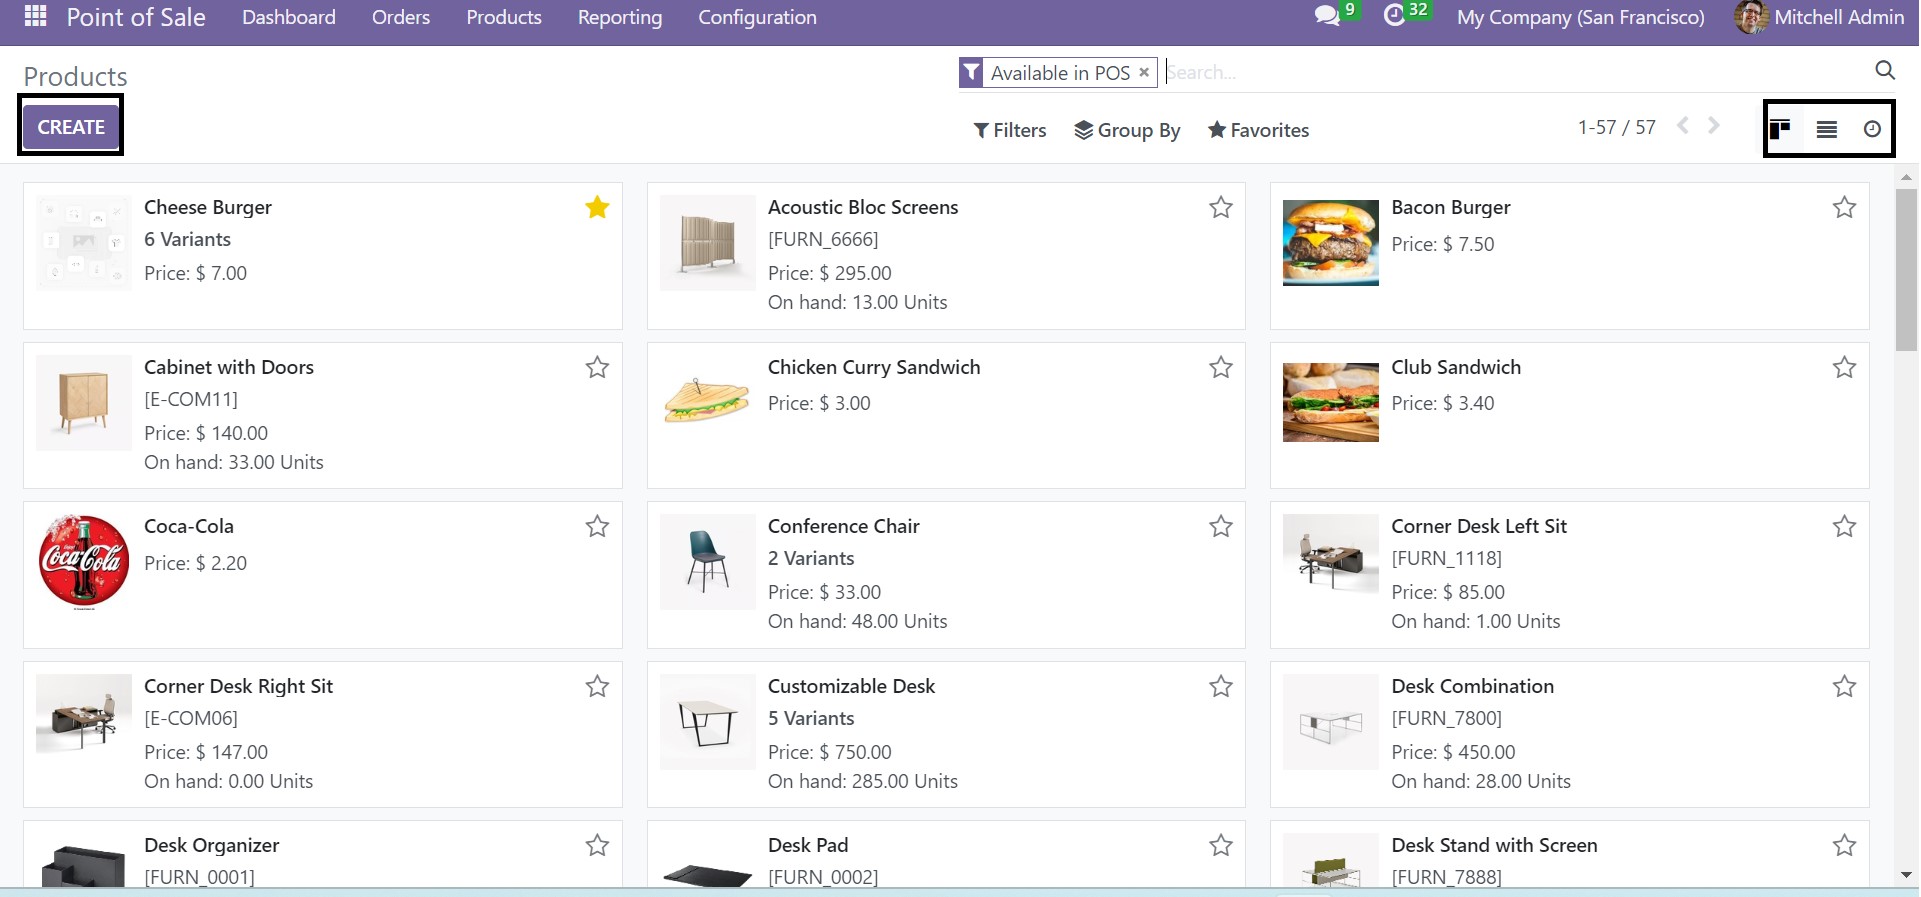
The Filters and Group by option will help you in sorting the provided products according to a particular criterion.Group by option helps you in categorizing the products according to your wish.
To create a new product, you can go to the Create icon.
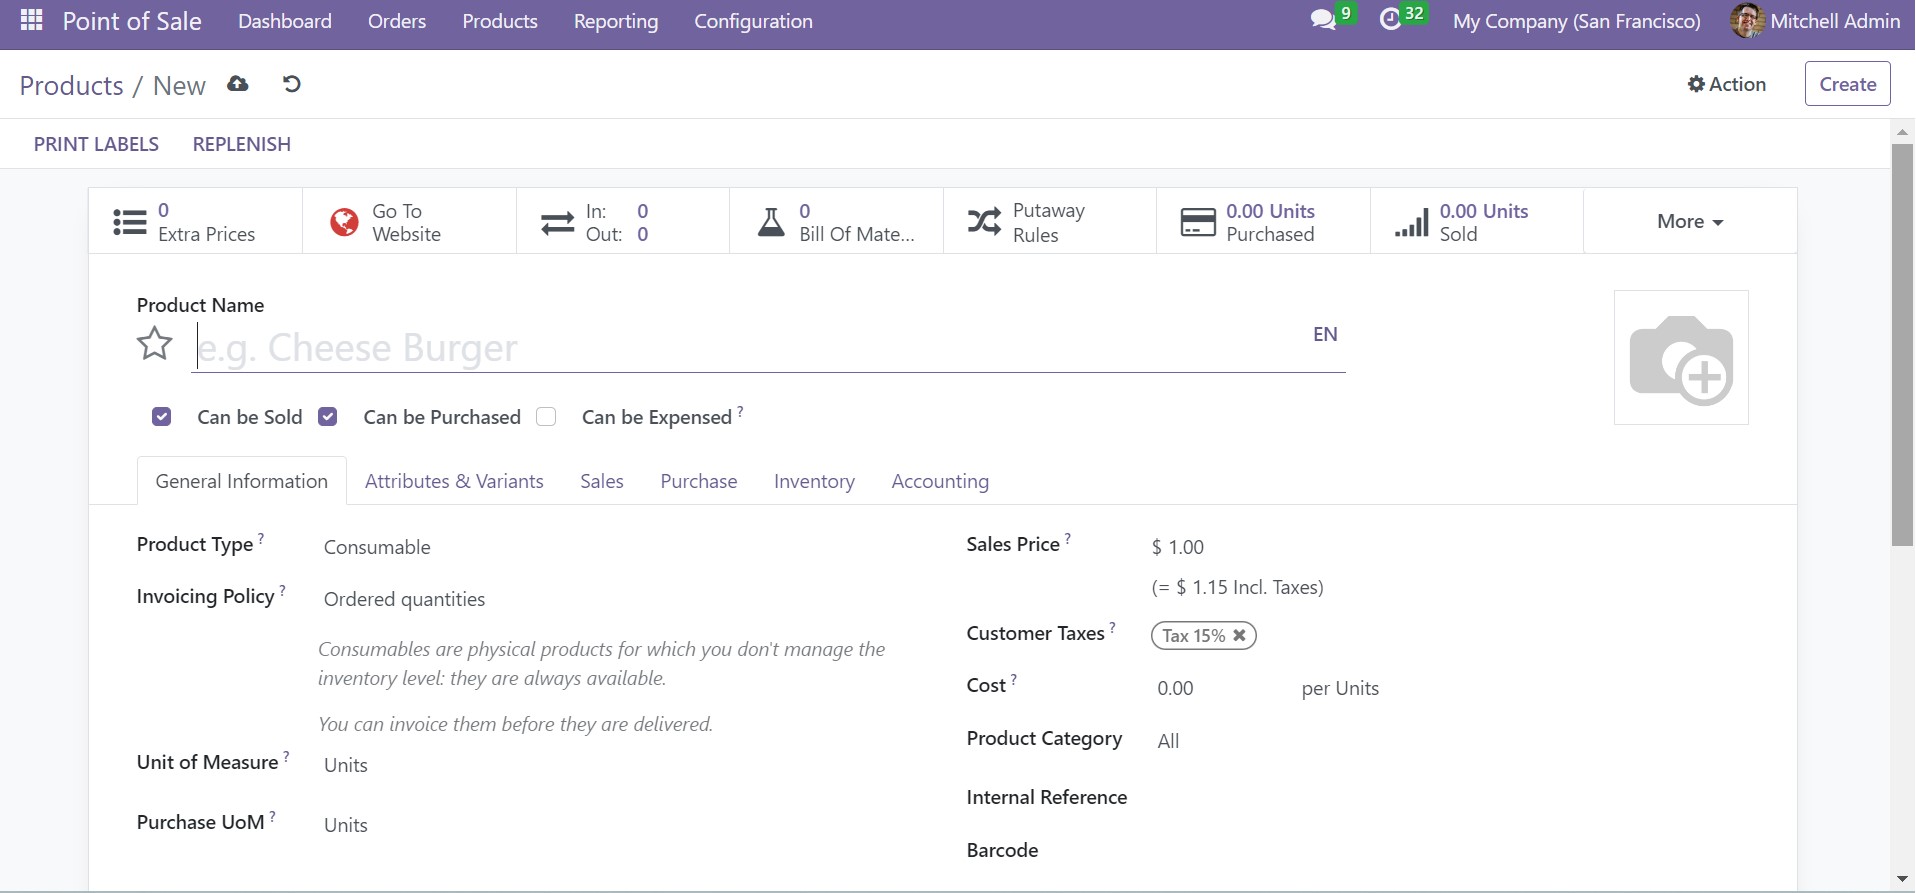
Here, you can provide a name for the product in the provided space. An image of the product can also be added for further clarification on the product. Now, you have an option to decide whether the product is sold or purchased. Under the General Information tab, you can add additional information, such as product type, invoicing policy as ordered quantities, or delivered quantities as well. Below that, units of measure, purchase units of measure, the sales price of the product, customer tax, cost, category of the product, internal reference, barcode, and company can be added in the provided spaces. An internal note about the product can be given in the internal notes field.
Under the Attributes and Variants tab, various products can be included using the Add a Line option, as shown below.
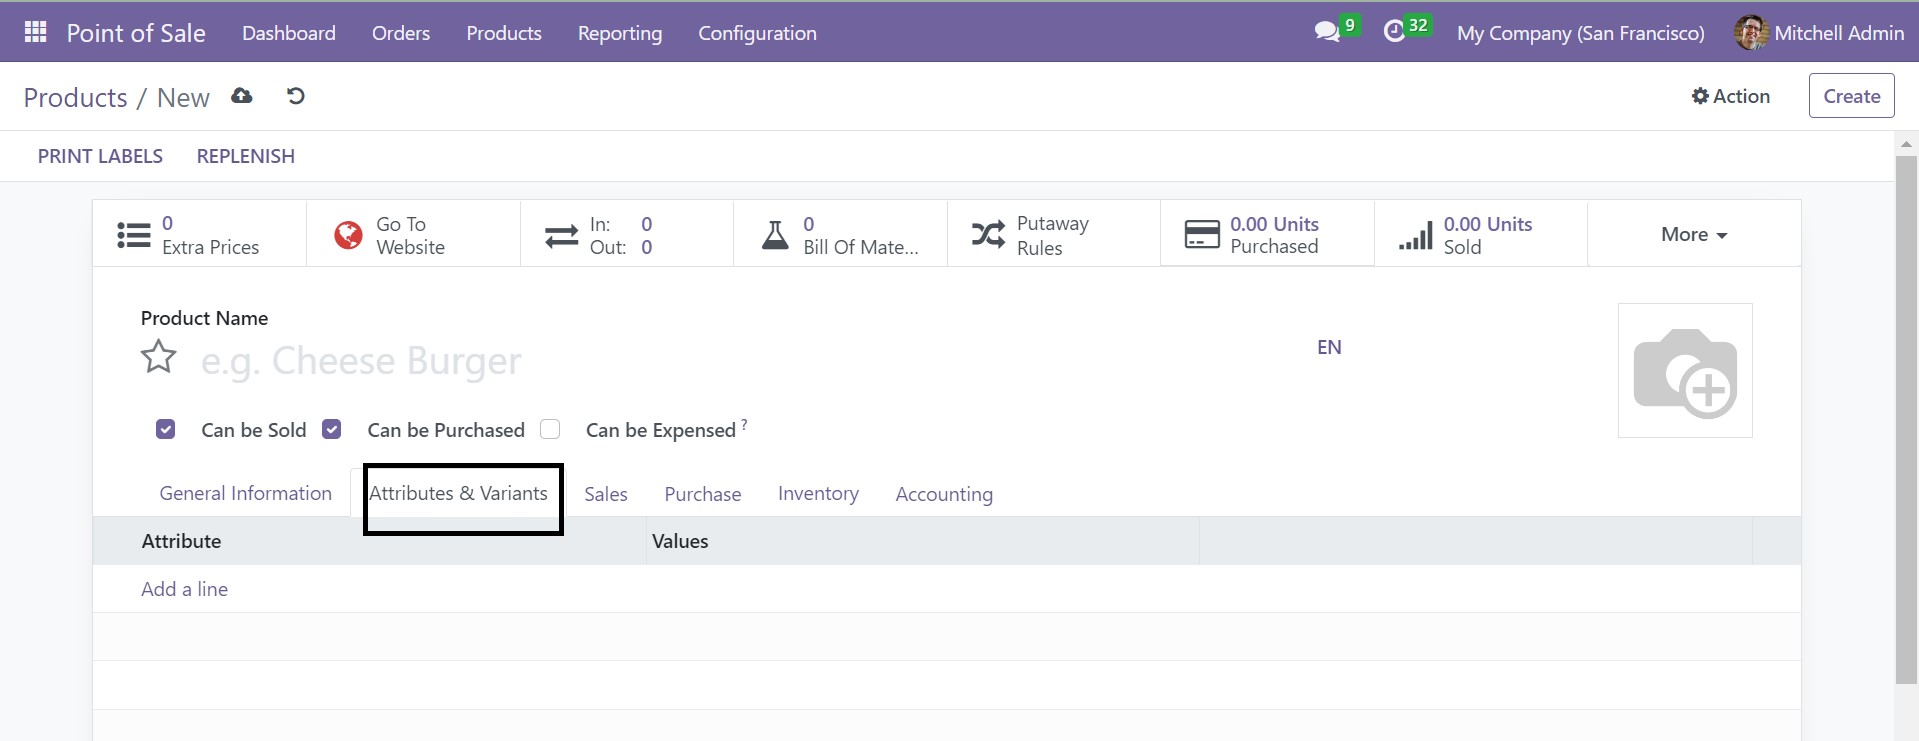
You can see the various attributes and their values in the allotted fields. Under the Sales Tab, you have details on upsell and cross-sell, point of sale, extra product media, sales description, eCommerce shop, and sales warning option to get filled.
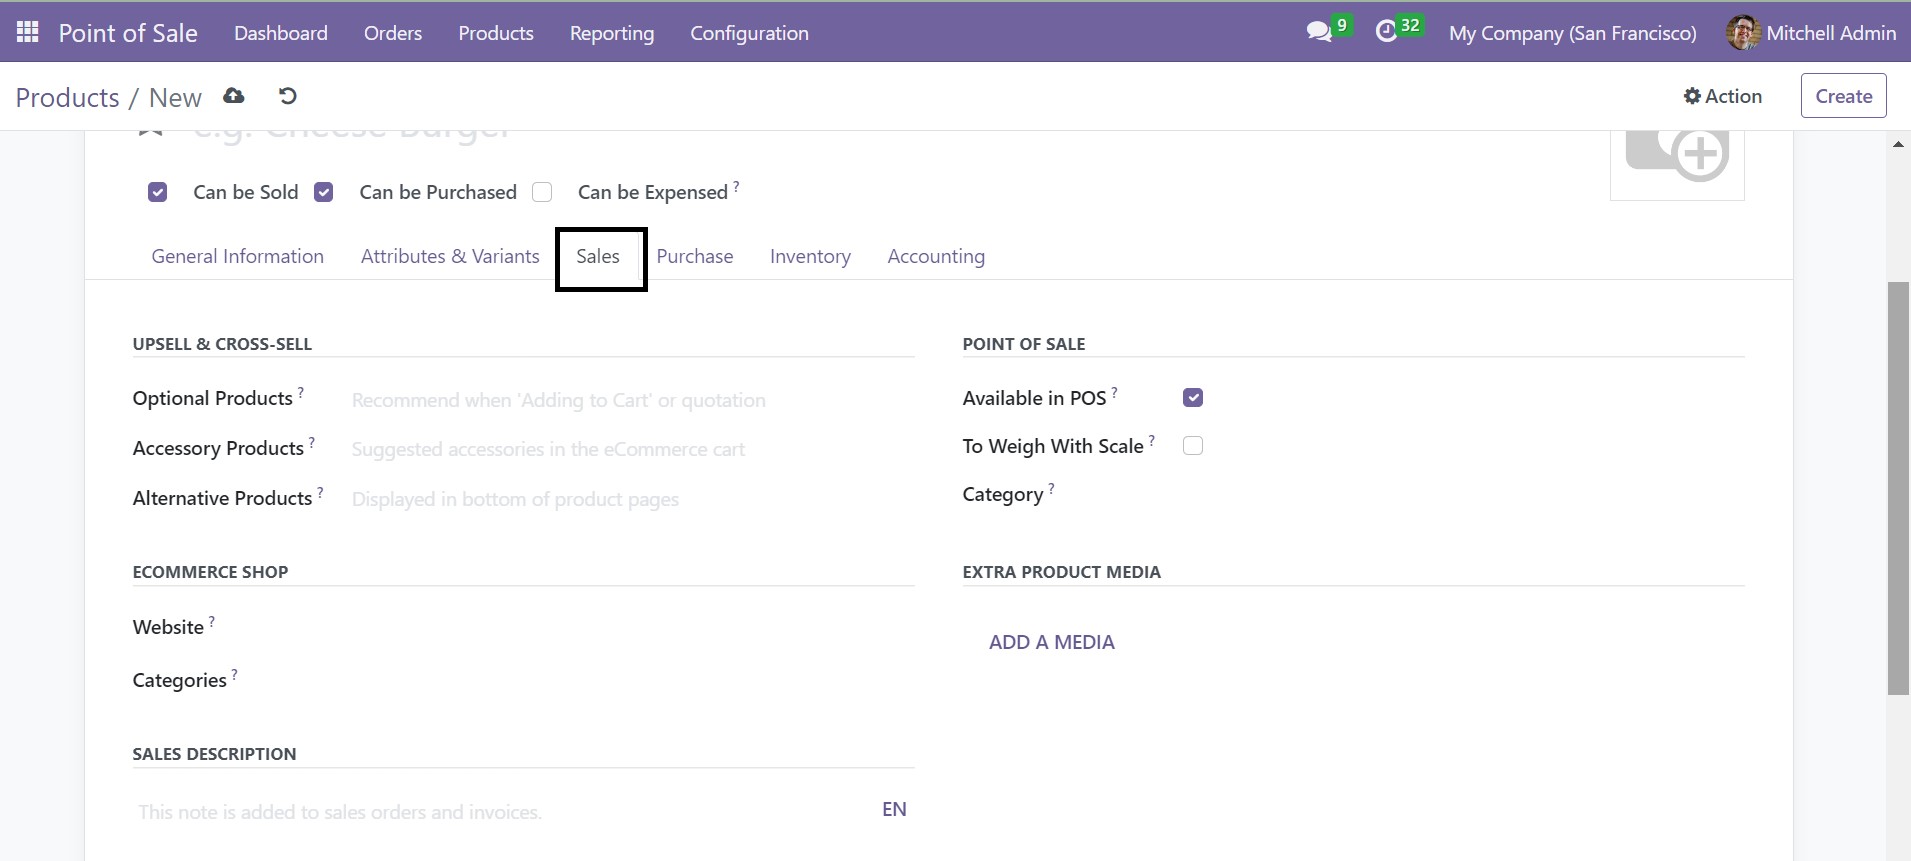
In the upsell and cross-sell options, you have optional products, accessory products, and alternative products options. Below the point of sale, you have space to give the available point of sale option to trigger to make the particular product visible in the point of sale, to weigh which scale option to trigger, as well as the category of the product to get mentioned. In the eCommerce option, you can mention the website on which it should be published and the categories as well. In the extra product media, you have Add a Media option, which may be a photo, video, or any other. In the sales description, you can provide a short description of the product.
Now, the next tab is the purchase. Here different vendors can be added with the help of Add a Line option very easily. Here, you can easily mention the vendor, currency, price, and delivery lead time according to the allotted space.
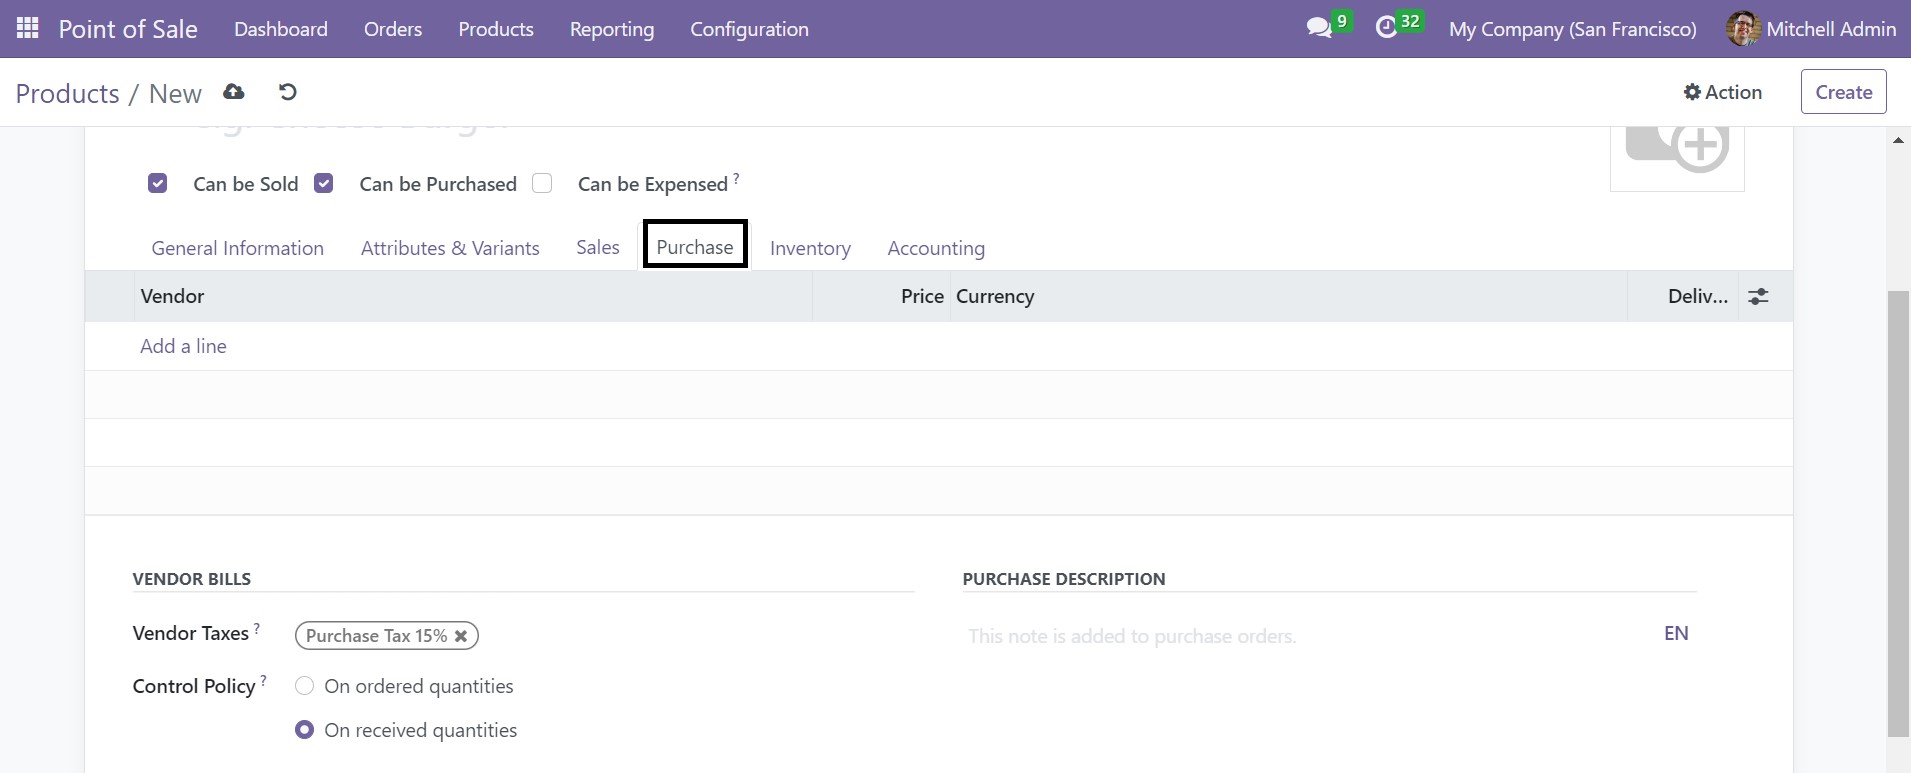
Under the vendor bills option, the vendor taxes and control policy can be provided. Below the purchase description, you can easily include a short description on the purchasing of the product.
Under the Inventory tab, you can determine the routes of operations.
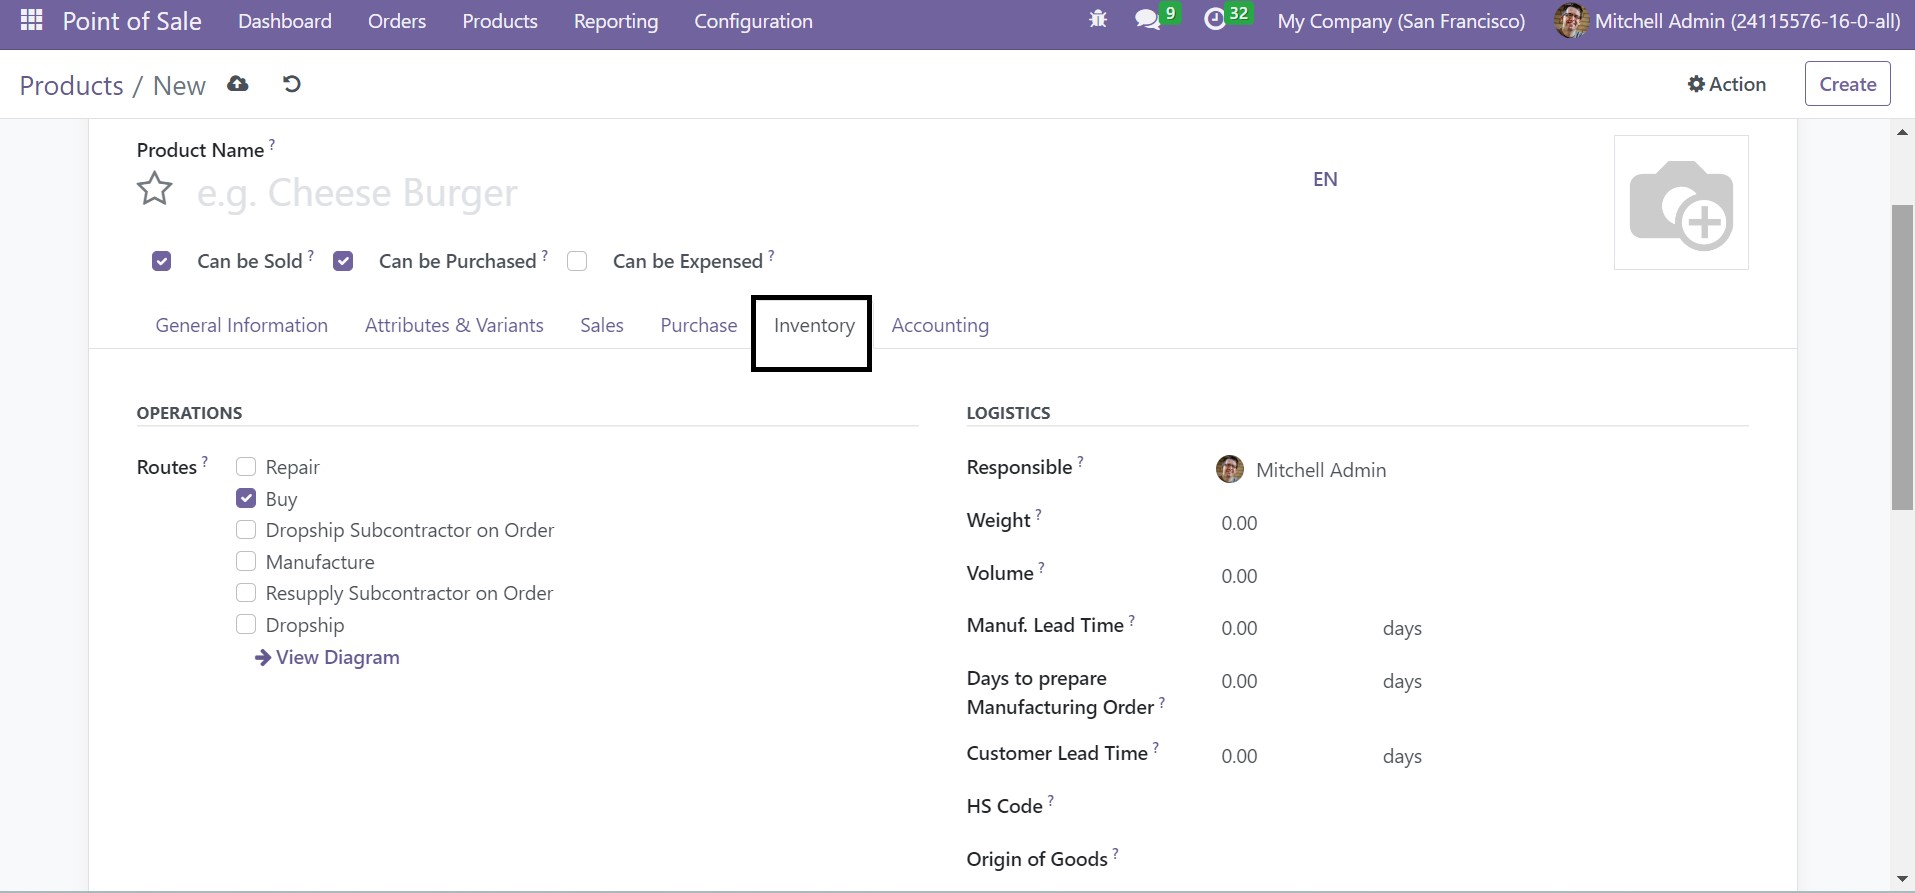
Under the routes option, you have various routes provided, such as repair, buy, dropship subcontractor on order, manufacture, resupply subcontractor on order, and dropship. If required, you can view the diagram as well. Under the logistic option, responsible officers can be added for the operations of inventory, weight, volume, manufacturing lead times, customer lead time, HS code, and origin of goods as well. Manufacturing lead time is used for the average time in a day for producing a product, and customer lead time is the delivery lead time in a day requested by the customer.
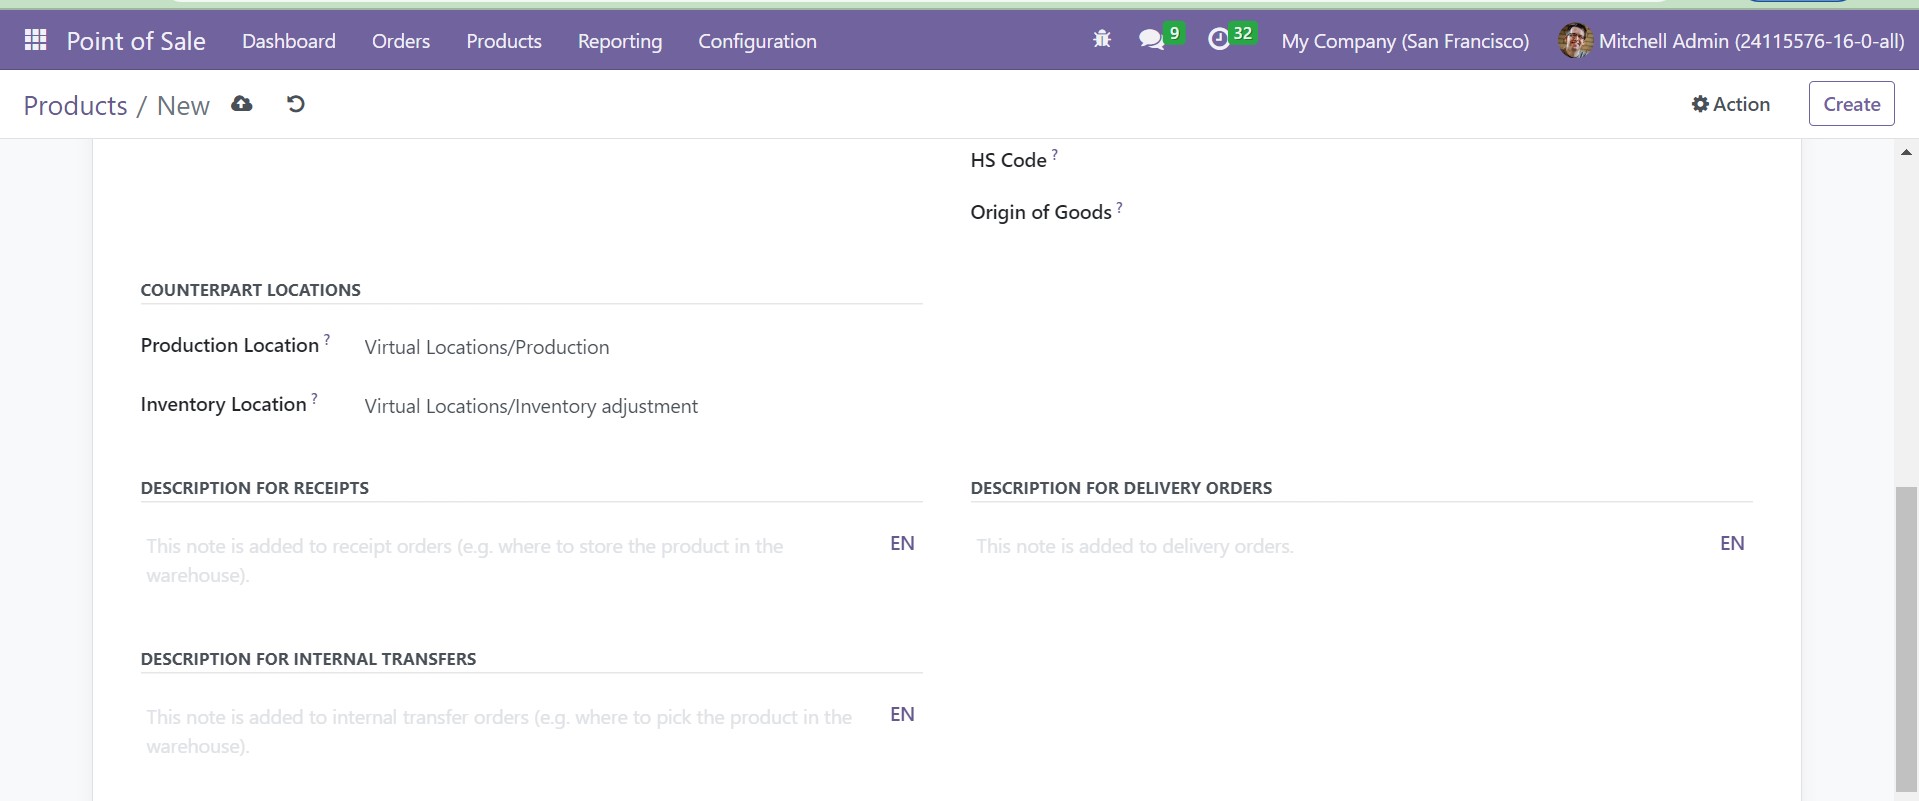
Under the counterpart locations option, you can mention the production location and inventory location. You can add descriptions for receipts, internal transfers, and delivery orders in the provided space.
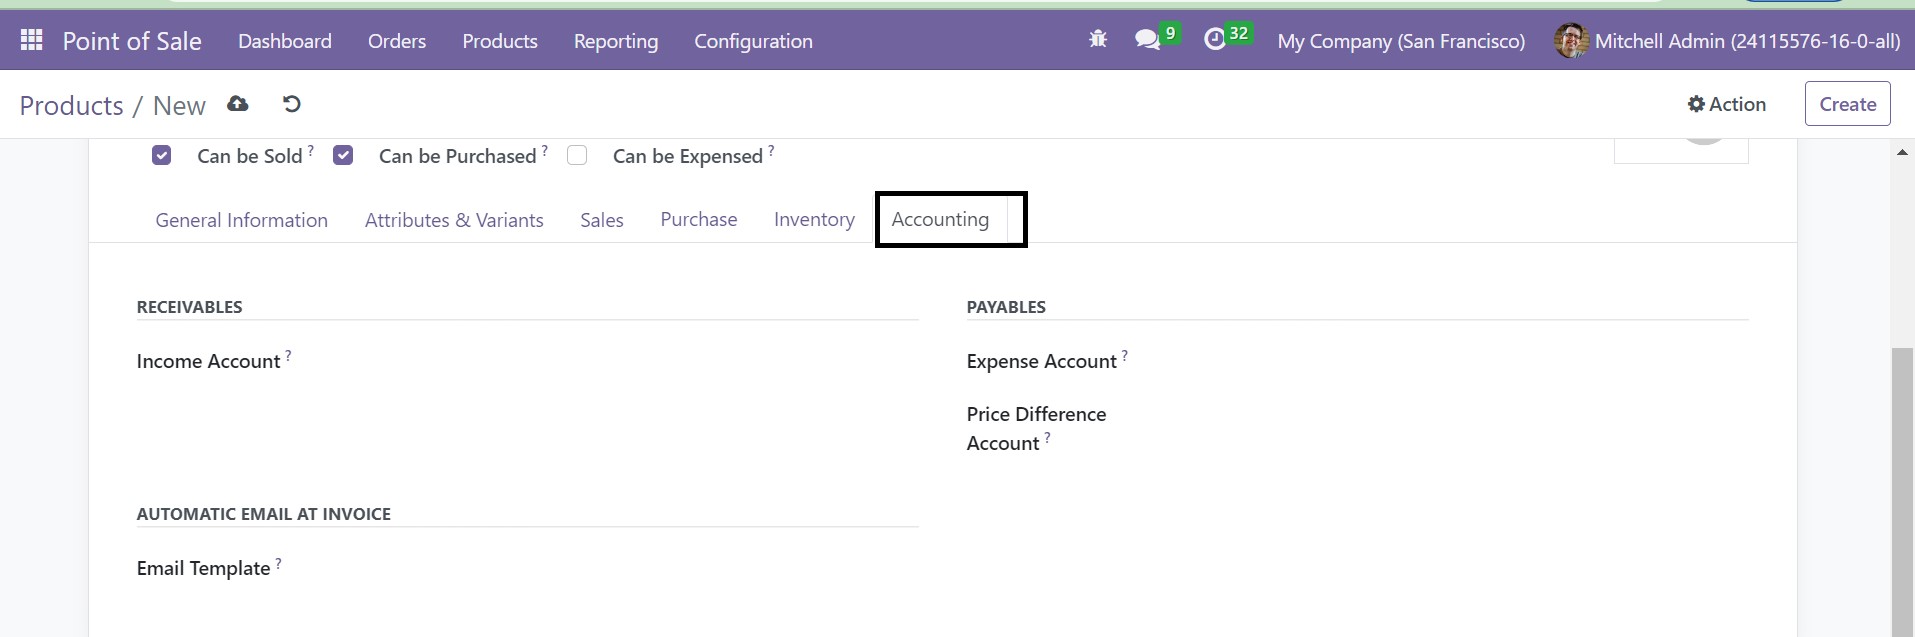
Below the Accounting tab, you can mention the income account in the receivables option. The Expense account and price difference accounts can be given in the payables option. In the automatic email at invoice option, an email template can also be added without any risk, which helps to send the email to a product-specific email when the invoice is validated. Finally, got to the Save icon to get the product added to the list.
Product Variants
The variants of a particular product can be easily configured under the point of sale module. The option will be available in the products menu on the main page. The page will give us a view of various product variants that are already created.

In the list of the product variants, you will get the information, such as internal reference, name of the product, website, variant values, sales price, cost, quantity on hand, forecasted quantity, and units of measures. There are customizable filter options and Group By options for categorizing the product variants. To make a new product variant, go to the Create icon. The process of creating is similar to that of product configuration.
PoS Product Categories
The products can be easily classified into different groups or categories. The process can be done by using the PoS Product category option provided in the Configuration menu. Various categories of products will be available on this page, as shown below. The product category can be added using the Create icon.
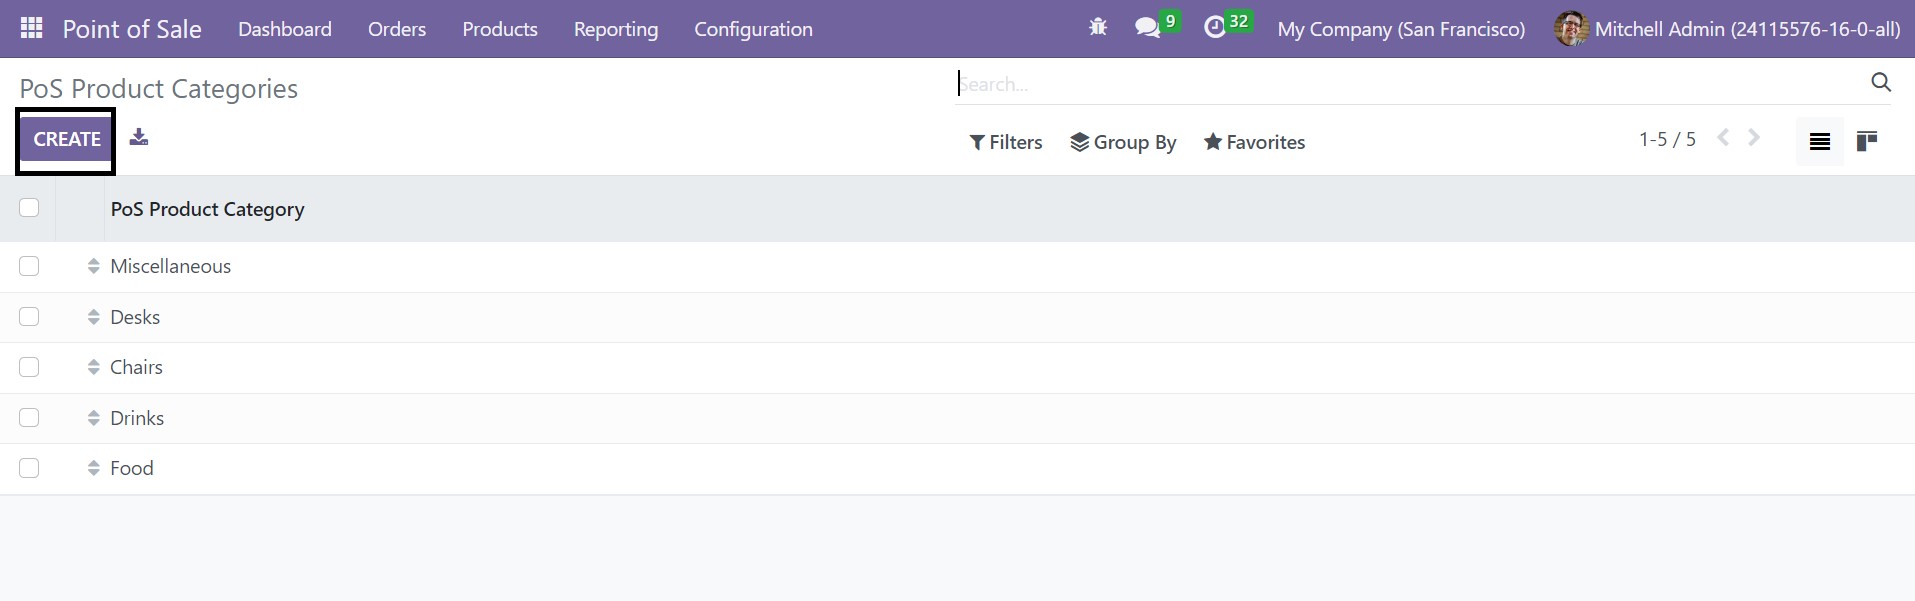
It can be seen in the Kanban view as well. Filers and Group By options can be made used for sorting according to our needs. On selecting the Create icon, you will get a page as follows.
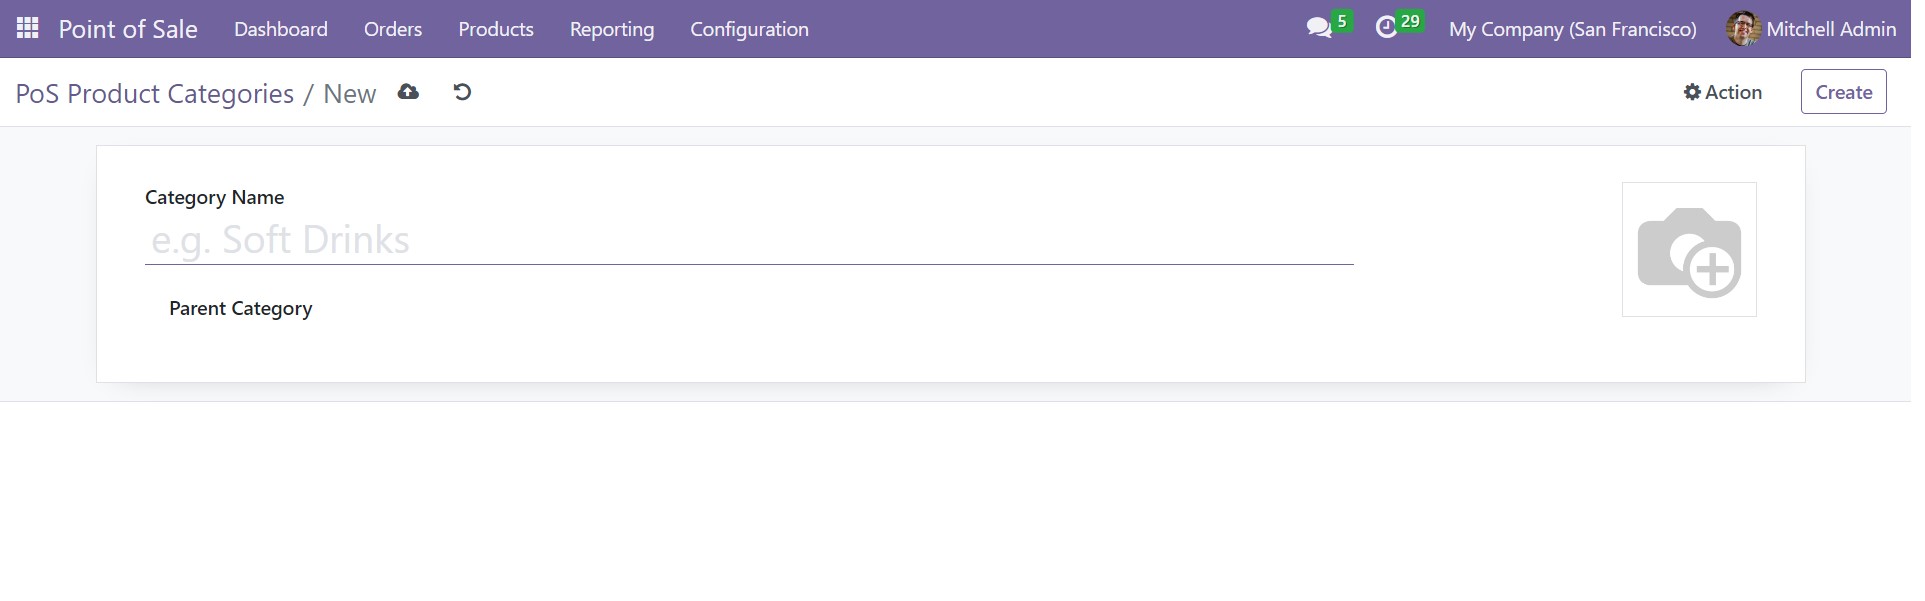
On the creation page, you can add the name for the product category and parent category in the allotted space. You can also add an image for the category for better clarification. Finally, go to the Save icon.
Attributes
Within the Point of Sale module, you have an option for Attributes in the Configuration menu, which helps you in creating various variants. The attributes can be created easily along with their values.
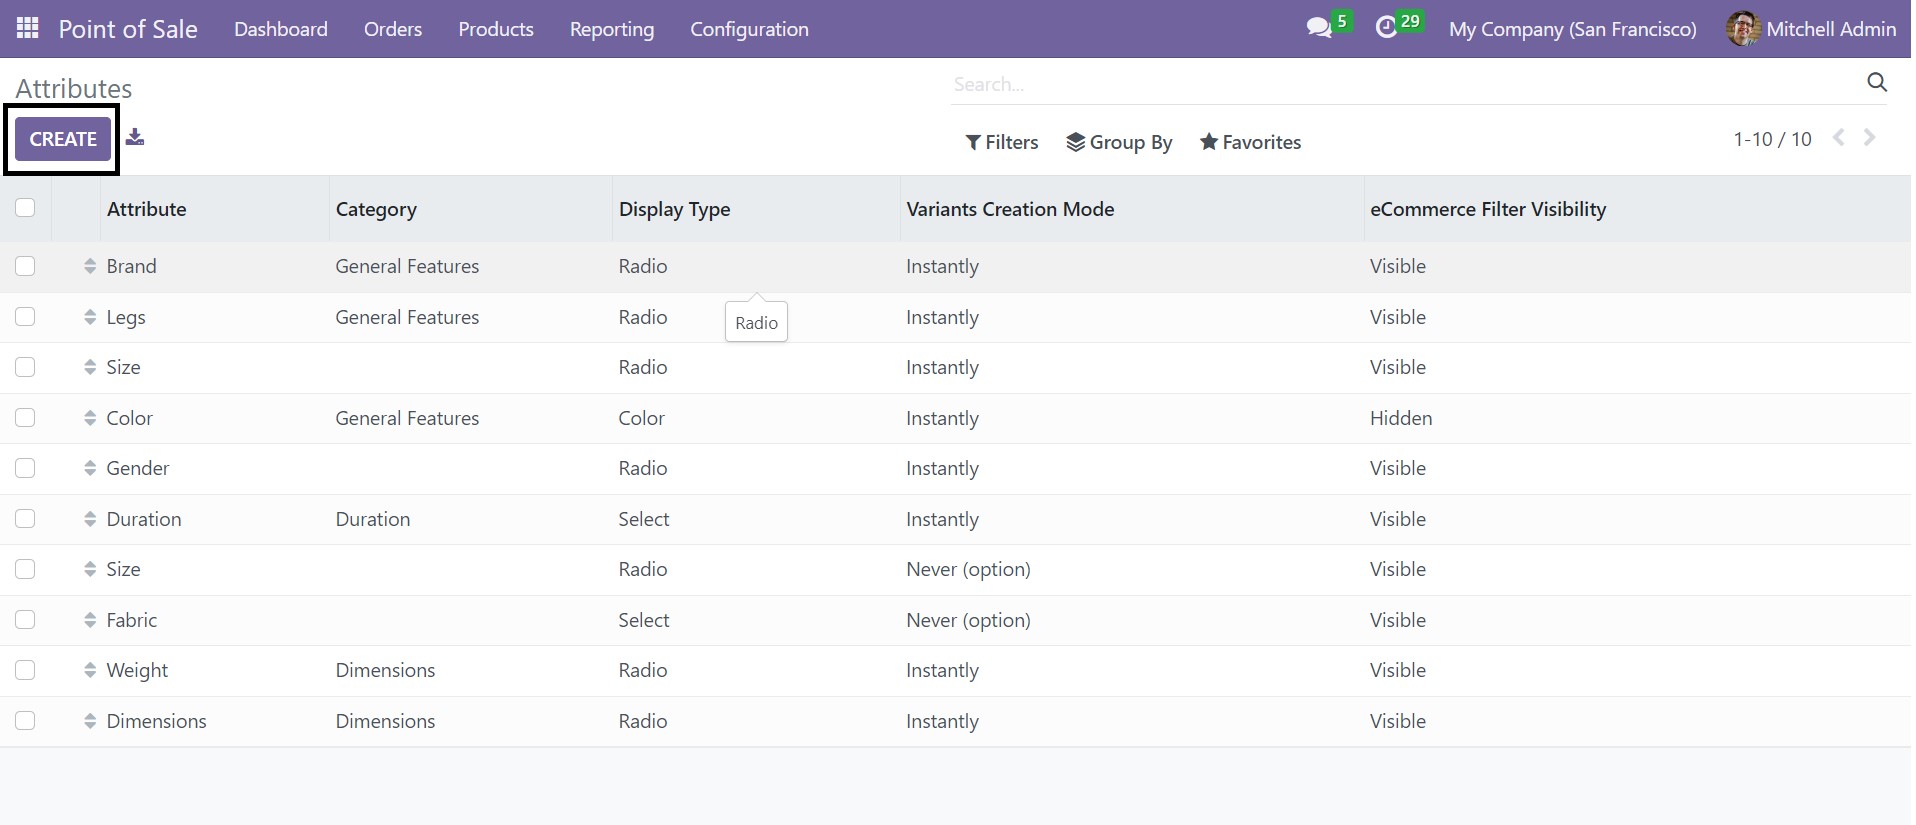
As on the image, you can see the list of attributes, their category, display type, variants creation mode, and eCommerce filter visibility. You can make a new attribute to the product with the help of the Create icon with very few clicks.
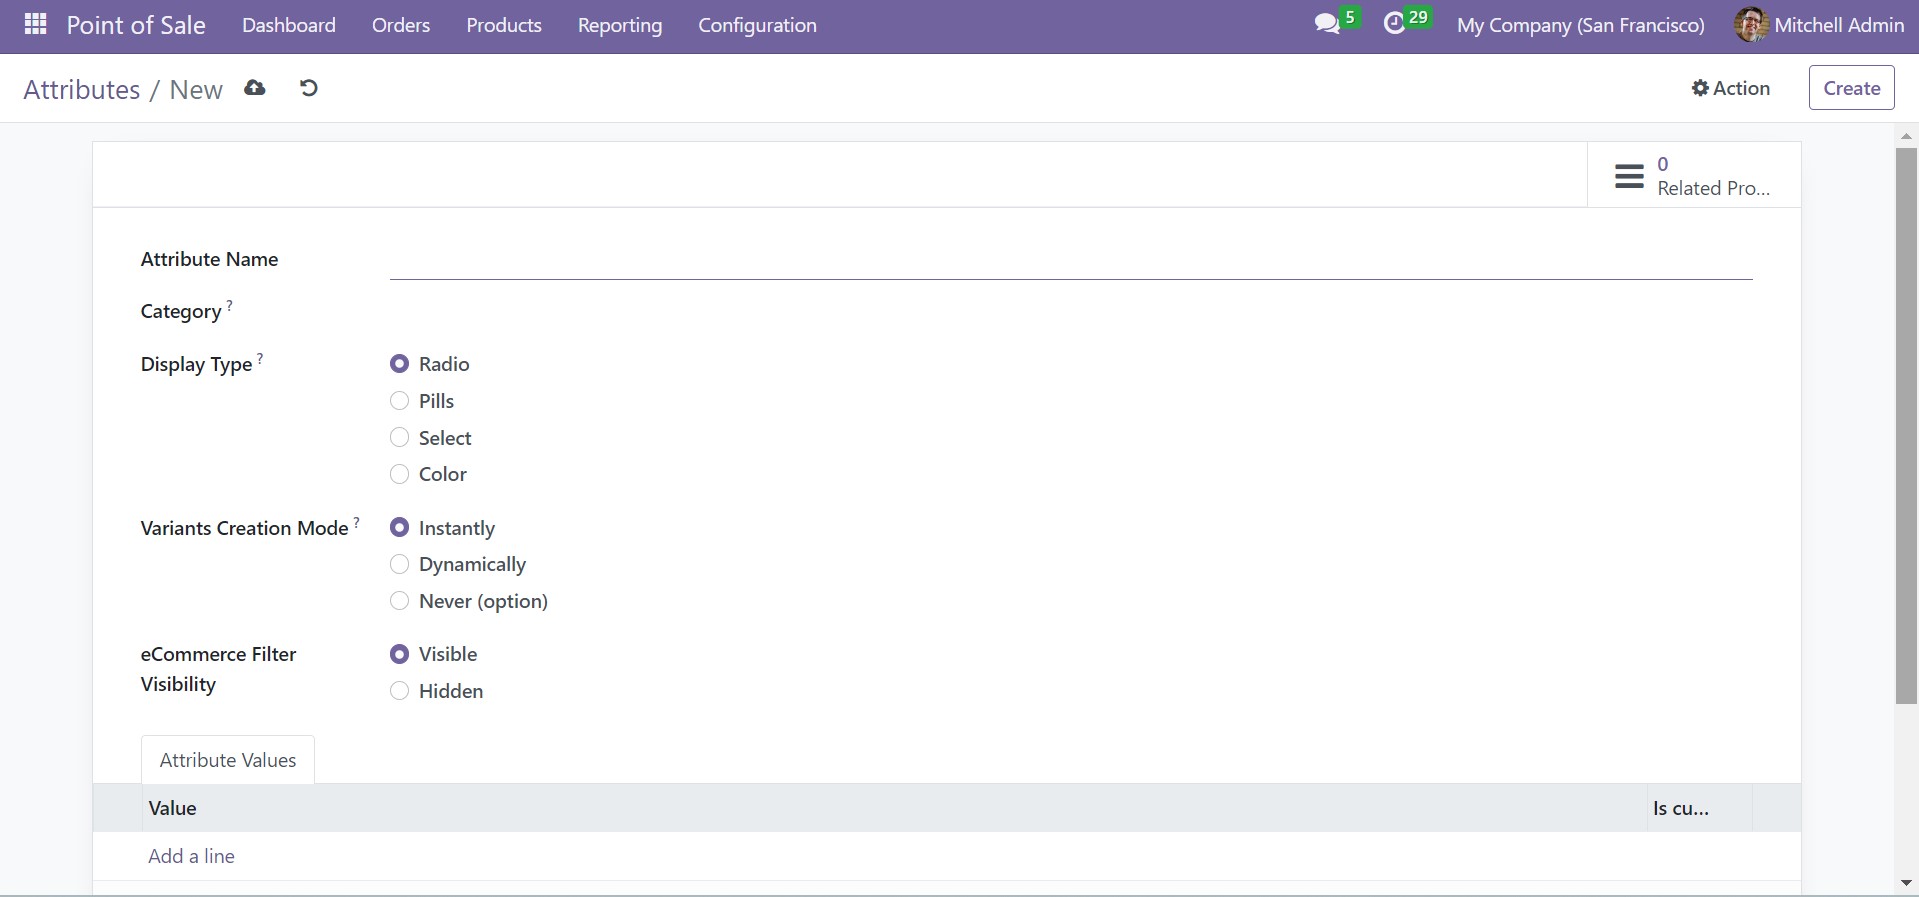
On the creation page, you can add the name for the attribute and category. The display type can be selected as radio, pills, select, or color. Variant creation mode can be selected instantly, dynamically, or never. Instantly options make the possible variants made soon after the attributes and values included. Dynamic options make the variants made only on adding the values are included for the attributes for a sales order. And the never option makes the attributes never get created. eCommerce visibility can be set as visible or hidden. Under the attributes value option, you can include the value with the help of the Add a Line option. Finally, go to the Save icon.
Pricelists
You may create a different price list for a particular customer. This can be considered as a list of prices or rules for price according to a particular criterion. In order to get this option available in the dashboard, you have to go to Settings of the Point of Sale module.
In the pricing tab, you can see the options in price lists to get triggered. On triggering these options, under the products menu, you will get the option of price list.
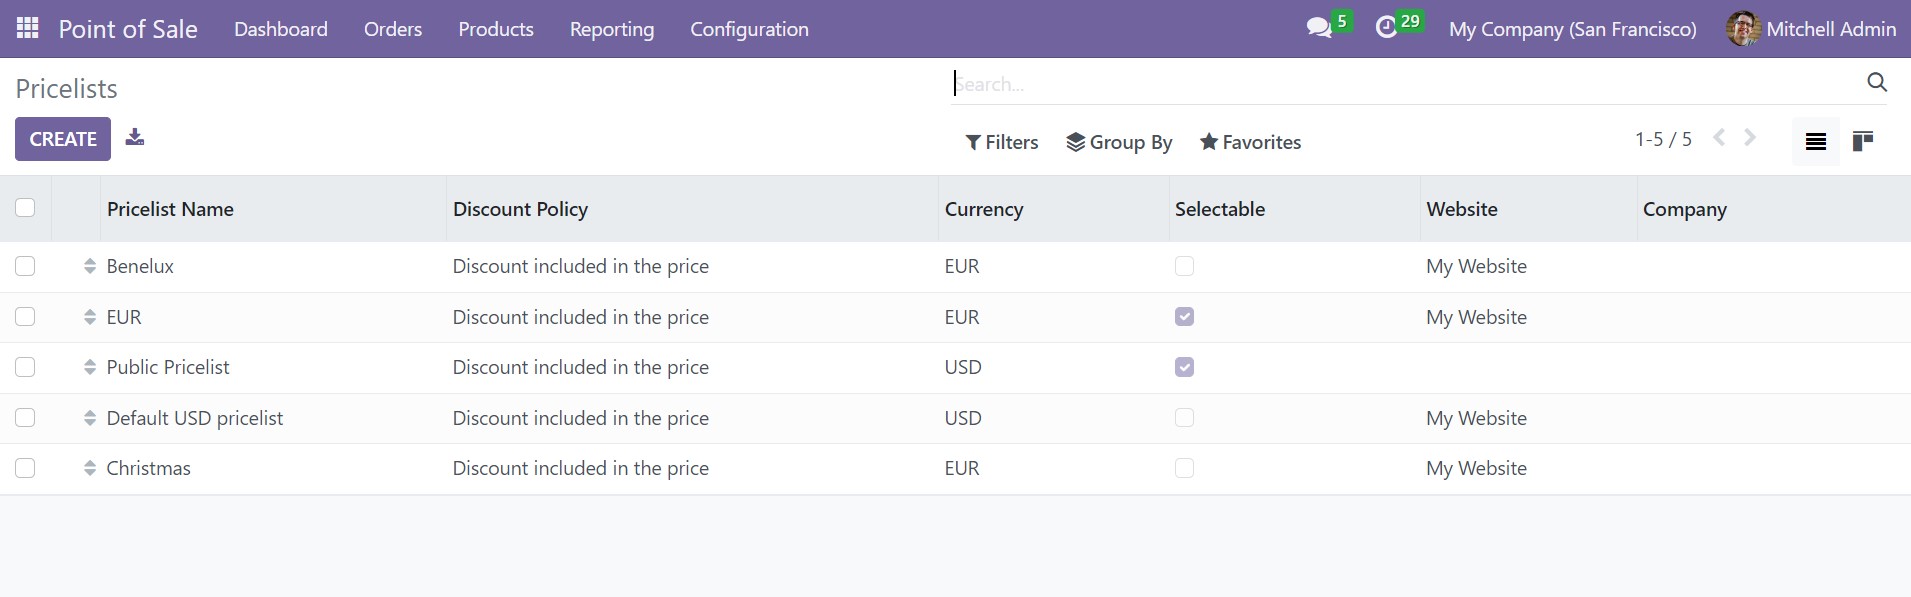
On the pricelist page, you will get the list of already created pricelists. The list includes details, such as name of the price list, discount policy, if any, selectable, the website on which it should be published, and the name of the company. You may also view the page in the Kanban as well. There is a Create option to make a similar kind of price list.
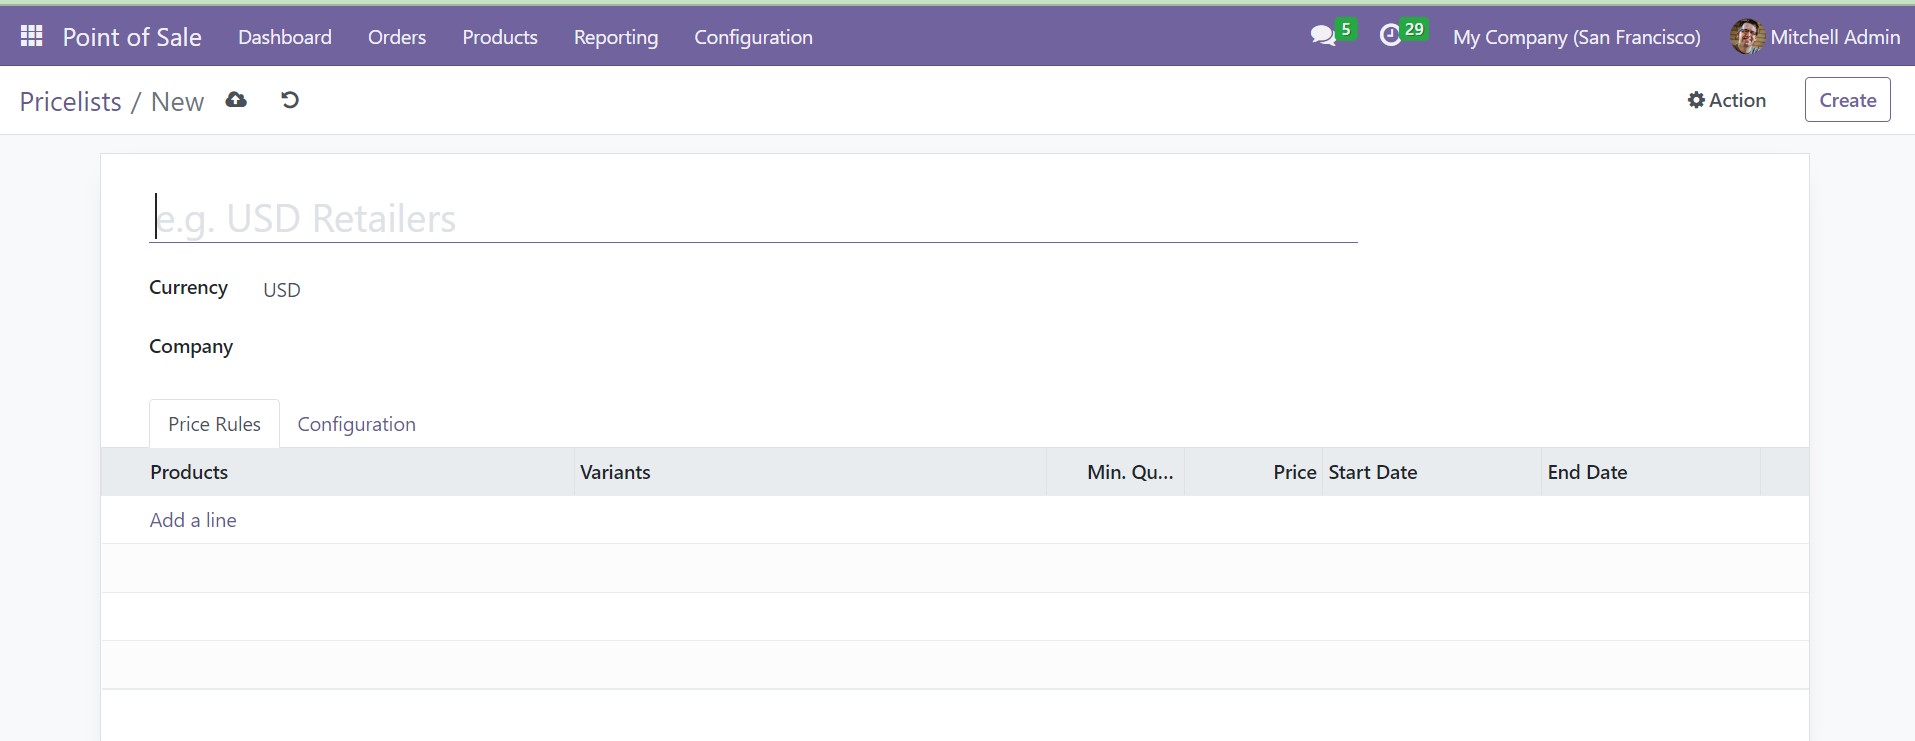
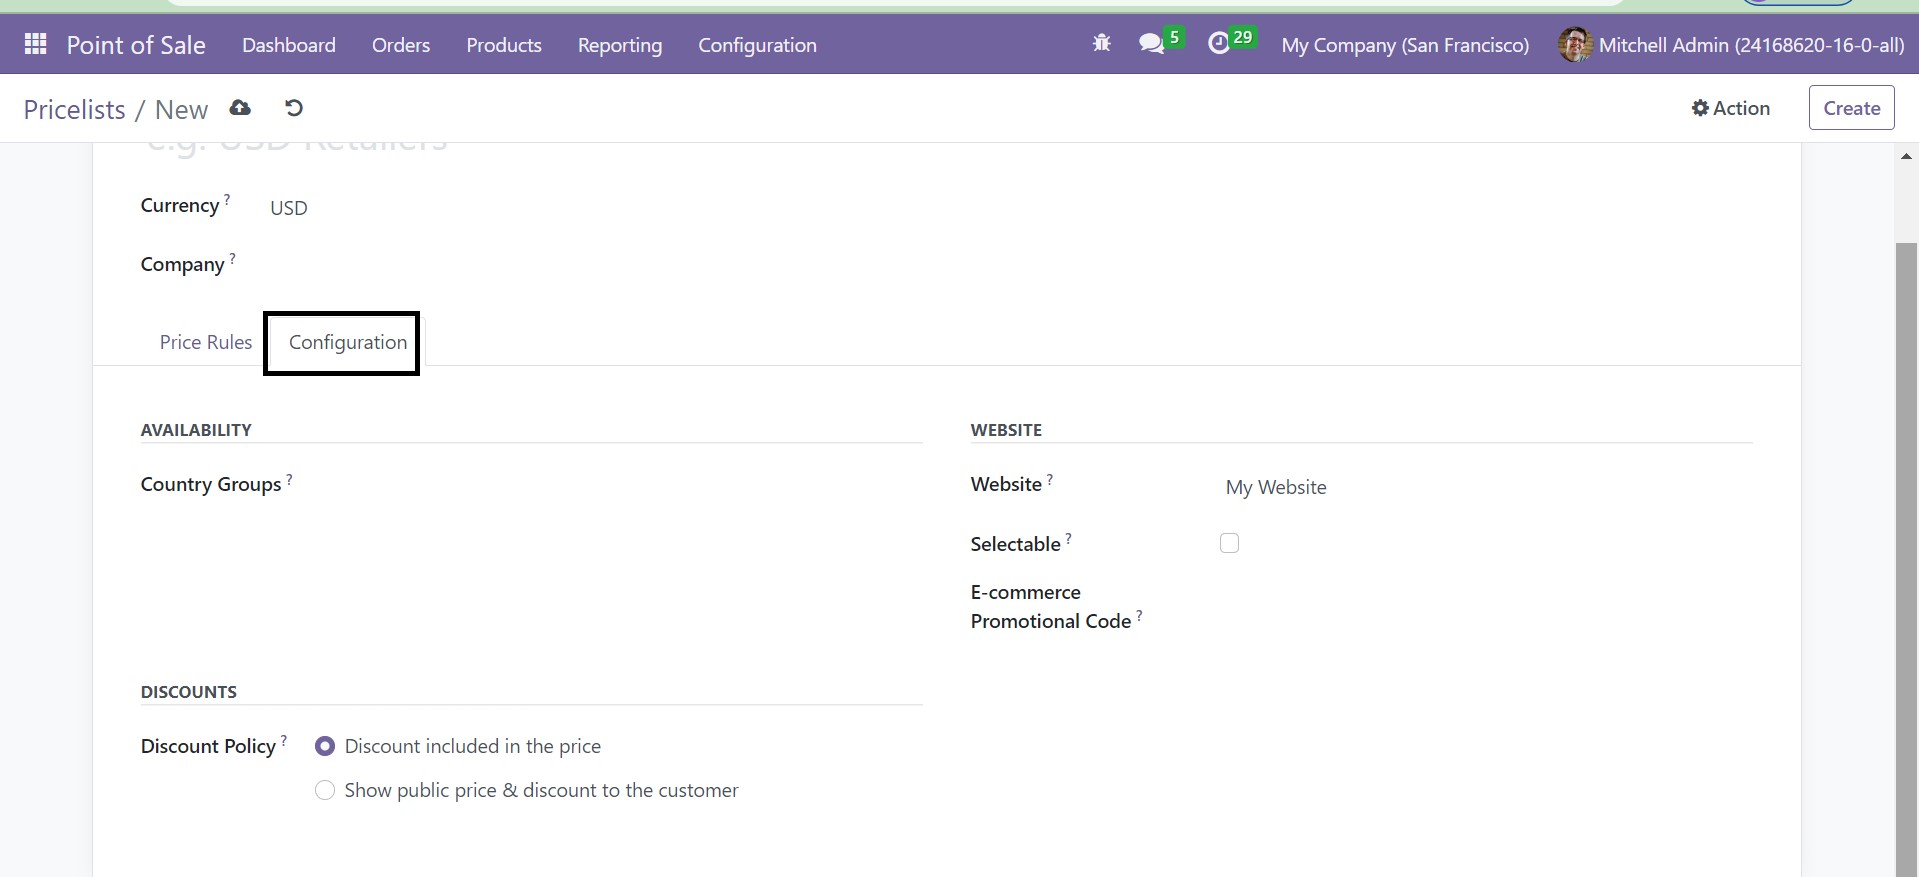
On this page, you can add the name for the price list in the provided space. The company and currency should also be given. Under the Price Rules tab, with the help of Add a Line option, you can include the price rules. Below the Configuration tab, the country group can be included in the availability option. In the website option, website eCommerce promotional code can be provided. The selectable option can be triggered in order to allow the user to select this price list. Under the price list option, the discount policy can be set as a discount included in the price or show public price and discount the customer.
Finally, go to the Save icon in order to get the price list added to the existing list.
Payment Methods
You can see various kinds of payment methods for activating different business operations in the Point of Sale for easy running of the sale process. Using the Odoo Software, the process has become an easy task. The option can be seen in the Configuration menu of the Point of Sale module.
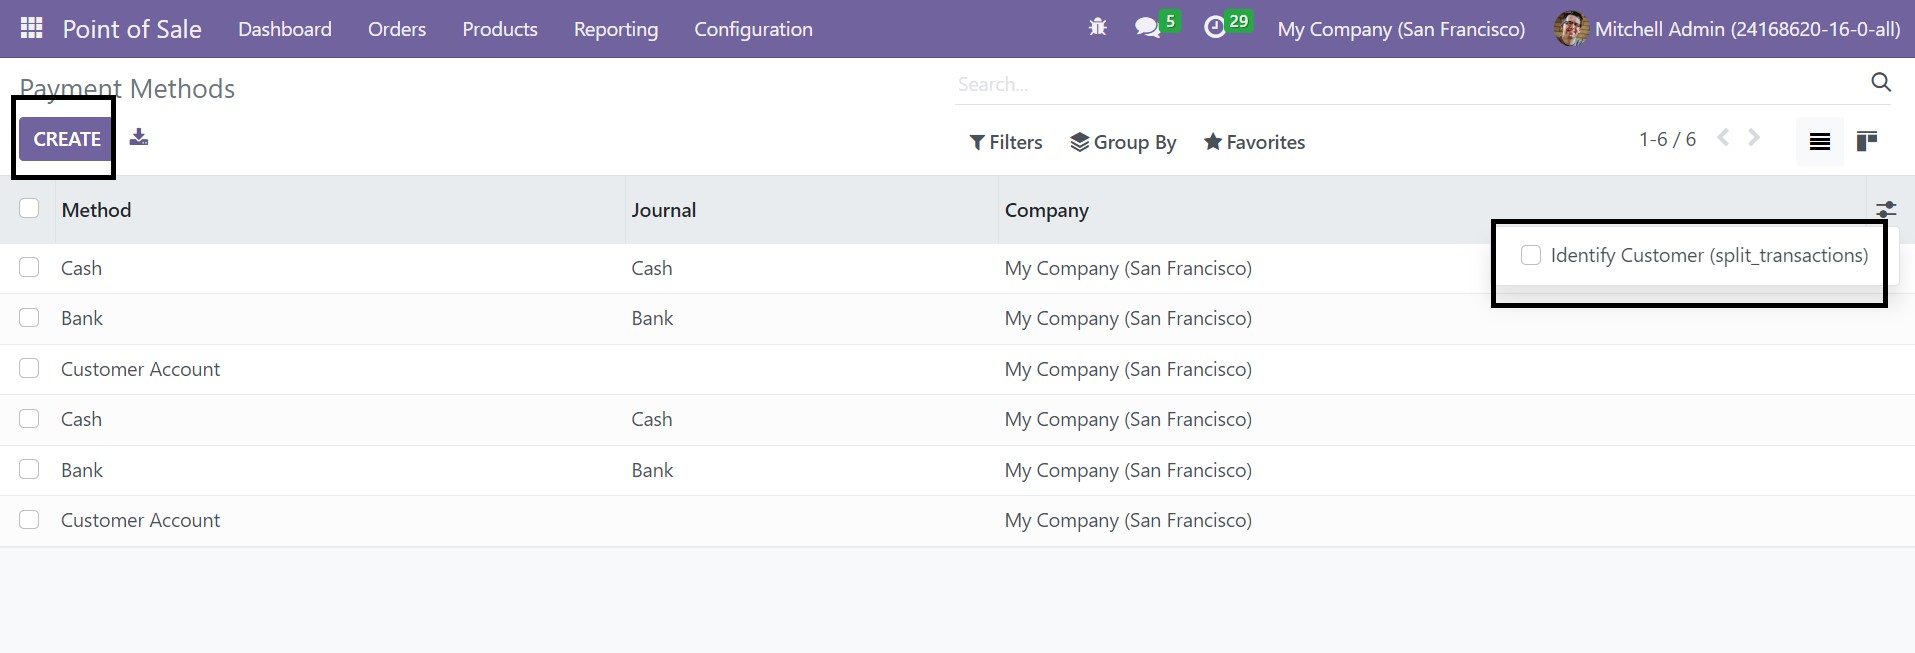
As you can see on the image, the page is filled with the list of already made payment methods along with some extra information for the process of the transaction. In order to get further information about a particular one from the list, go for any one of the payment methods. The added details about the payment method can be edited using the Edit icon. The page in the list views will be available in Kanban view as well, according to our wish. Filters and Group By option help you to reduce the risk in sorting out and to categorize them accordingly.
On the page, you can see some information, such as method type, journal, and name of the company, respectively. You are provided with an additional option on the right side of the window identifying customers, which can be used if required. In order to make such a payment method, you can go to the Create icon provided on the left side of the page, as marked in the above image.
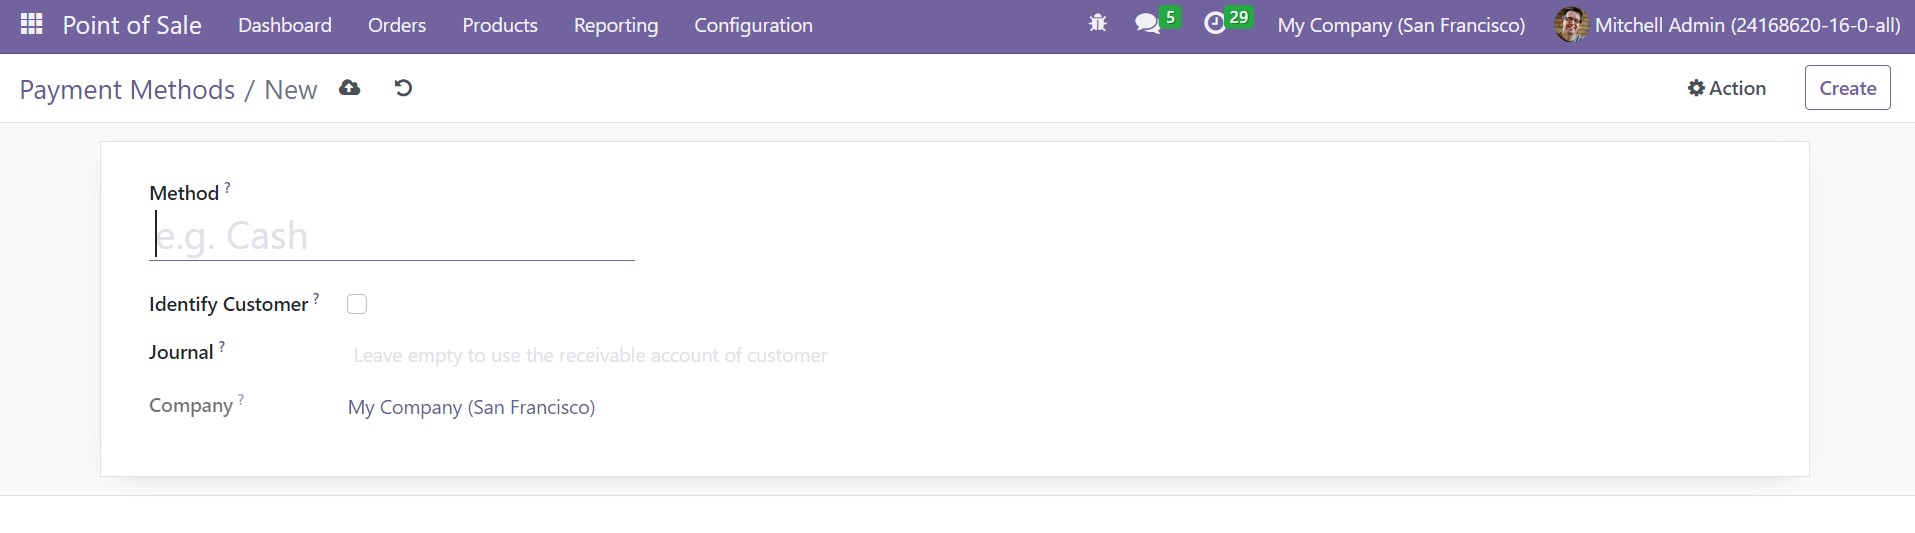
Here, you have to provide the name of the method. Then, trigger the identify customer option. Then provide the particular journal and name of the company in the allotted space accordingly. Finally, go to the Save icon to get the payment method added to the list.
Dashboard
The dashboard of the point of sale module will have all the records of the sessions conducted in the module. The option helps to keep track of the cash flow of every operation. You can easily make such a session in the point of sale module. Later, you can easily operate those sessions in the sale page itself. According to our needs, the session can be stopped or paused.
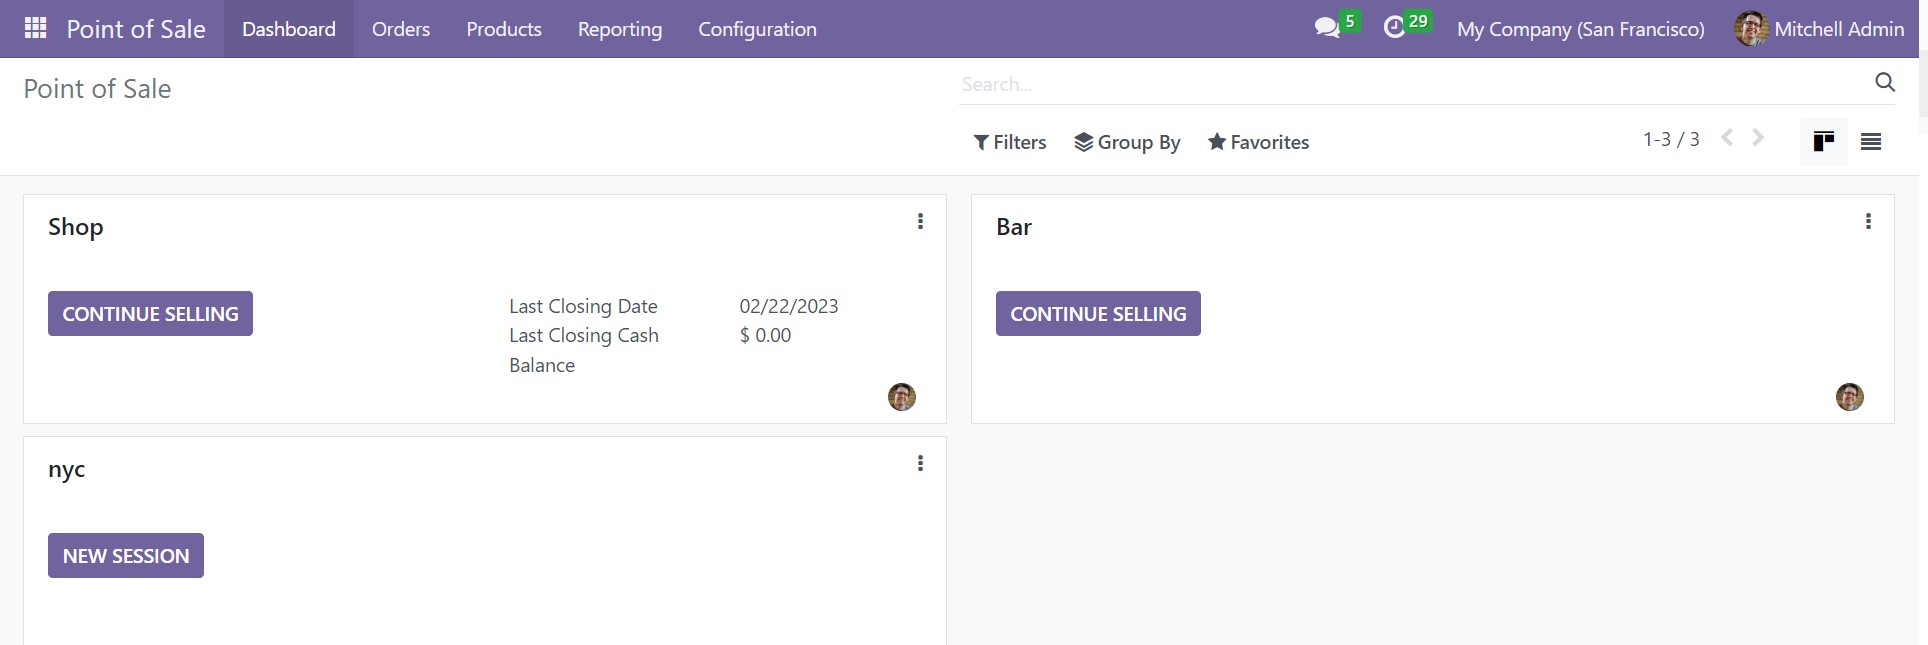
From this given list, you can go for any of these in order to perform a session in the point of sale module. On selecting a particular one, a new window will open.
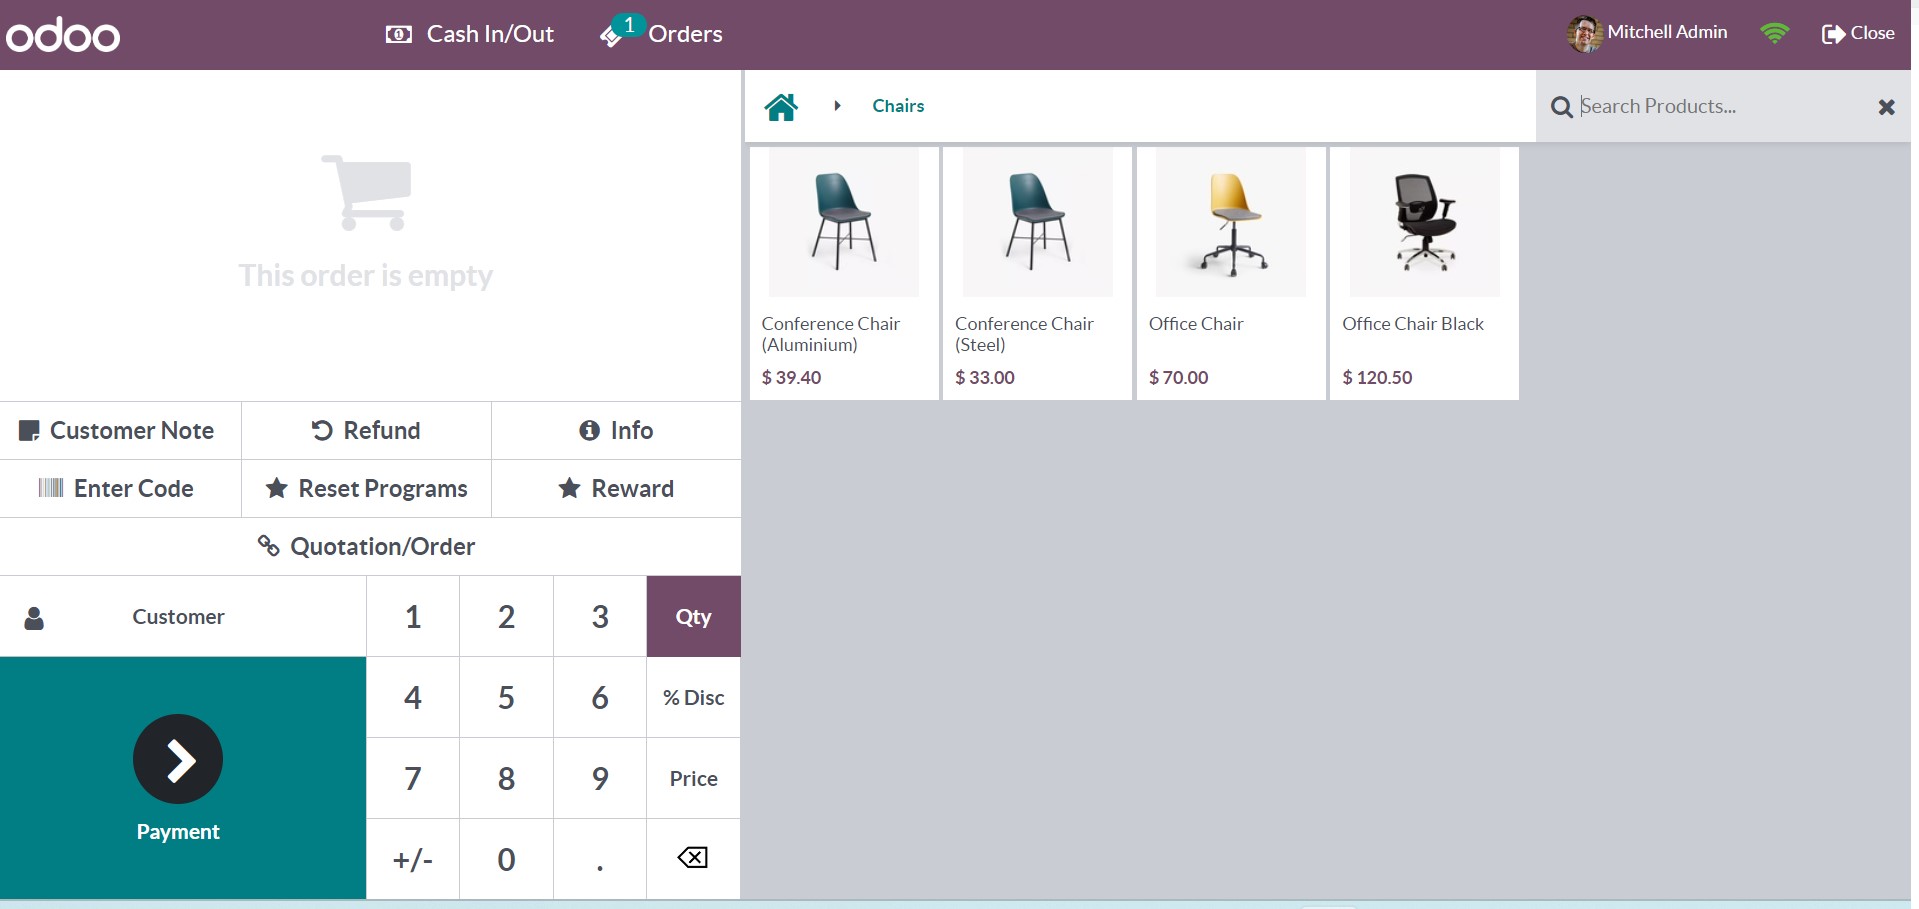
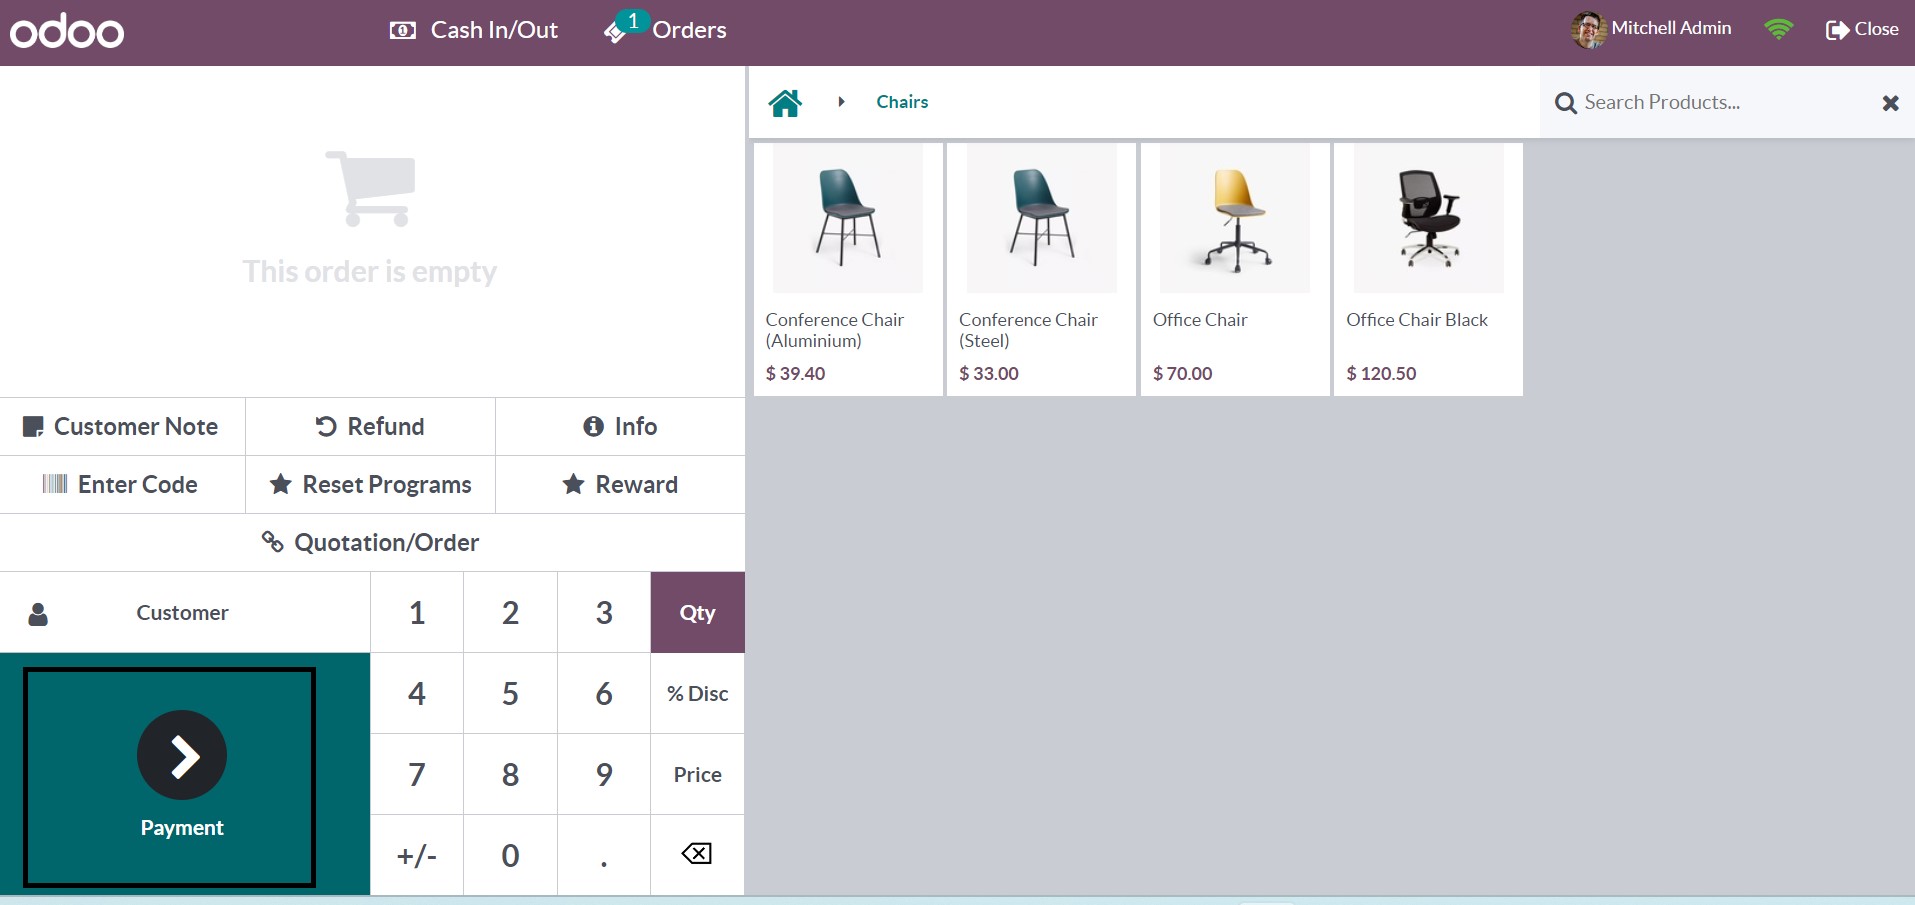
As on the image, on the right side, you will get the product along with the price of the product. You can even put them in the cart if required. You are able to buy how much you want according to your wish and those selected will be available on the left side of the page. When you are done with selecting the product, then you can include new customers by selecting the Customer option.
On doing so, you will get a list of customers, and with the help of the search option, you can search for the required customer. On the page, you can see the details, such as the name, address, phone, and email address of every customer.

With the help of the Create icon, you can make a new customer very easily. On selecting the Create icon, a new window will open.
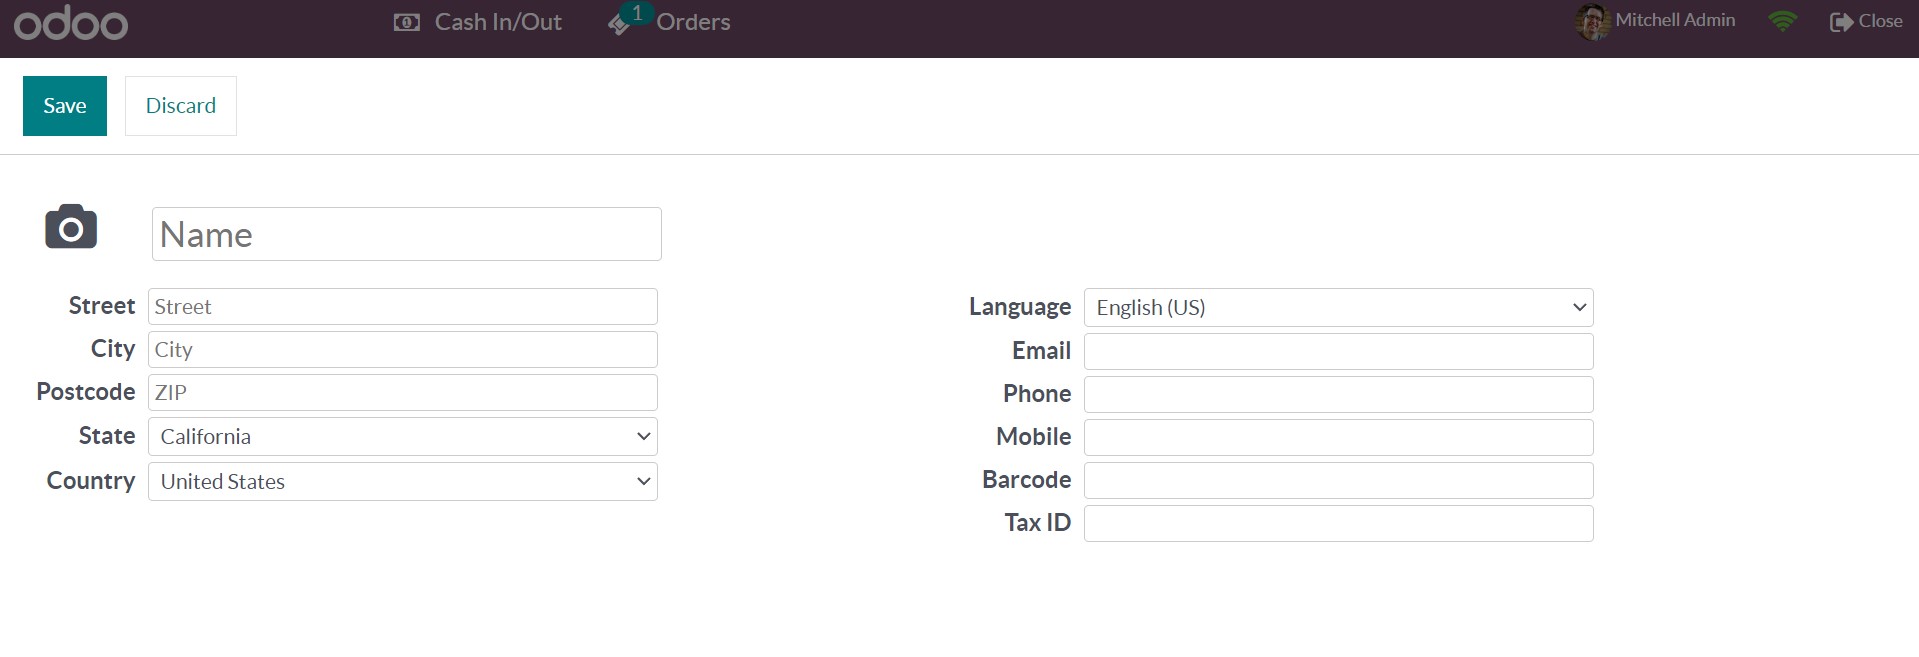
On the customer creation page, you can provide the name of the customer, a profile photo on the image space, street, city, postcode, state, country, language, email, phone, mobile, barcode, and tax ID, respectively. Finally, go to the Save button to get these details added to the new list. On adding the newly created customer, the previous page with the list of customers will be visible. There you will get the Payment option, as shown below.
On selecting the option of Payment, you will be directed to a page.
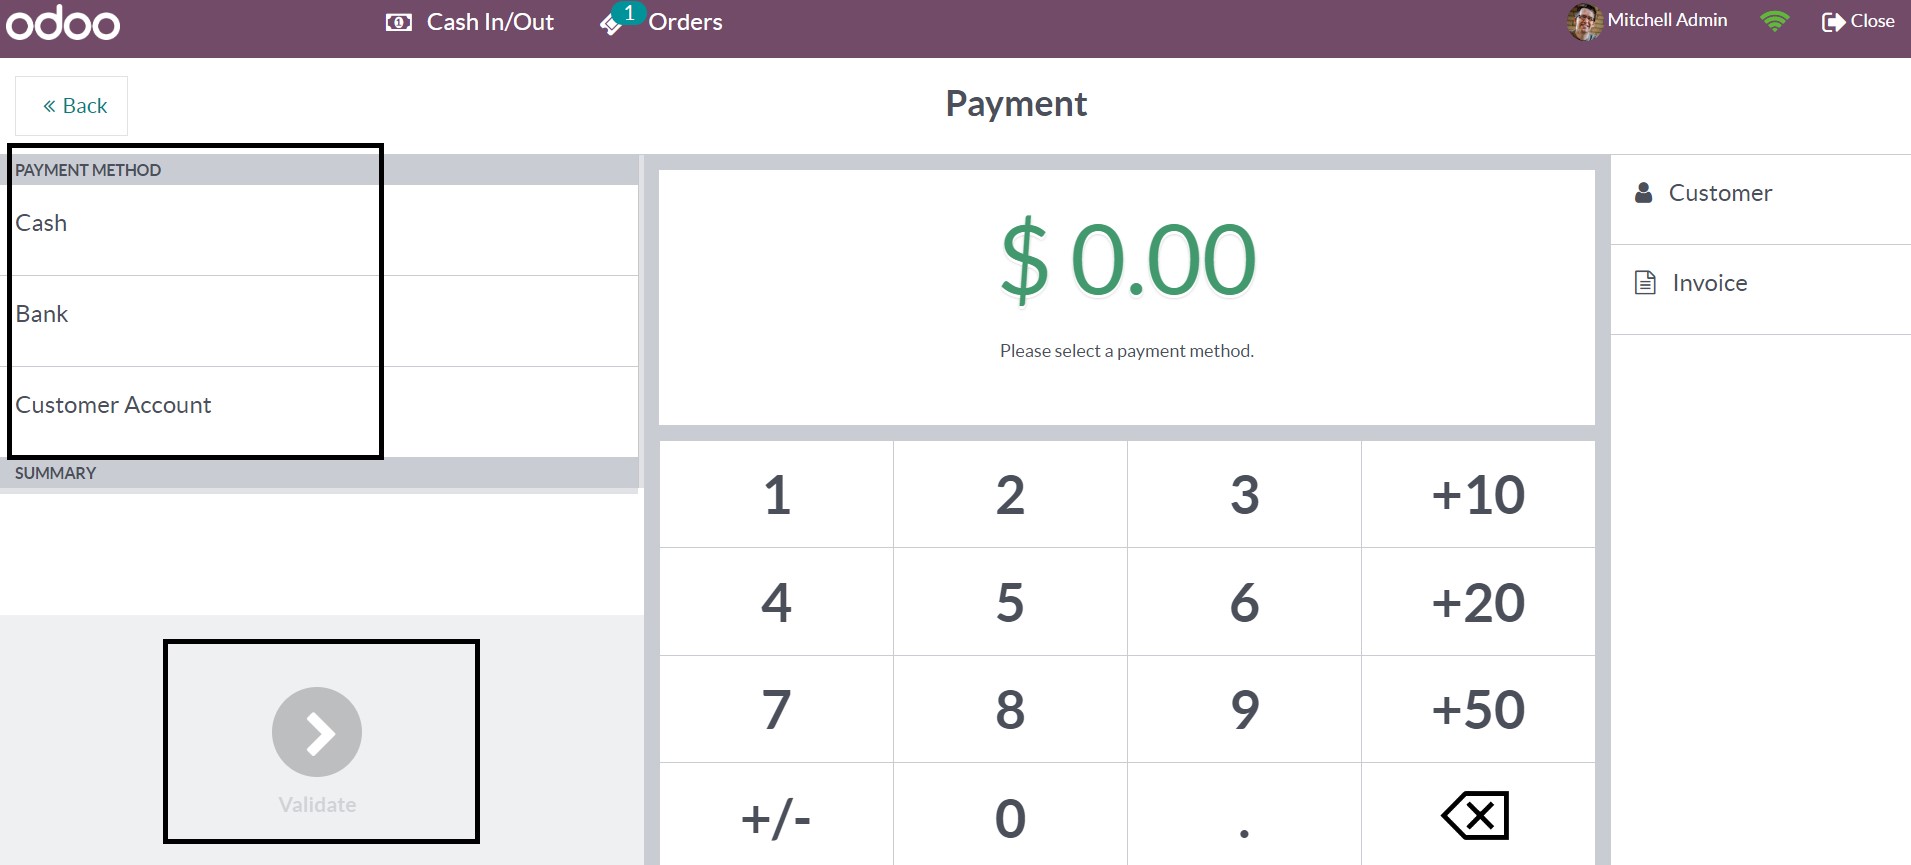
Here, you can make use of the payment methods provided. Among them, the one which is preferred can be selected. On completing the selection of the payment method, you can select the Validate option, as marked in the above image. With the help of the Invoice option, you can create invoices very easily.
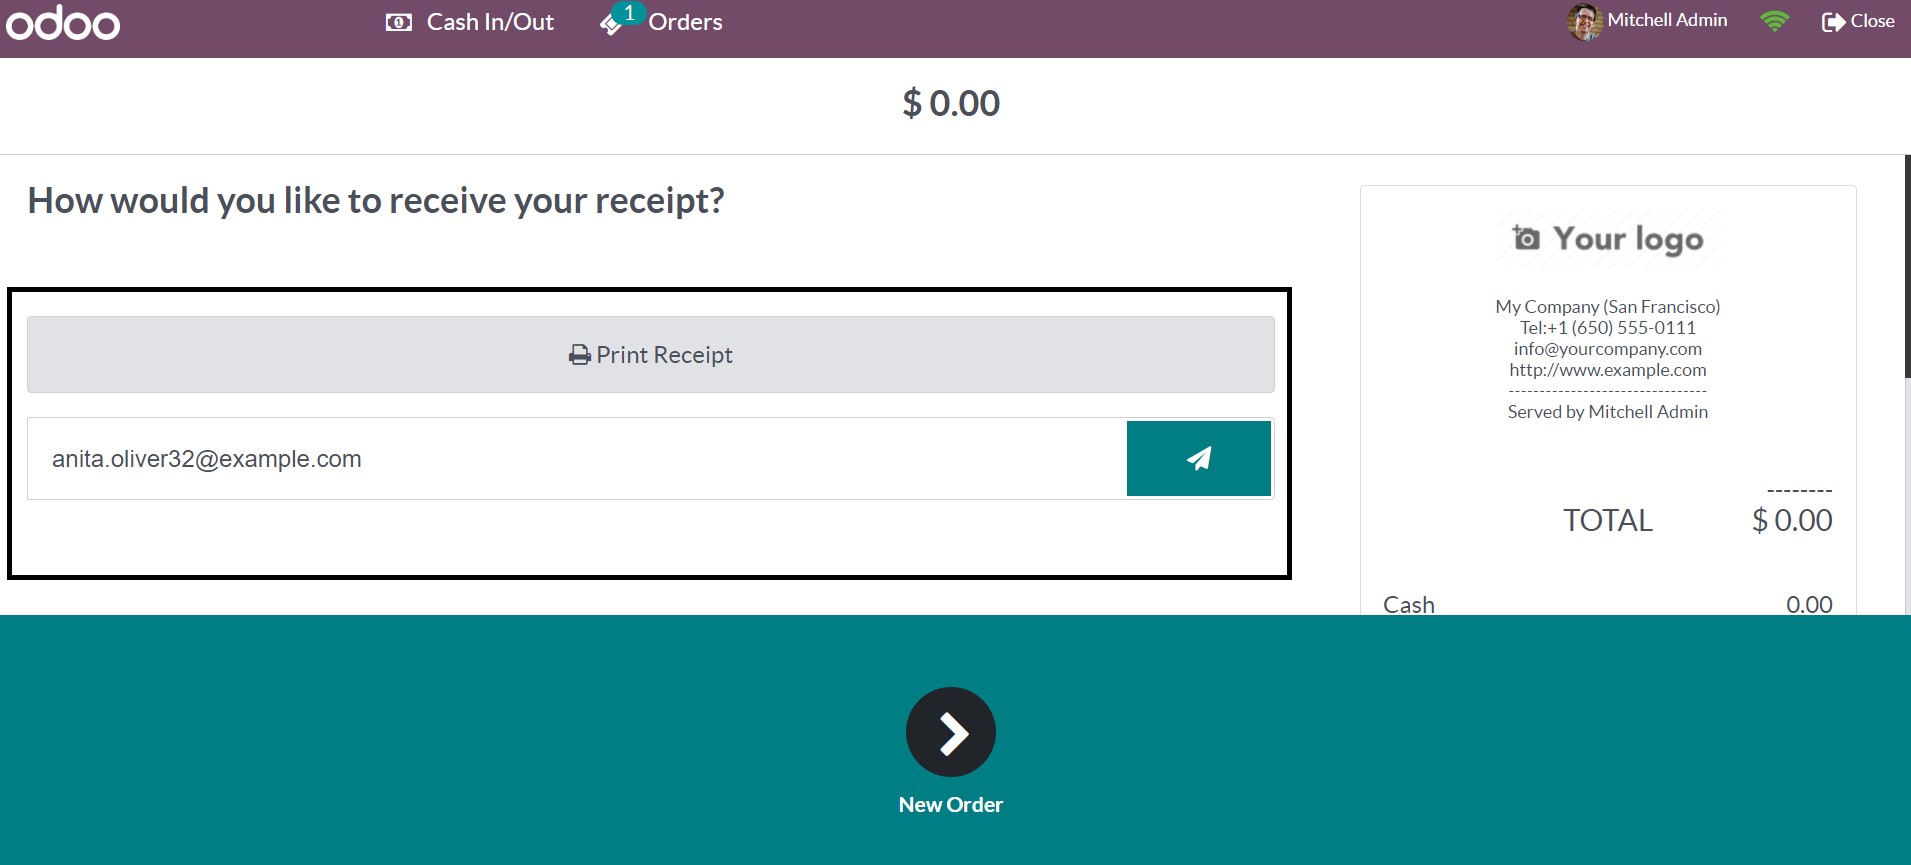
Here, you can make use of the Print Receipt option. The invoice can be easily sent to the customer with the help of the Send icon provided in the window. These are the basic steps to be followed on the Point of Sale operations.
Using promotion programs, companies can easily enhance sales. With the help of such promotion programs, companies can have their new customers and, thereby, new sales orders. Within the Odoo ERP, you have various kinds of promotion programs for the purpose of sales marketing. The option of a promotion program is available under the Products menu.
Discount and Loyalty
On the Point of Sale module, you have an option of discount and loyalty option in order to provide discounts on various products. On selecting the option from the products menu, a window will open, as shown below.
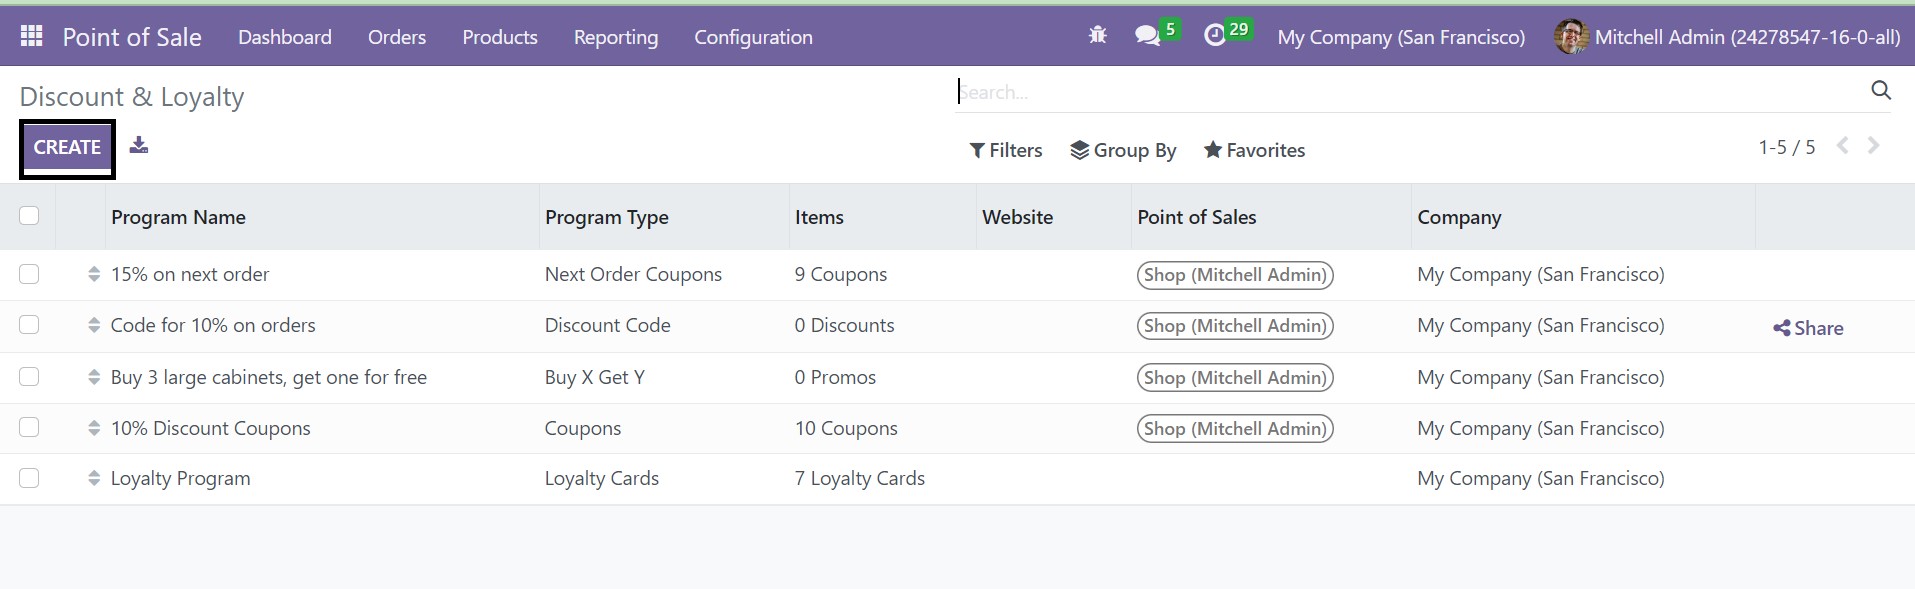
On the discount and loyalty page, you will get the list of already created discounts and loyalty for the specific products. The page has Filters and Group By options to categorize according to our needs. You have the details, such as program name, program type, items, point of sales, website, and name of the company. In order to make a similar kind, you can go to the Create icon, as shown in the image above.
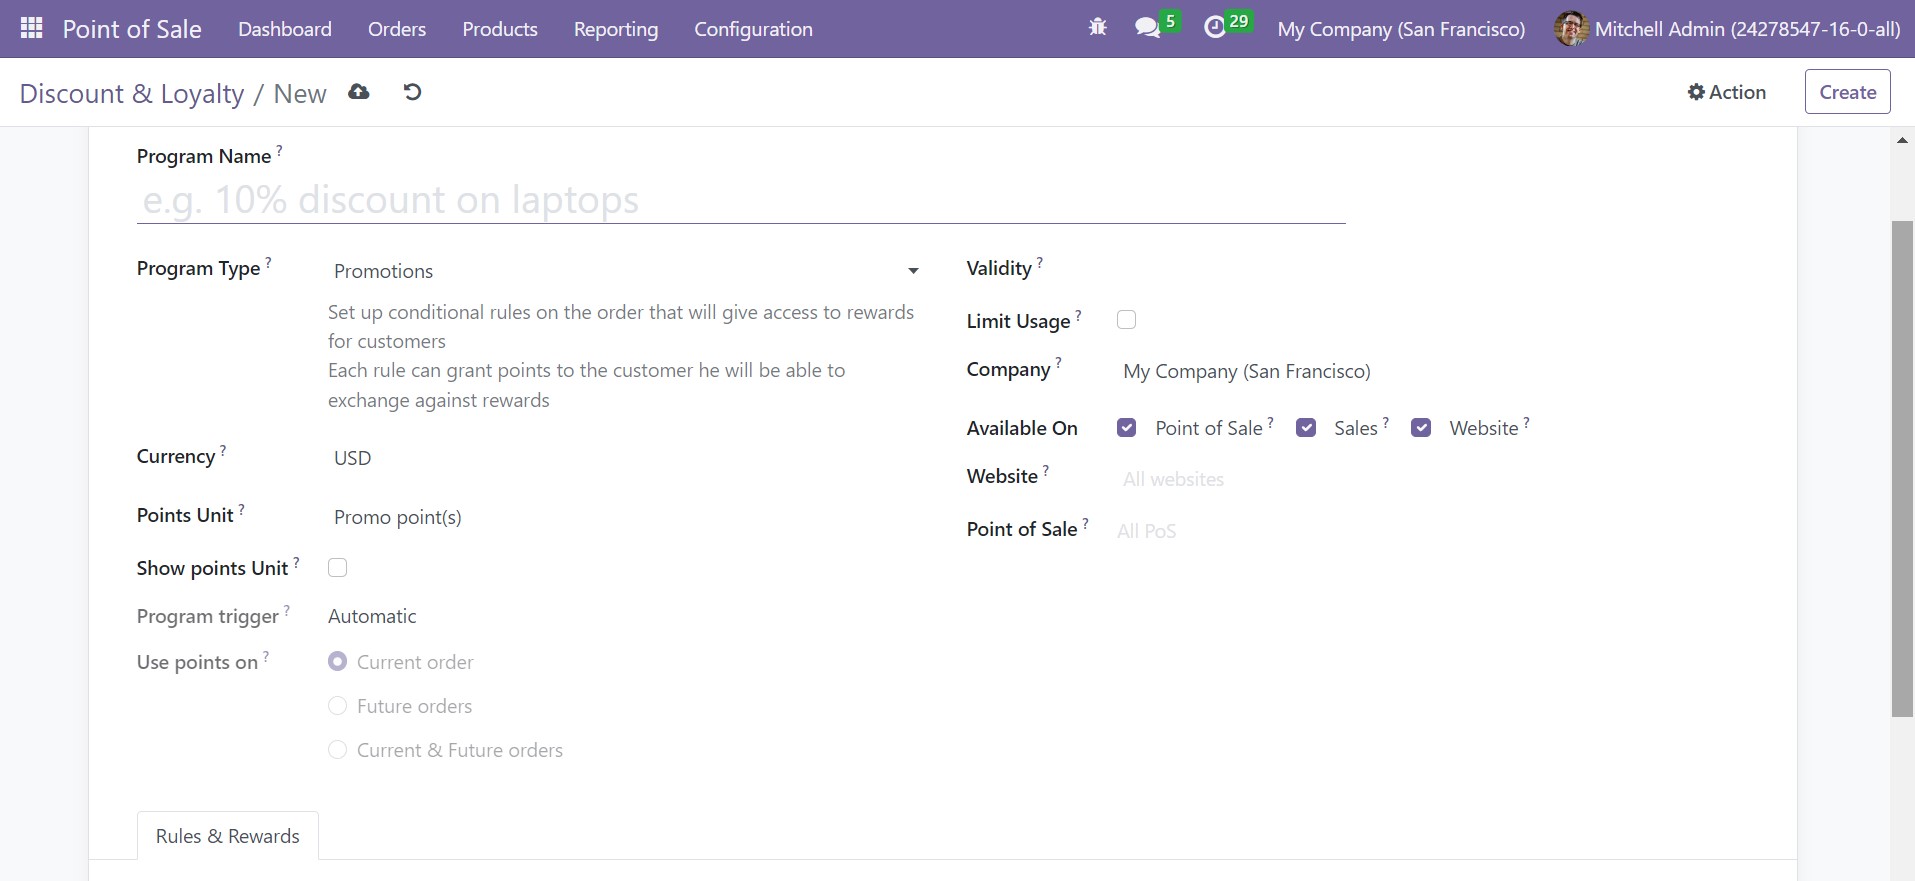
On the creation page, you have to provide the name of the program, and select program type as the coupon, loyalty, promotion, and many more. Select a particular currency, and points unit. Now, you have to trigger the show points sale option. A validity date can be provided in the allotted space. Then, you can activate the Limit Usage option as well. Available options can be set as point of sale, sales, and website. You can provide a website on which it should be published and a point of sale.
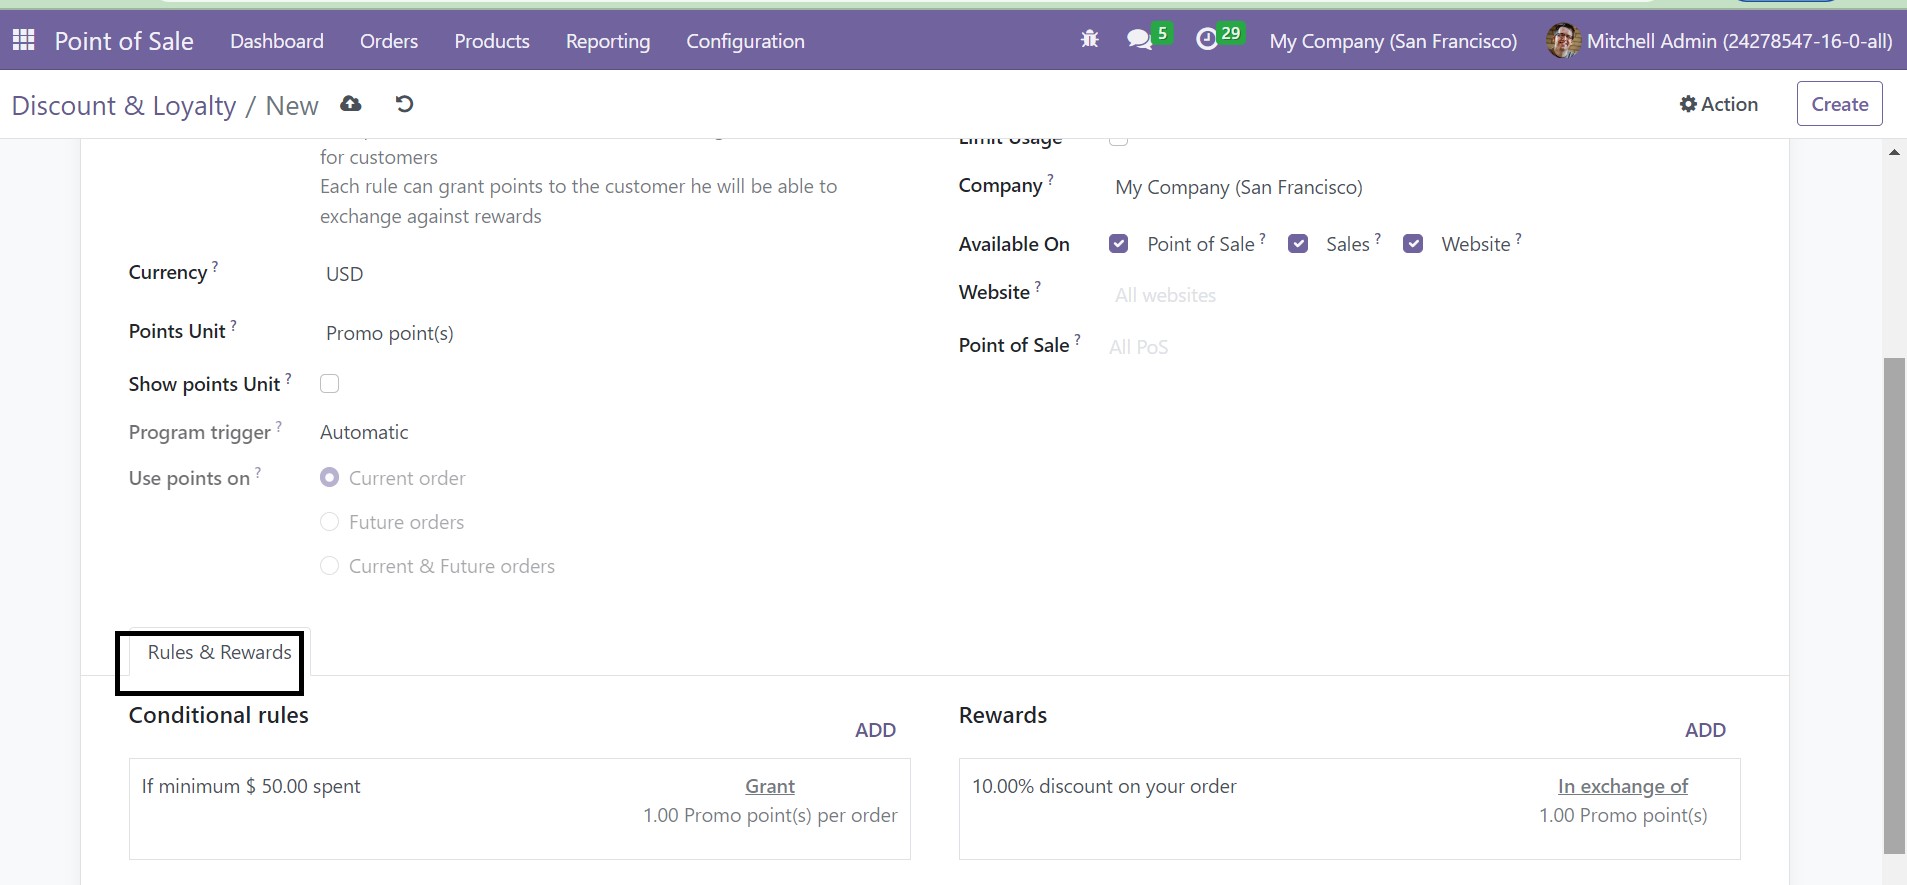
Under the rules and rewards tab, you can add the condition rules with the help of the Add option. Similarly, the rewards can be included in the provided space using the Add icon. Finally, go to the Save icon.
Gift Cards
The gift cards can be created within the Point of sale module very easily. The option is available under the products menu in the point of sale module.
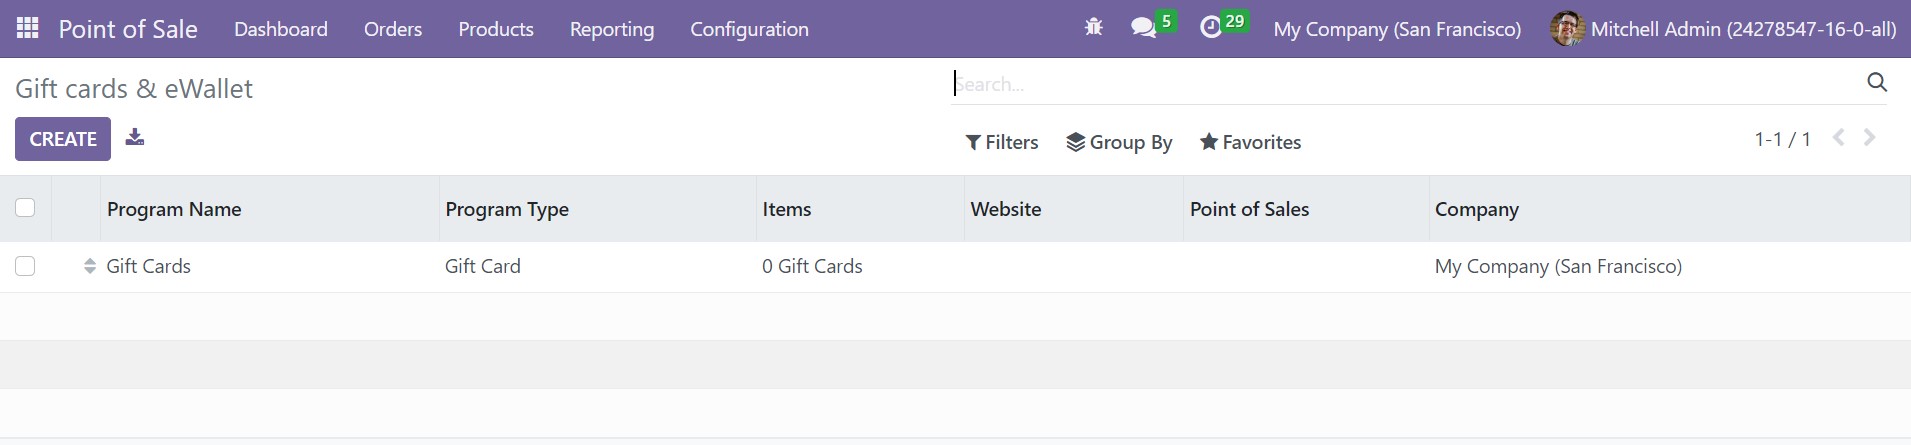
On the gift cards page, you will get the details, such as program name, program type, items, website, point of sale, and company, respectively. You can make use of the Filters and Group By options if required. You can make use of the Create icon to make a similar kind of gift card in the point of sale module.
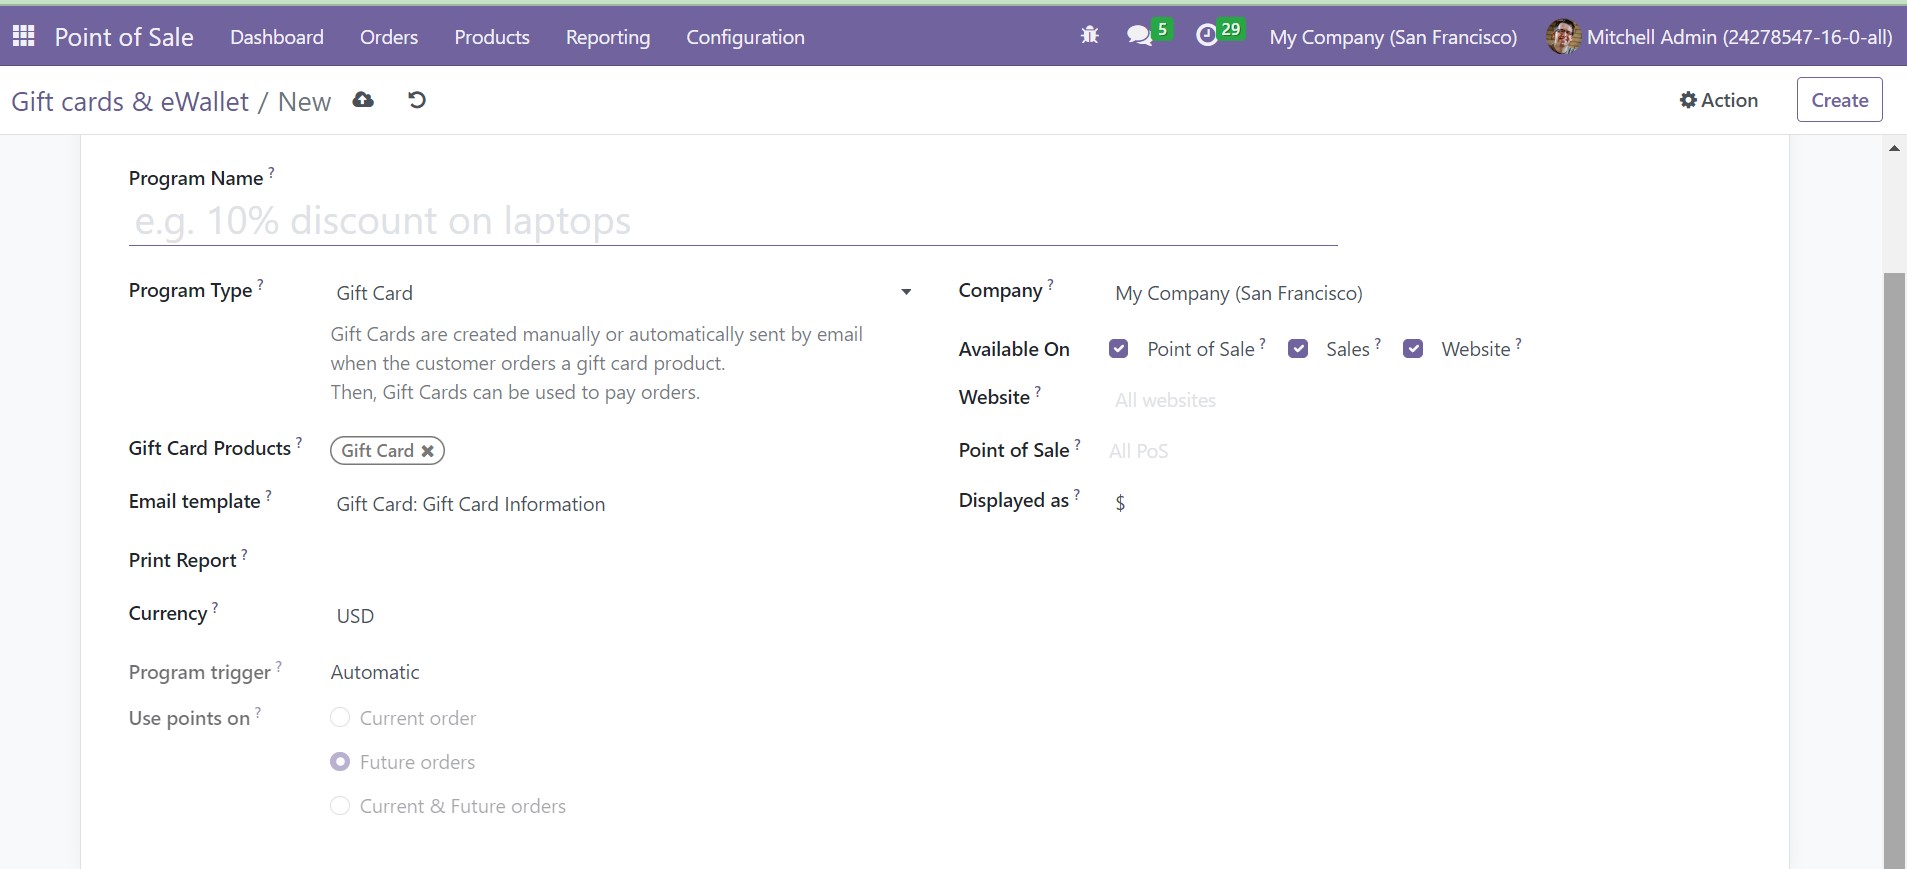
On the gift card creation page, you will get the option of the program name and program type to fill. You can add the gift card products in the allotted space. Then an email template, print report, and currency option can be seen to get filled. You can provide the company name, an available option to trigger as point of sale, sales, and website. You can mention a website, point of sale, and display options as well. Finally, go to the Save icon.
Coins/Bills
Within the point of sale module, you can soon make coins or bills. The option of coins or bills can be seen in the Configuration menu itself. On the coins/bills page, you will get the list of names with coins/bills value and point of sales options.
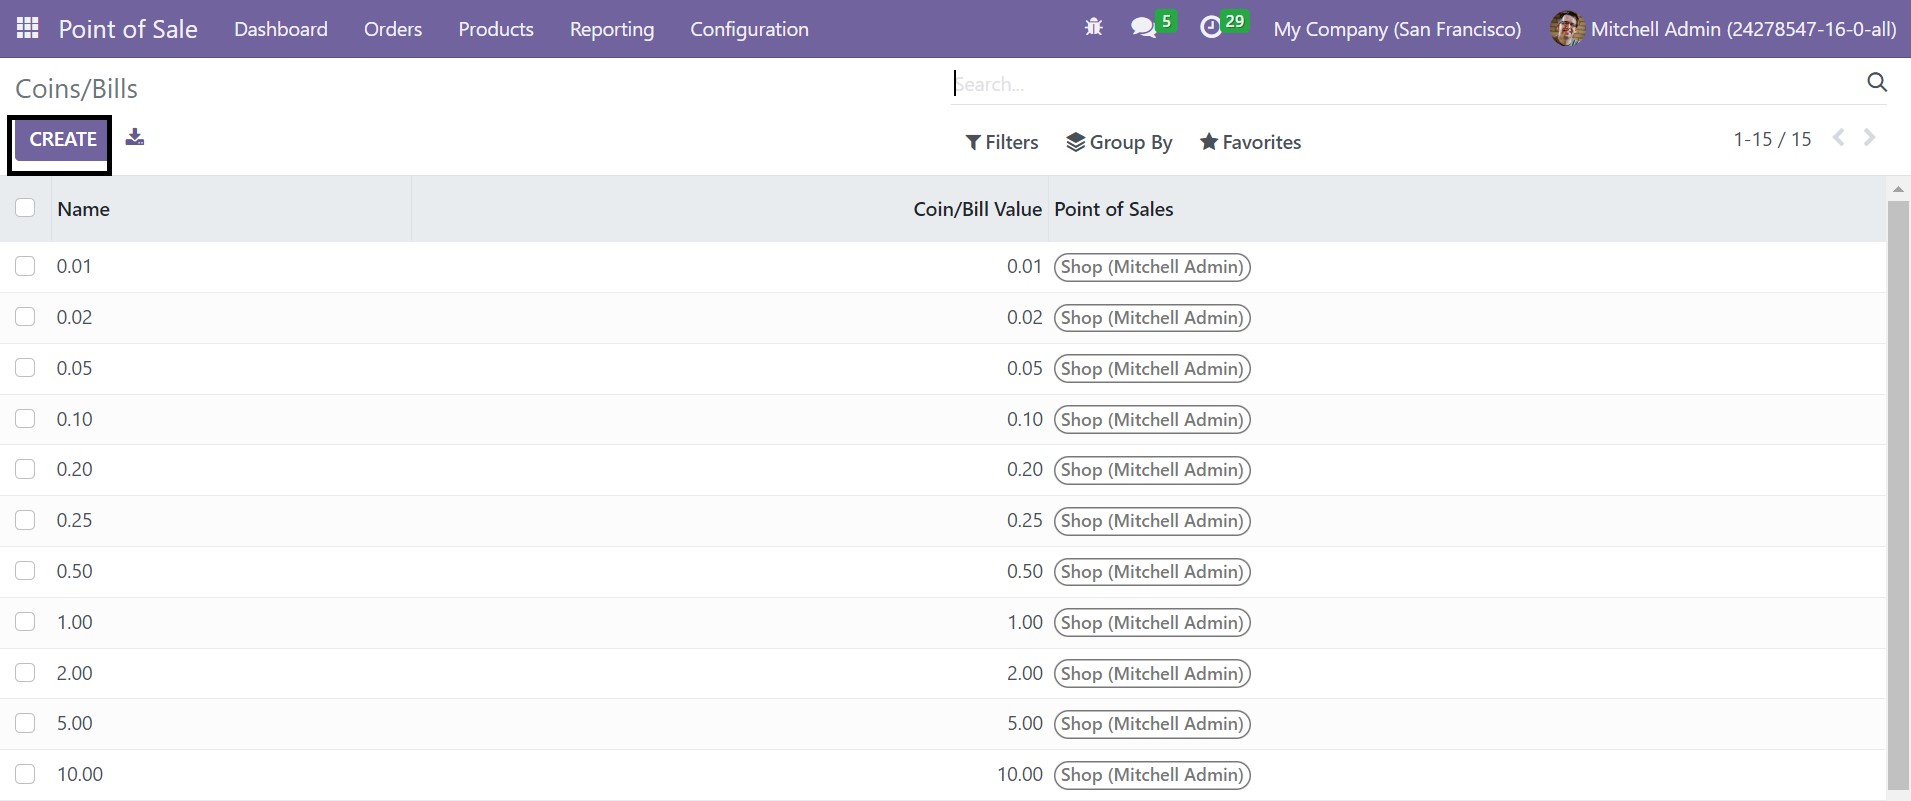
In order to make a similar kind of coins or bills, just go to the Create icon, as shown in the image above.
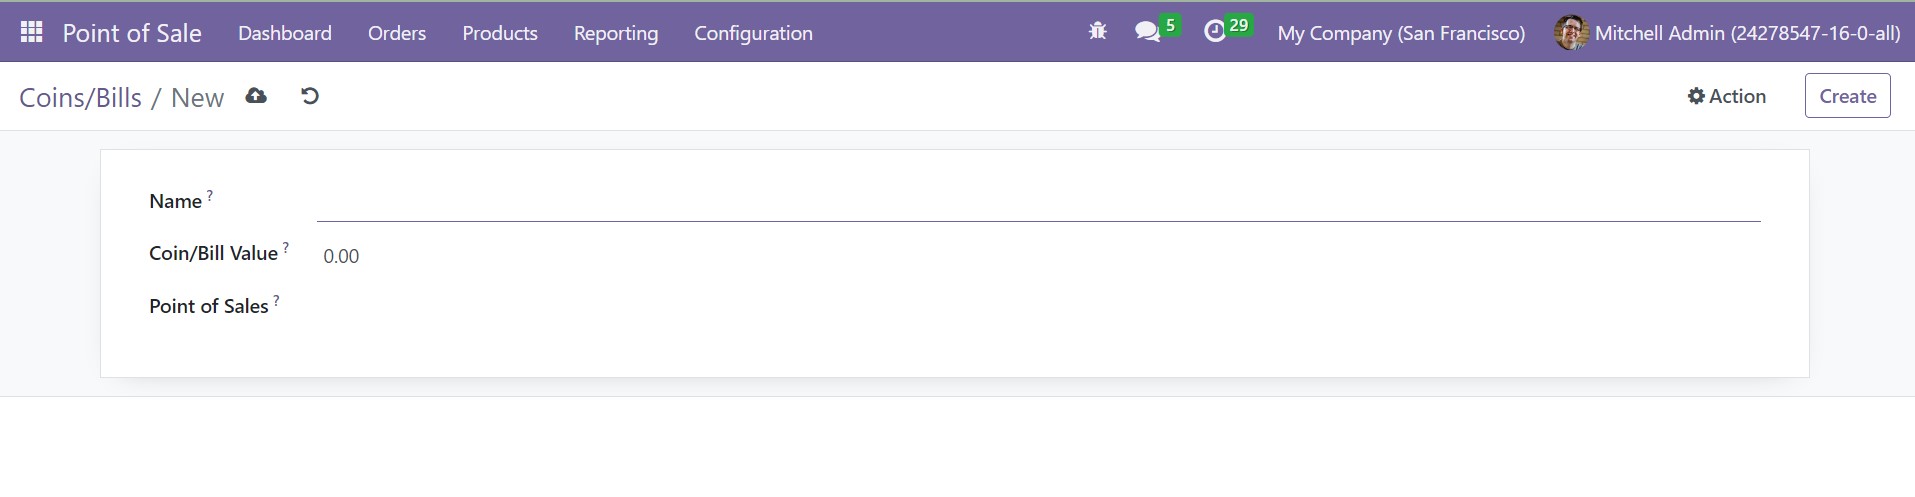
Here, as you can see, you have space to mention the name, coins/bills value, and point of sale, respectively. Then, as usual, go to the Save icon to get the newly created bills/coins to get added to the already created list.
Floor Plans
The floor plans option in the configuration menu helps you to configure various plans for the floor. The option can be taken from the configuration menu itself.
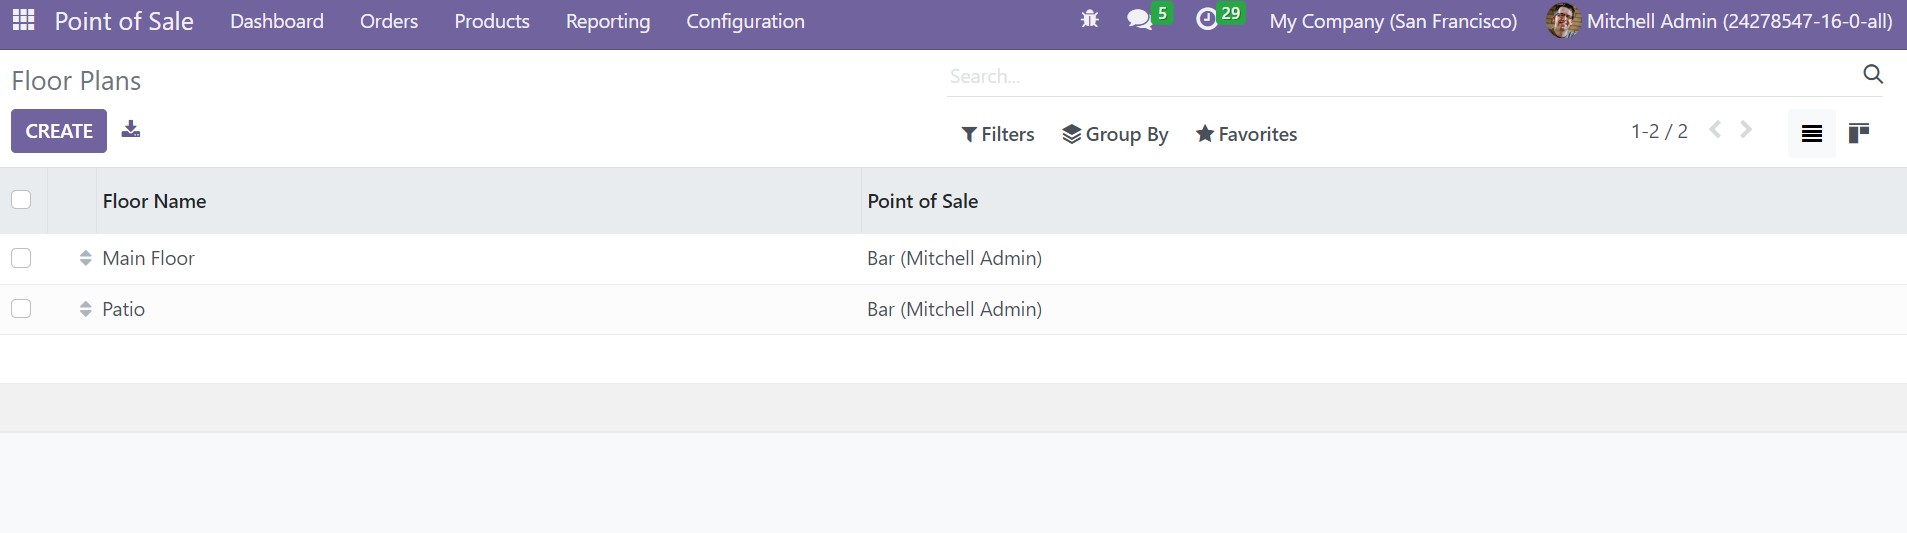
As in the image, you will get the list of created floor plans, which include details, such as floor name and point of sale. To make a similar kind of plan, go to the Create option provided on the page.

On the floor plan creation page, add a name for the floor plan and point of sale. You can set a background color as well. With the help of the Add a Line option, you can include a new plan with the table name and seat shape.
Settings
The settings option under the configuration menu of the point of sale module provides the users with lots of advanced options. Some of the options are discussed in the early pages.
Accounting
The accounting tab helps you to provide the default sales tax. The option will be available in the Configuration menu.
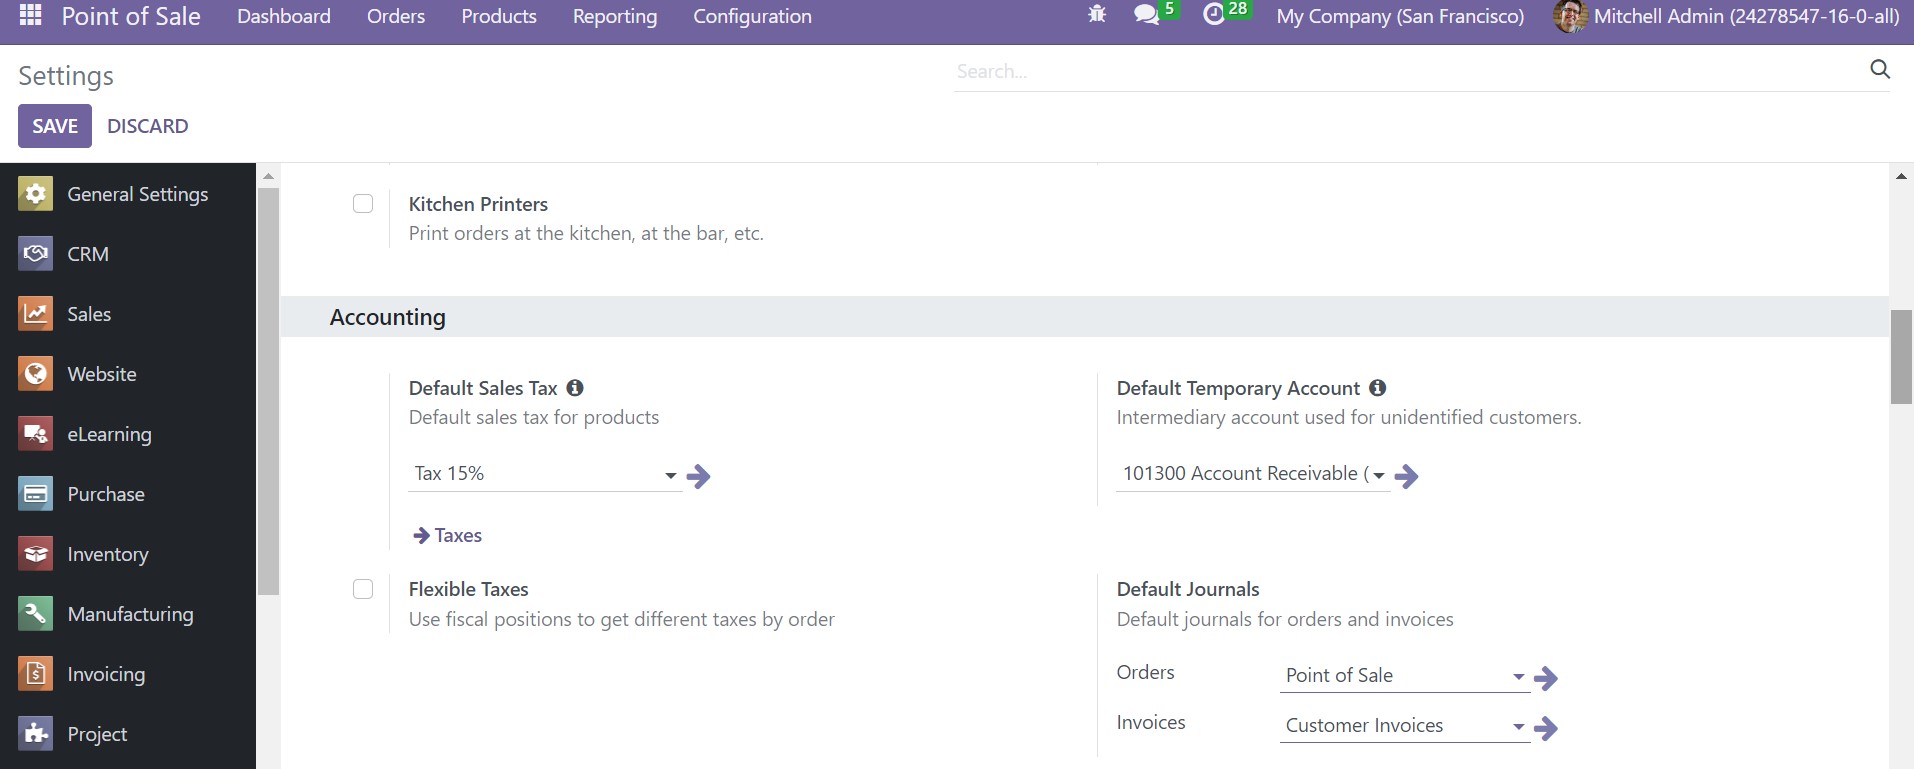
The arrow icon near the tax option will provide a window where you can find lots of other options related to tax. The Tax options can be opened from the configuration menu also.
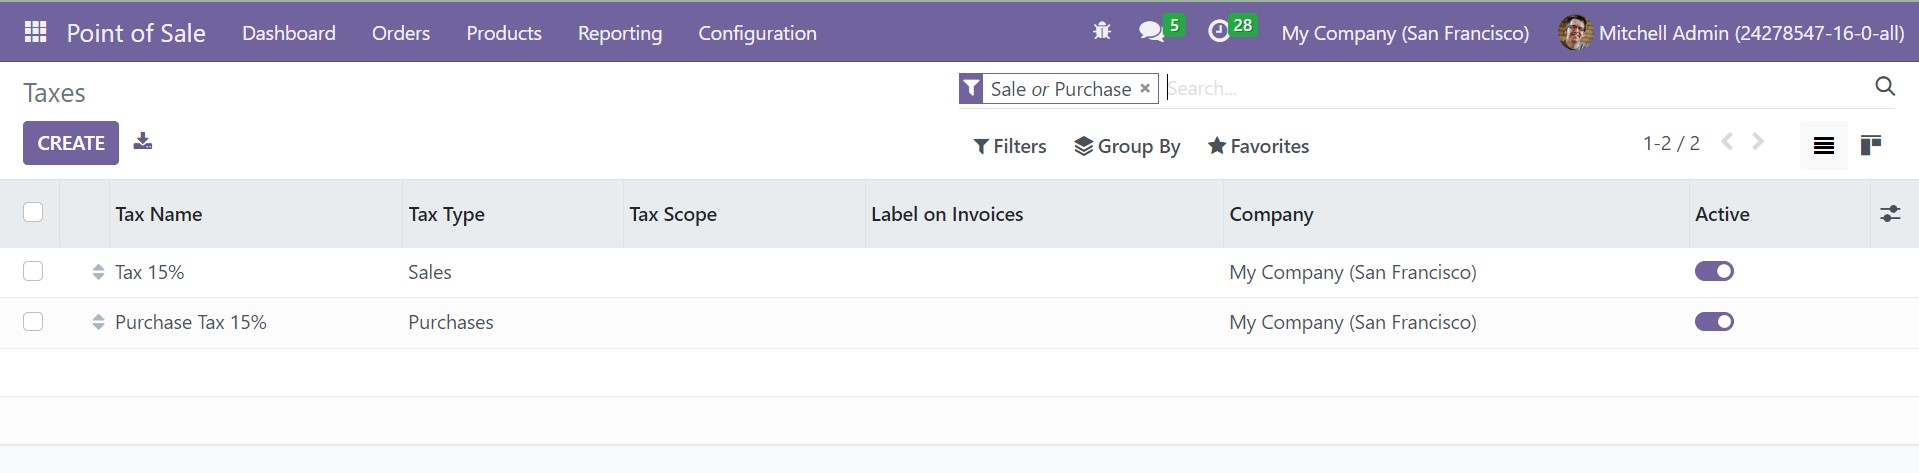
On the tax page, you will get the list of all the configured taxes on this page. The page consists of tax name, tax type, tax scope, the label on invoice, company, and an active option to get activated. To create a similar kind of tax, go to the Create icon.
You can also create a similar kind of tax from the Tax option provided in the Configuration menu, where there is a New option to make a similar kind of new tax, as shown below.
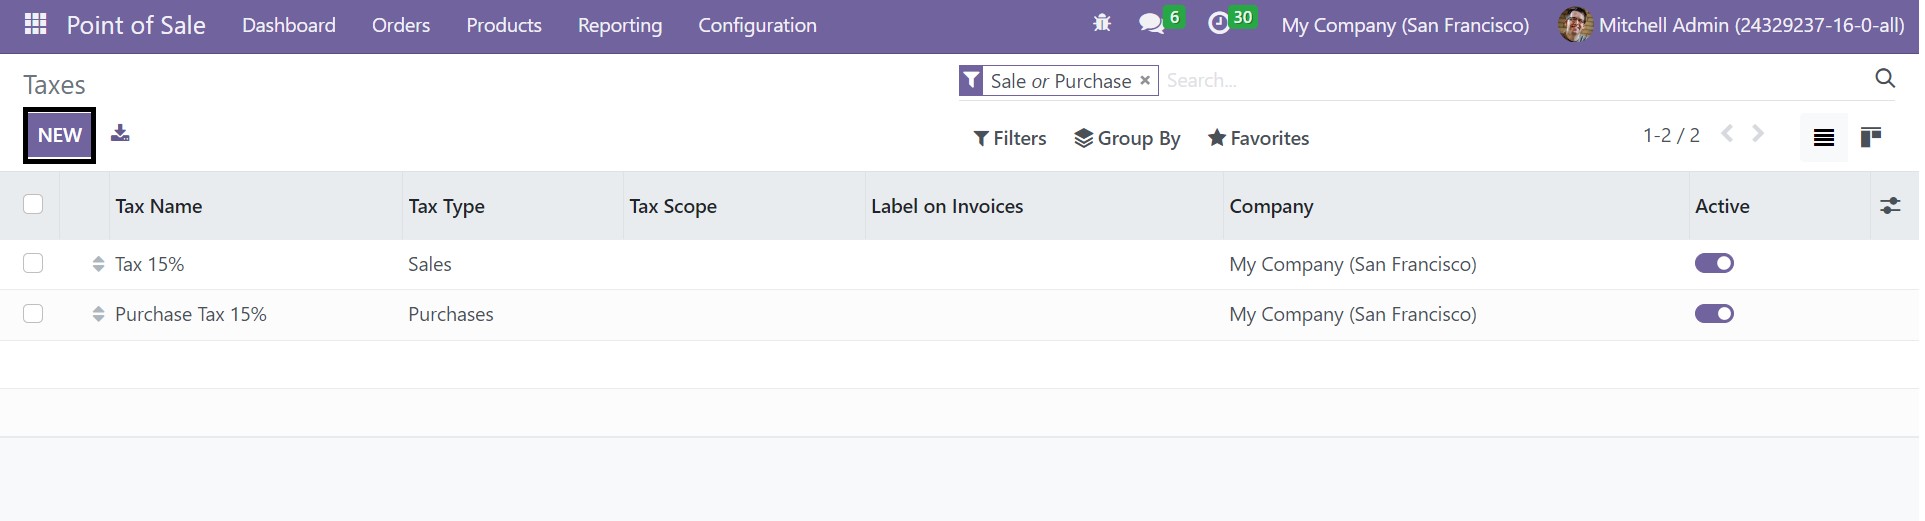
On the page, you will get the details, such as the name of the tax, the type of the tax, the scope of the tax, the label on invoices, and the name of the company, respectively. On opening the new page to create a similar kind of tax, you will get some fields to get filled.
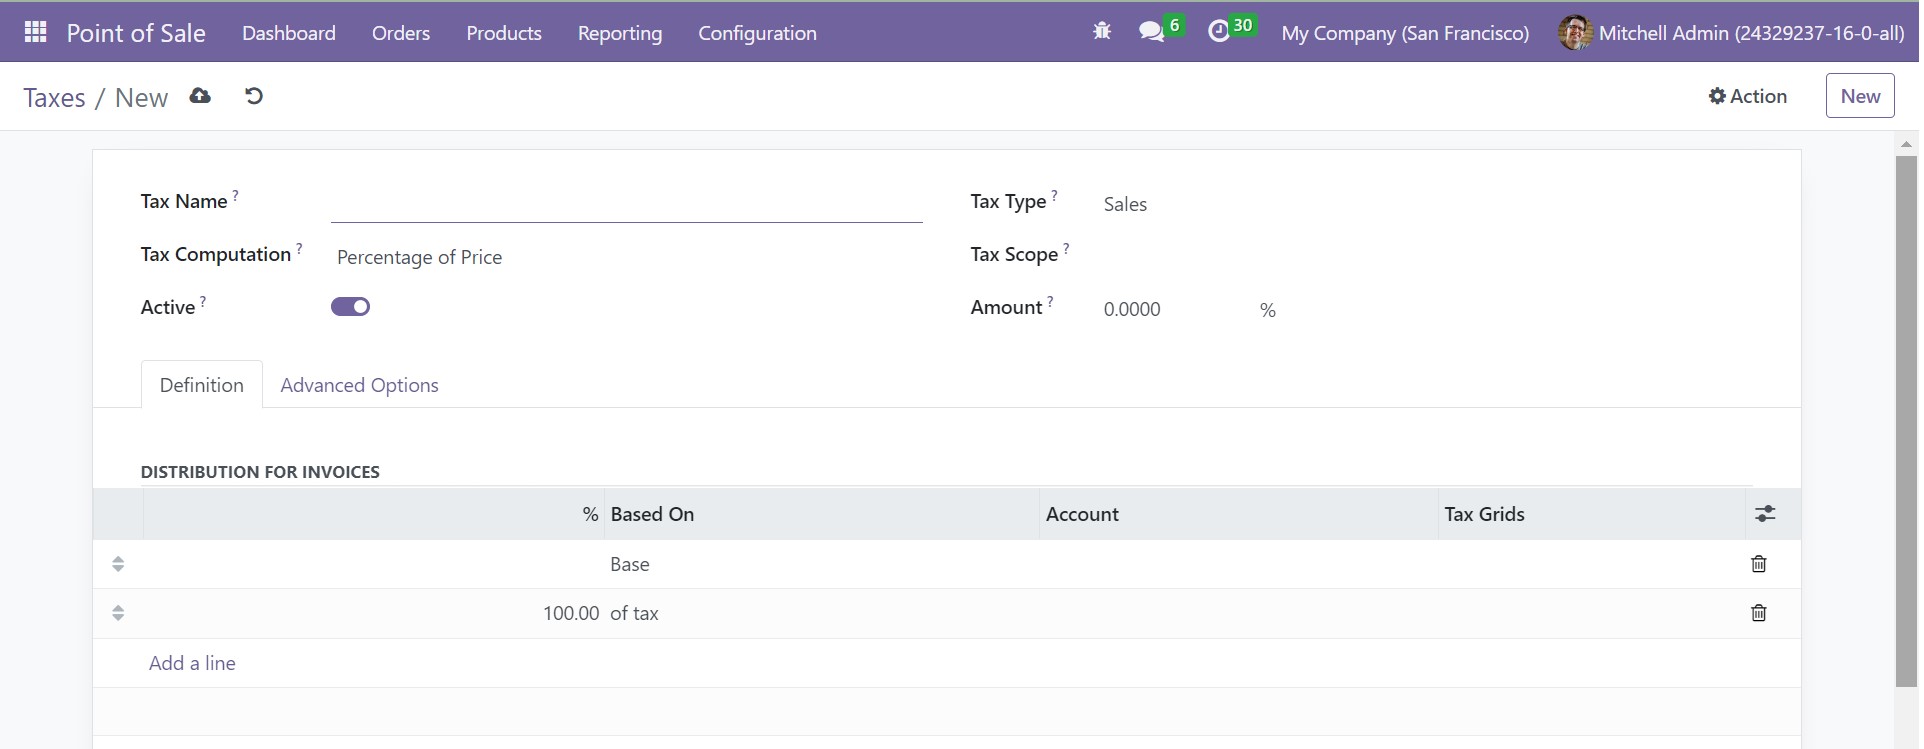
Here, you have to provide the name for the tax, and select a type of tax, which decides whether the tax is selectable or not. The tax types include sale, purchase, or none options. You may go to any Tax Computation process, which are Group tax, tax with a group of sub-taxes, Fixed, which makes the tax constant even if the price change, Percentage of price, which means the tax price is a % of the cost, Percentage of Price tax Included, which means the tax cost is a category of the price, and the Python Code, which is used for the purpose of computation of the tax.
You may select a tax scope on particular goods and services. This option will control the use of taxes on a particular type of product alone. The amount of the tax can be provided in the Amount field. You can trigger the Active icon in order to activate the new tax.
Below the Definition tab, you have the distribution for invoices option, where you can include the distribution of the newly created tax with the help of the Add a Line option. The distribution can be made used during the tax used for a particular invoice. And, under the Distribution for credit notes, you can provide the distribution of credit notes with the help of the Add a Line option, as done before. The option can be used when the tax is being refunded.
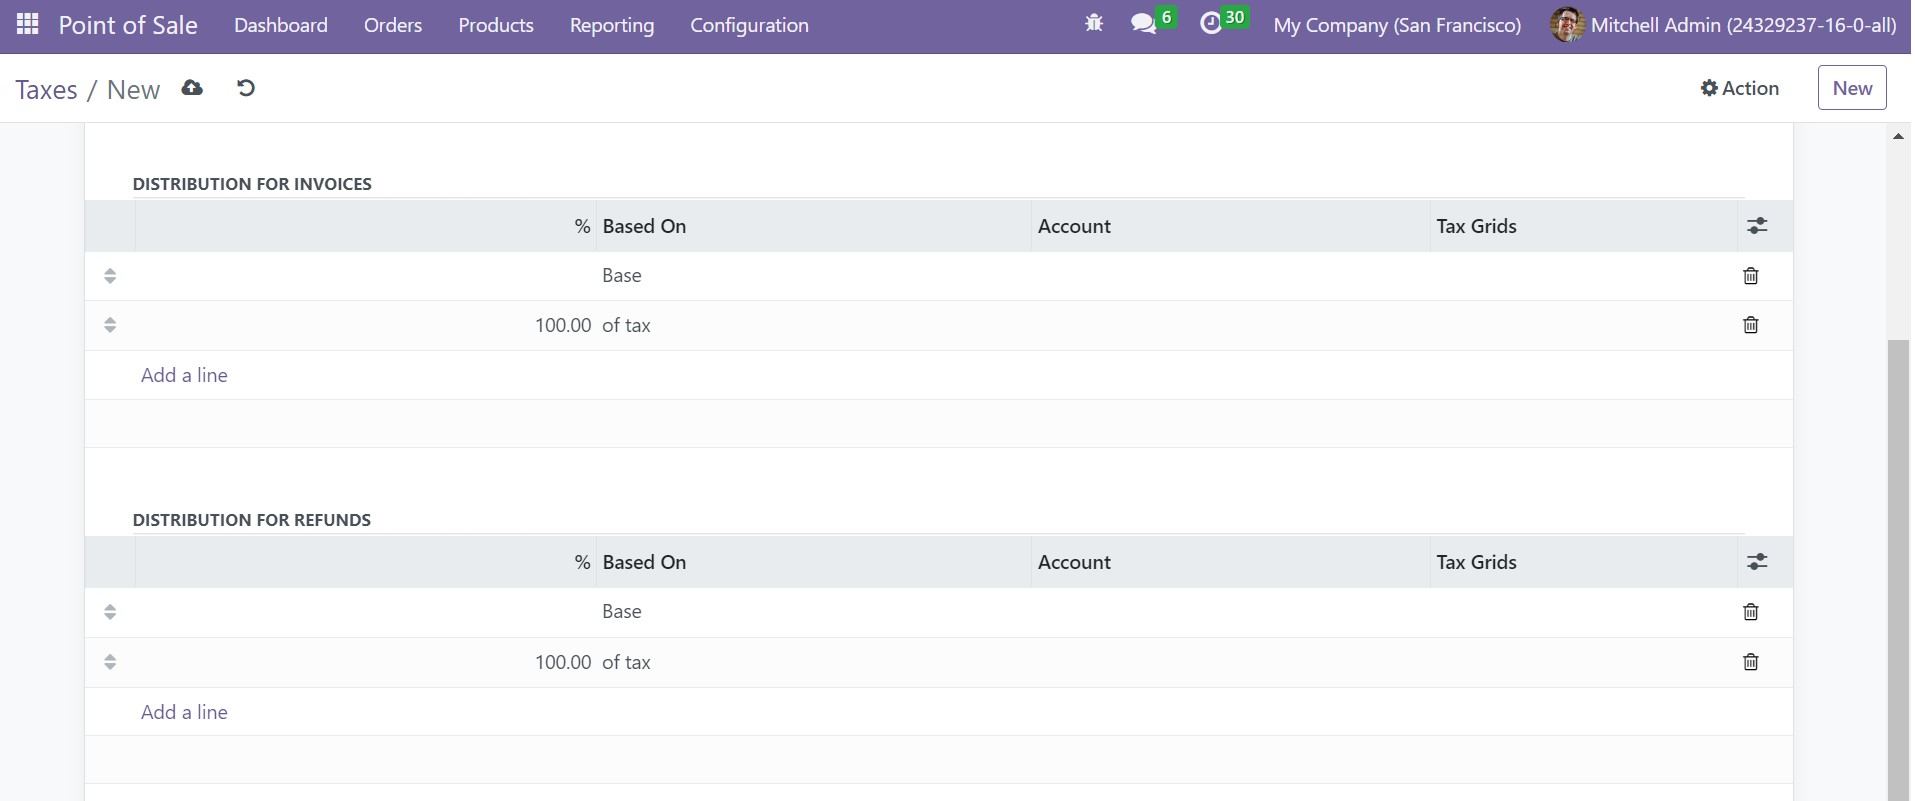
Now, below the Advance options, you will get space to provide the Label in Invoice and Tax groups options to fill.
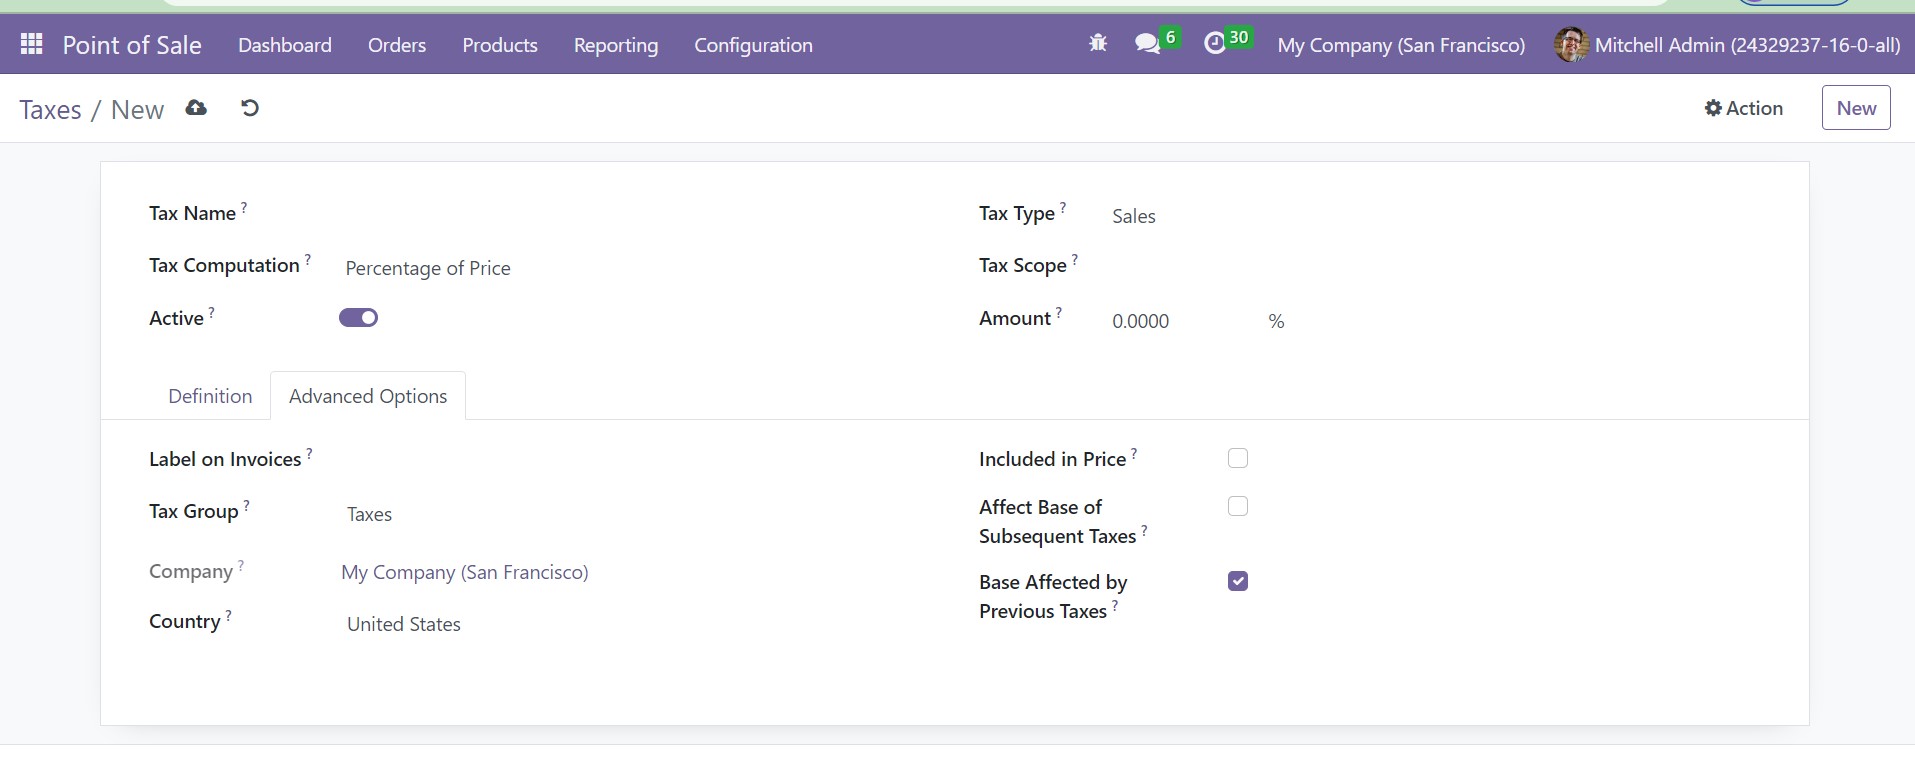
Below that, the company and country can also be mentioned. On triggering the Included in Price option, if the price used for the product and invoice is included in this particular tax. On activating the Effect Base of Subsequent Taxes, the particular tax with higher sequence more than this one wll be affected. On triggering the Base Affected by Previous Taxes, the tax which has a lower sequence will be getting affected. Finally, go to the Save icon to get this newly created tax to be made.
Payment Terminals
You have got a payment terminals option in the Settings menu of the Point of Sale module. This option helps you to make the transactions easy during the payment process.
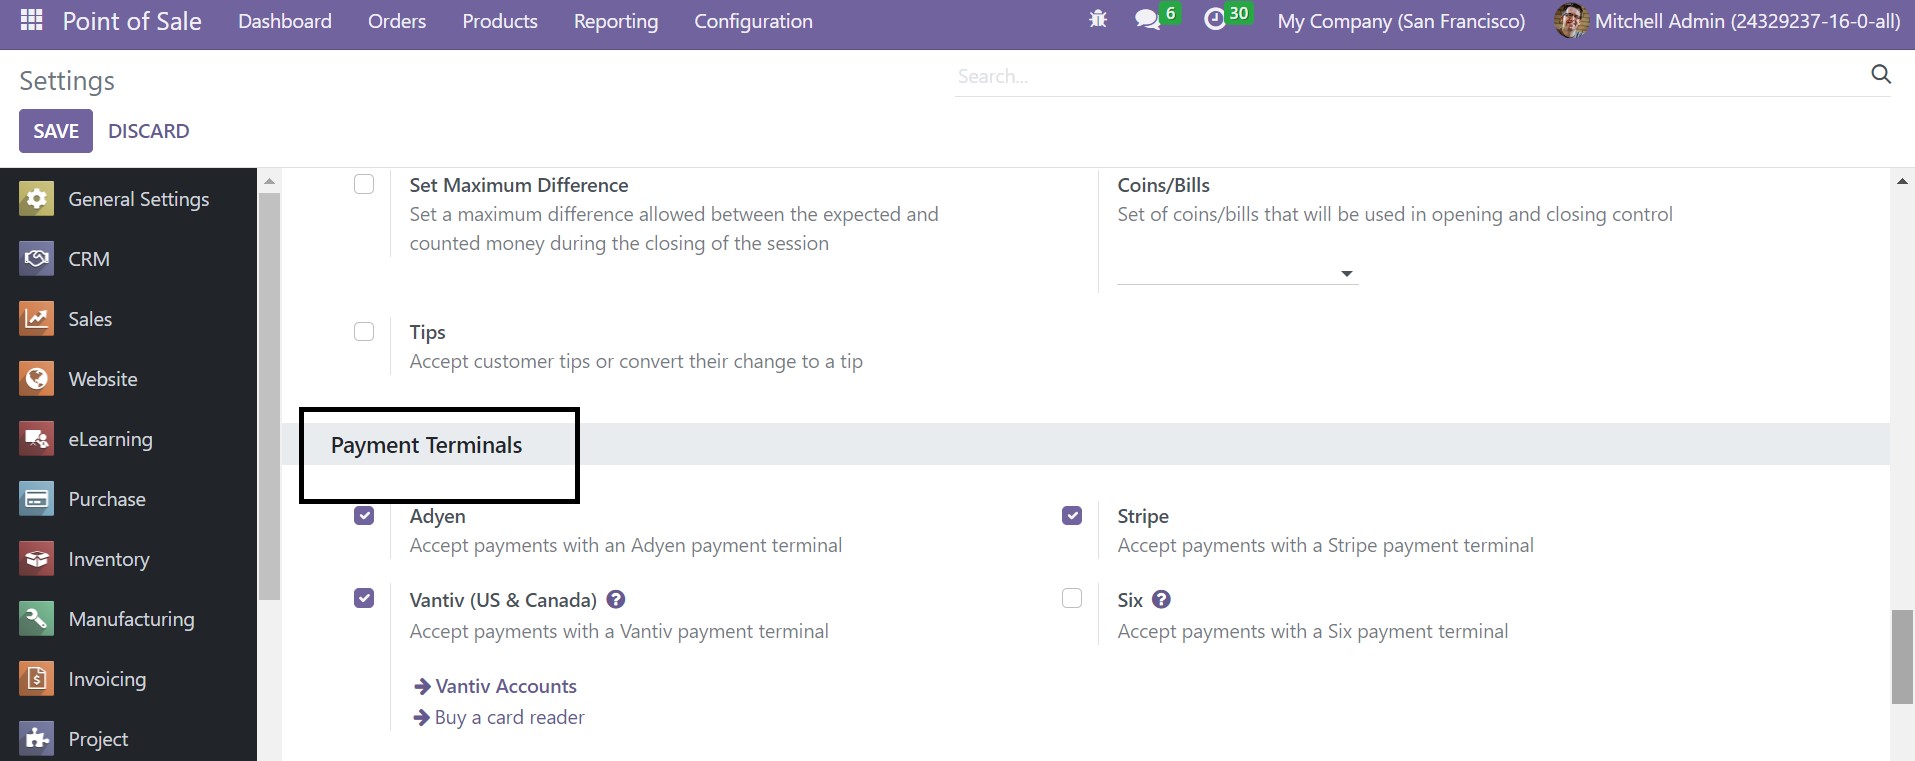
As you can see on the image, you have Ayden, Stripe, Vantiv, and Six payment terminals available on the page to get activated. In order to carry out the process of payment. You will get the Vantiv option from the Configuration menu as well.
Inventory
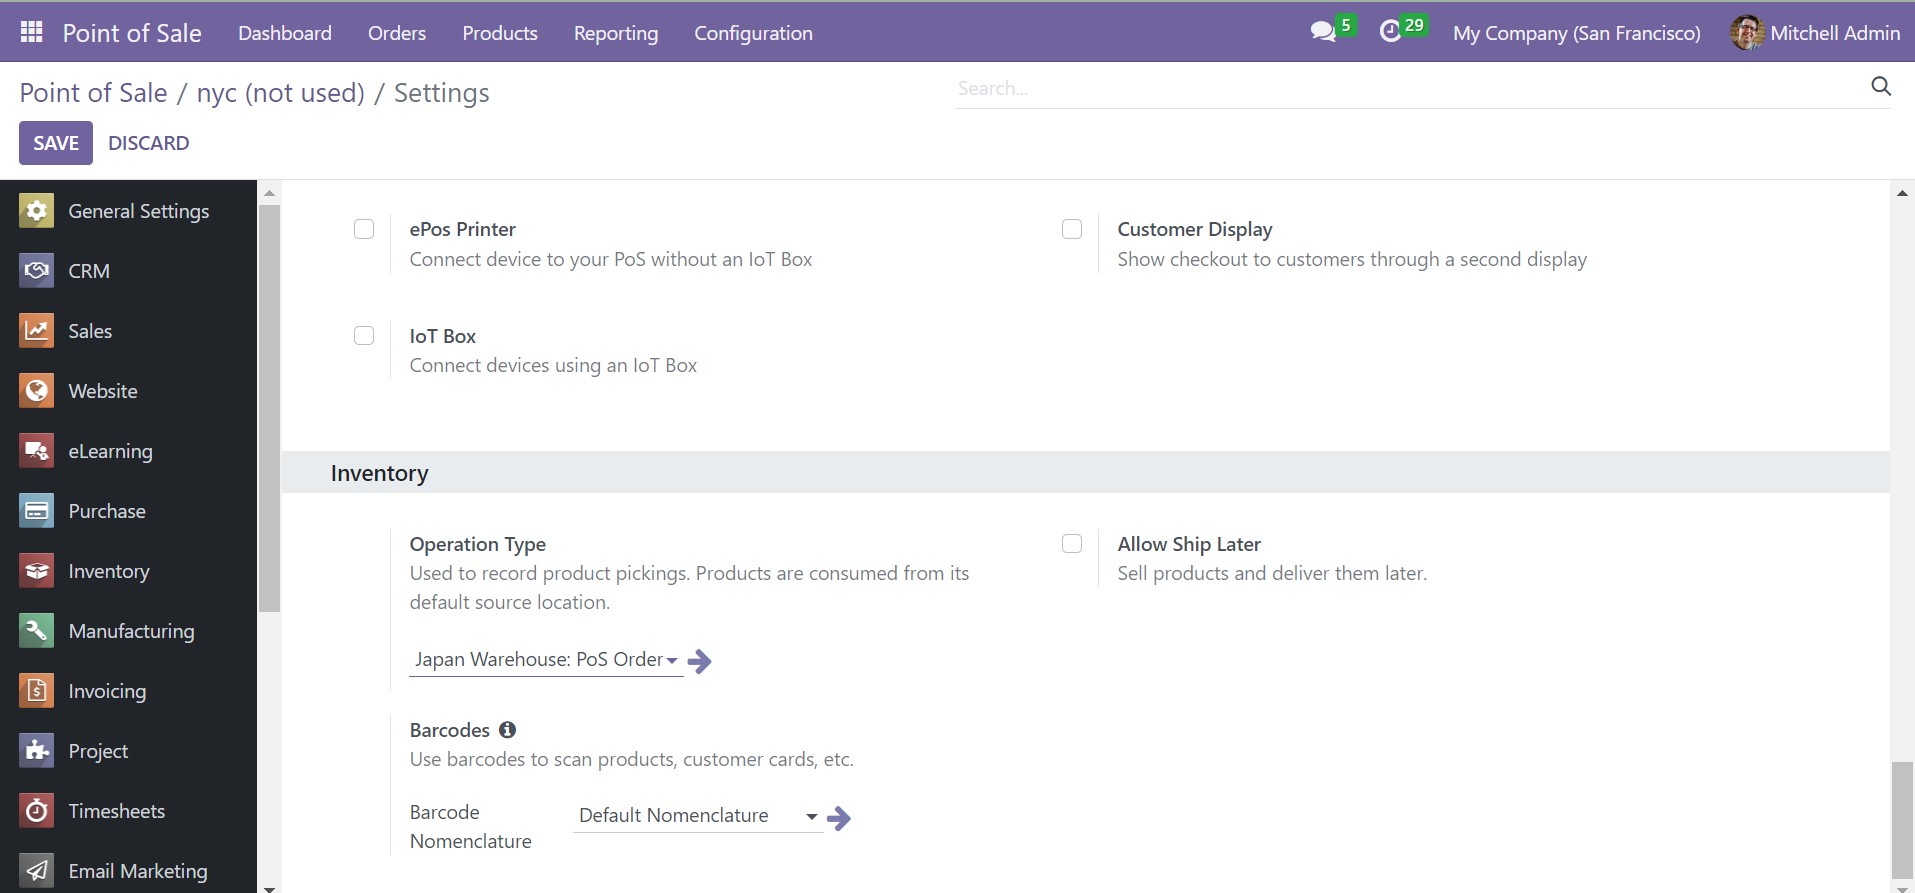
There is an option for inventory under the Settings menu of the Point of Sale module. This option helps you in updating the number of products in stock.
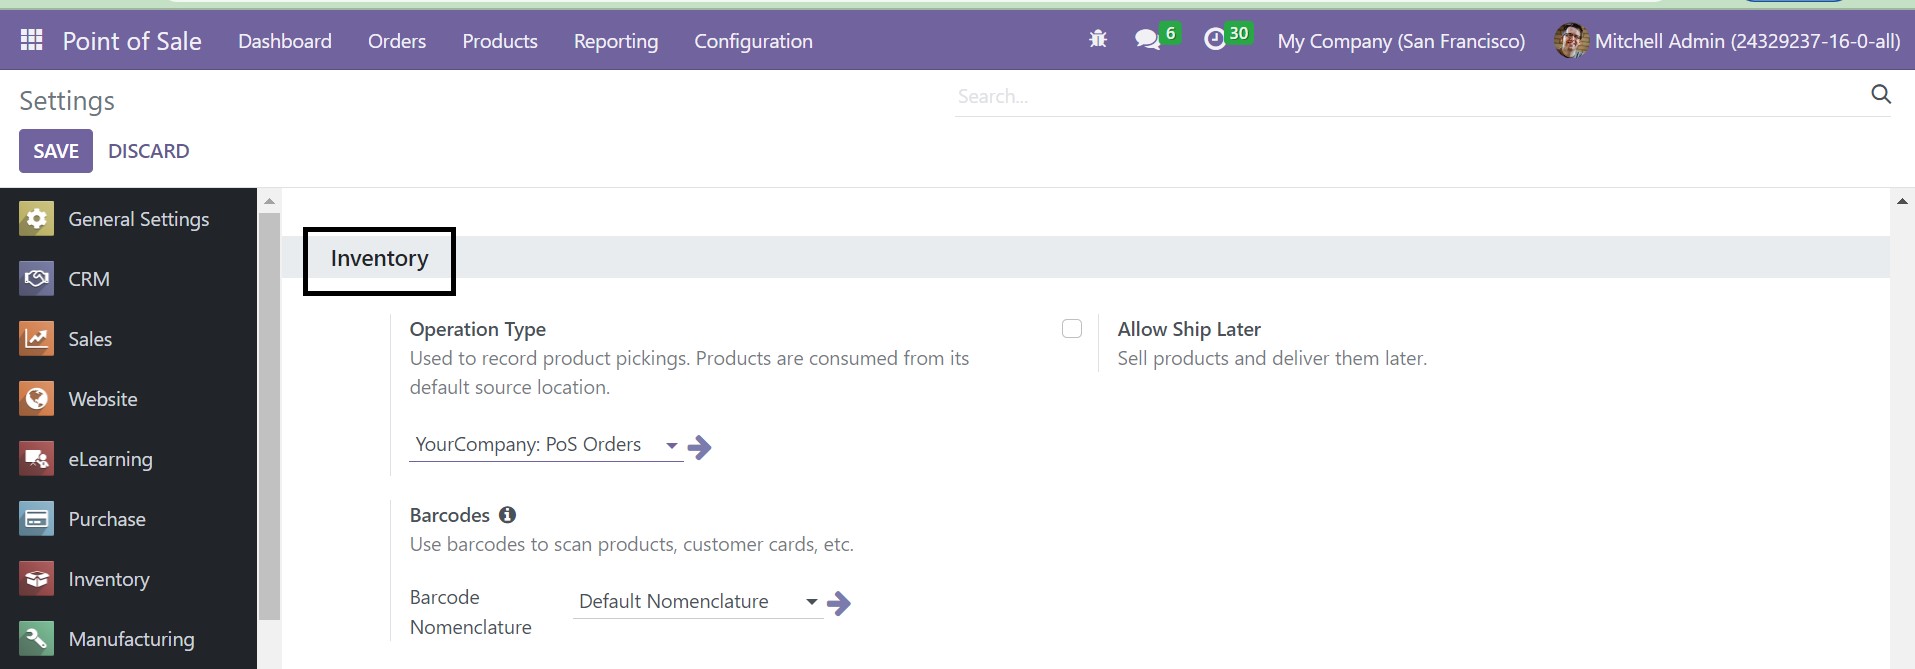
Here, you will get the Allow Ship Later option to get activated in order to sell the product and deliver them later. And there is a Barcode Nomenclature as well. Another option in the inventory tab is Operation type, which is used to keep the record of product pickings.
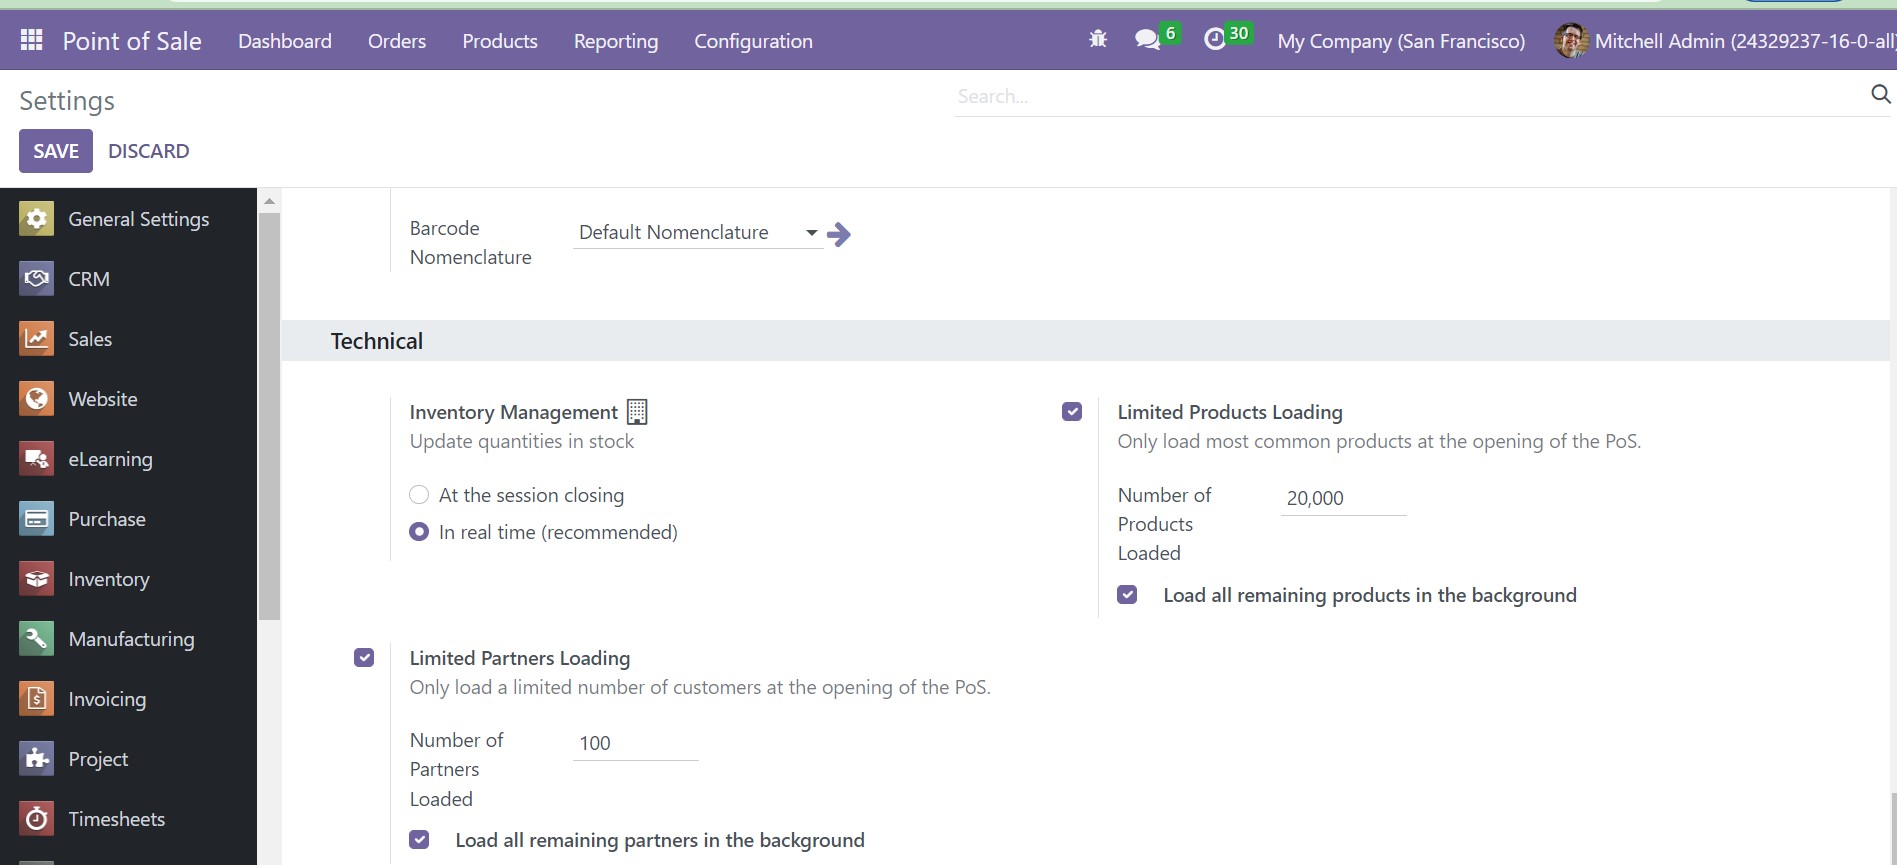
Below the Inventory opinion in the Settings, you have the Technical option, where you have two methods, such as at the session closing and in real-time. At the session, closing means, the picking is done on closing the entire session. And in real-time, the picking will be done on its own when each order is sent to the server.
Reporting
Using the Reporting option in the Point of Sale module in the Oodo ERP Software, you can get various reports. The data can be easily analyzed and managed using these reports. You will get reports on Orders, Sales Details, and Session Reports.
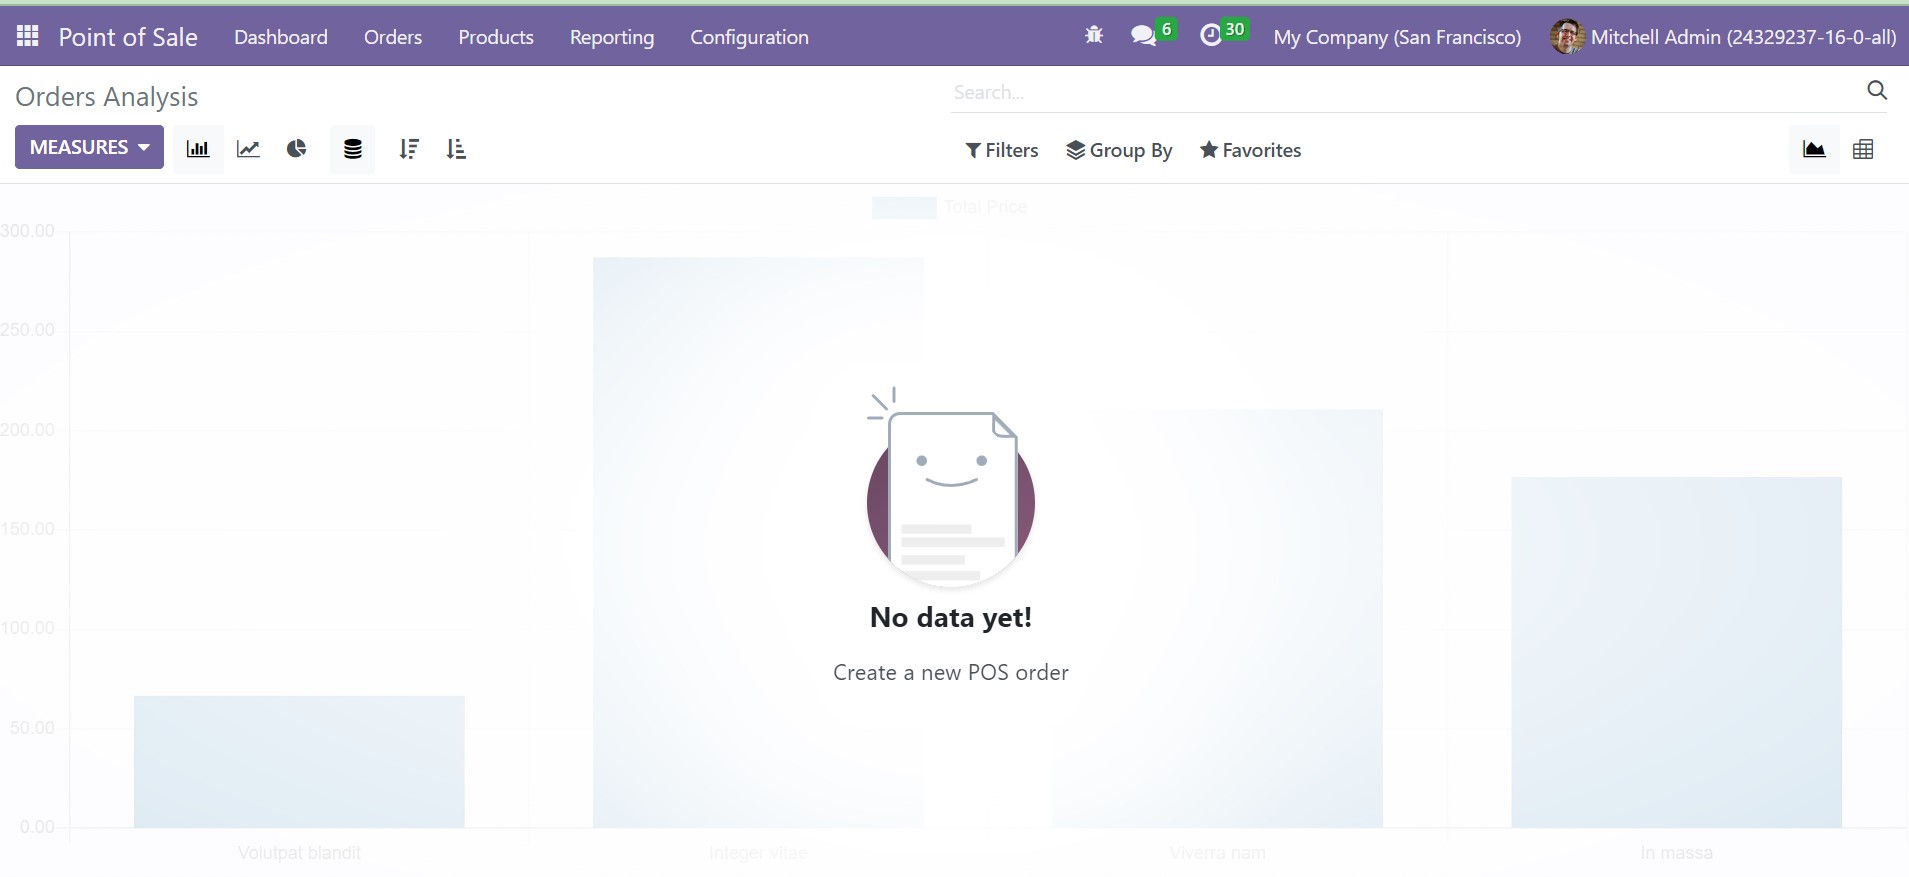
The page can be viewed in pivot as well as in graphical representation. There are Line, Bar, and Pie charts within the graphical representation. The Measures, Filters, and Group By options can be used for having advanced reports. On selecting the Sales Details, you will get a page.

On this window, you can provide the starting and ending date. The sales details will be available with the point of sale and the name of the company. Later, it can be printed out using the Print option.
So far, we have come to know about the wide variety of uses of the Point of Sale module. It is highly efficient to regulate and control sales operations and all the sales transactions can be easily done from this module.